
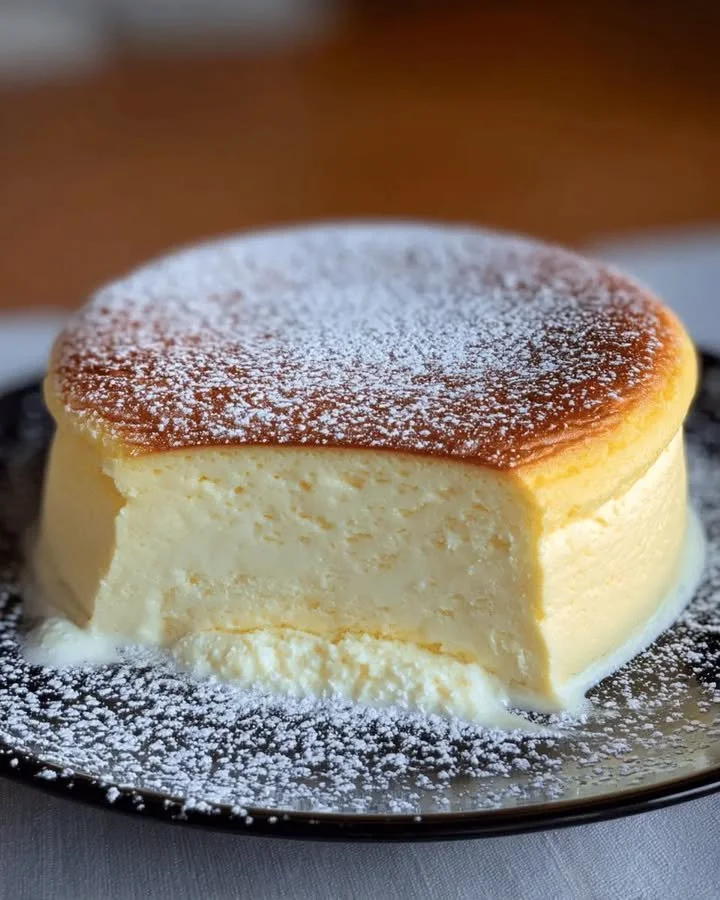
As someone who loves to bake, there’s something incredibly special about a light, creamy cheesecake. I remember the first time I made a mini cheesecake—my kitchen filled with the sweet scent of vanilla and a buttery graham cracker crust baking in the oven. It felt like I was wrapping up love in every bite! Today, I’m excited to share my mini light cheesecake recipe, perfect for any occasion. Each petite cheesecake brings all the joy of a larger one but in a delightful little package.
Why You’ll Love This Recipe
This mini light cheesecake recipe is not only scrumptious and satisfying, but it’s also wonderfully versatile. I love that it’s lighter on calories without sacrificing that creamy richness we all adore in cheesecakes. Plus, they’re the perfect size for individual servings, making them ideal for gatherings or a personal treat. It’s a delightful way to impress your family and friends without spending all day in the kitchen. Trust me, once you’ve made these, they’ll become a regular in my weekly baking lineup! (See the ingredients in the next page below…)
Ingredients
– 1 cup graham cracker crumbs
– 2 tablespoons sugar
– 4 tablespoons unsalted butter, melted
– 16 ounces light cream cheese, softened
– 1/2 cup sugar
– 1 teaspoon vanilla extract
– 2 large eggs
– 1/4 cup sour cream
– Fresh fruit or toppings of your choice (like chocolate sauce or caramel)
Equipment Needed
– 12-cup muffin pan
– Muffin liners
– Mixing bowl
– Electric mixer
– Measuring cups and spoons
– Rubber spatula
– Cooling rack
Step-by-Step Instructions
First, preheat your oven to 325°F (163°C). Then, in a mixing bowl, combine the graham cracker crumbs, 2 tablespoons of sugar, and melted butter. Stir until the mixture resembles wet sand. Line your muffin pan with muffin liners and press about a tablespoon of the crumb mixture into each liner to form a crust. Bake for 5-7 minutes until lightly golden and set. Your kitchen will start to smell divine! (See the next page below to continue steps…)
Next, while your crusts are cooling, in another bowl, beat the light cream cheese until it’s smooth and creamy. Gradually add in the 1/2 cup sugar and vanilla, mixing well until it’s all incorporated. Then, add the eggs one at a time, mixing on low speed between each addition. Finally, fold in the sour cream gently to keep that light texture intact. This mixture should be fluffy and deliciously inviting!
Now, it’s time to fill those crusts! Spoon the cheesecake filling evenly into each prepared crust, ensuring that you don’t overfill. Bake for another 15-18 minutes, and remember that they will puff up slightly but will settle as they cool. You’ll know they’re done when they wobble slightly in the middle—just perfect! After baking, let them cool in the pan for about 10 minutes before transferring them to a cooling rack to cool completely.
Once they are at room temperature, I recommend chilling them in the refrigerator for at least four hours (or overnight if you can resist!). This chilling time not only helps set the cheesecake but allows all those creamy flavors to meld together beautifully. I often find that they taste even better the next day!
Pro Tips for Best Results
As I’ve experimented with this recipe, I found that using room-temperature cream cheese is crucial in avoiding lumps in your batter. I tested this three ways, and the smoothest texture always came from letting the cream cheese soften for a while before beating it.
Another tip is to use an electric mixer at a low speed to incorporate the eggs. This helps maintain that luscious lightness. If you mix too aggressively, you might introduce too much air, and that can lead to cracks while they bake. Remember, we want them fluffy, not airy!
Lastly, let your cheesecakes cool down in the oven with the door slightly ajar after baking. It’s a small hack that helps prevent cracking due to rapid temperature changes. I’ve saved many a cheesecake this way!
Common Mistakes to Avoid
One common mistake I’ve made in the past is overfilling the cups. It can be tempting, especially when that creamy mixture looks so delicious! But trust me, keeping to the filling recommended will prevent messy overflow and keep your cheesecakes looking beautifully crafted. A little goes a long way! (See the next page below to continue…)
Another pitfall is not allowing them enough chilling time. I once tried to serve them too soon, and they just fell apart. Please, do your taste buds a favor: be patient! The longer they chill, the creamier and more delightful they become.
Also, avoid using too much baking time. Each oven is different, and mine usually requires a bit less than others. Keep an eye on those little beauties and take them out once they are set but still jiggle slightly in the middle. If they puff up too much, that can lead to cracks in the surface. So, watch them closely!
Serving Suggestions
When it comes time to serve my mini light cheesecakes, I love to top them with fresh berries. Strawberries, blueberries, and raspberries not only look stunning but add a refreshing burst of flavor that complements the creamy base perfectly. If I have time, I’ll whip up a small batch of homemade berry sauce to drizzle over the top for an extra touch!
If I’m in the mood for something indulgent, drizzle some chocolate or caramel sauce on each cheesecake. The combination of creamy, sweet cheesecake with rich flavors never fails to impress and elevate my dessert game. Plus, the way the sauces glisten on top makes everything look so inviting!
Finally, I love to serve them with a dollop of whipped cream. For a little more flair, I sometimes sprinkle a tiny bit of crushed graham crackers on top for a fun texture contrast. Every detail amplifies that delightful experience when they take their first bite!
Variations & Customizations
While this mini light cheesecake recipe is a classic, I’ve enjoyed experimenting with flavors. One of my favorites is adding a hint of lemon zest to the filling. It brightens up the cheesecake beautifully and gives it that perfect touch of citrusy goodness. Just a teaspoon will do the trick!
I’ve also tried adding chocolate to my cheesecakes by mixing cocoa powder into the batter or even folding in mini chocolate chips. The result is a cookie dough-like cheesecake that’s hard to resist! If you’re feeling adventurous, consider swirling in some fruit puree or Nutella into the batter for an artistic touch.
For a healthier version, I sometimes substitute Greek yogurt for the sour cream. It adds protein and some tang but still keeps that lovely creamy texture. You can also explore using different crusts, like crushed nuts or even an oreo crust for chocolate lovers.
How to Store, Freeze & Reheat
If you have leftovers (which I often hope for!), they can be stored in an airtight container in the refrigerator for up to a week. They’re delightful cold, but you might also find that bringing them to room temperature before serving enhances their flavors even more!
Freezing mini cheesecakes is an option too. Once they are completely cooled and chilled, carefully wrap them individually in plastic wrap and place them in a freezer-safe container. They can keep for about 2-3 months. Just remember to thaw them in the refrigerator overnight before indulging.
When it’s time to enjoy frozen cheesecake bites, I like to let them sit at room temperature for about 15 minutes after thawing. This brings out the flavors even more and creates that perfectly creamy bite we all crave!
Conclusion
Baking mini light cheesecakes has become a long-time favorite in my kitchen. Their creamy texture and delightful flavors make them perfect for any occasion or simply a sweet treat for myself. I hope you find as much joy in making, serving, and sharing these little gems as I do. Happy baking, and don’t forget to savor every delicious bite!