
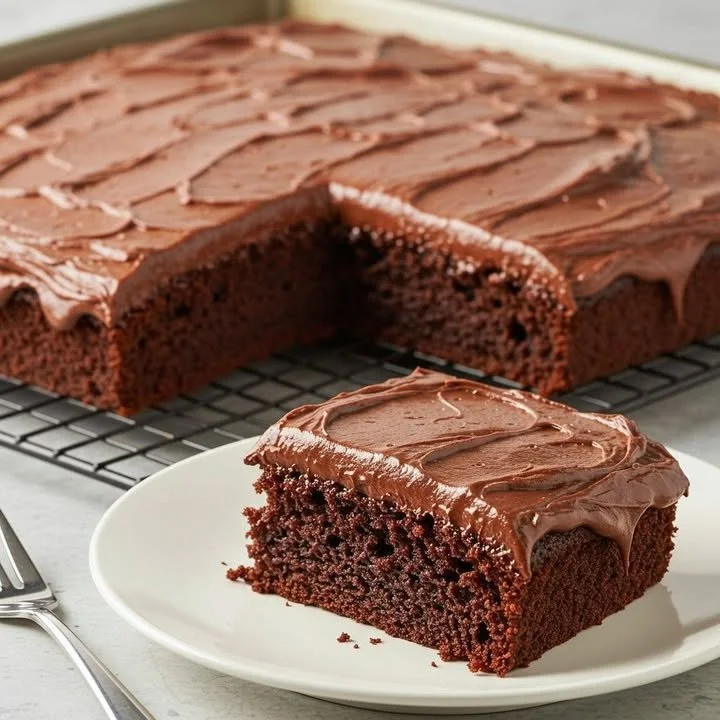
Baking has always been my way of unwinding after a busy day, and one of my absolute favorite recipes is Chocolate Sheet Cake with Milk Chocolate Frosting. There’s something magical about the rich, chocolatey aroma that fills my kitchen as it bakes. The combination of a moist cake topped with creamy frosting is simply irresistible! This cake is perfect for any occasion, be it a birthday celebration, a family gathering, or just a delightful dessert to enjoy with my afternoon coffee.
Why You’ll Love This Recipe
What I love most about this chocolate sheet cake is its simplicity and the fact that it never fails to please a crowd. It’s easy to whip up and always turns out moist and delicious. Plus, the milk chocolate frosting is sweet and creamy, making it the perfect finishing touch on top of the cake. Trust me, you’ll find yourself reaching for seconds—or even thirds! (See the ingredients in the next page below…)
Ingredients
– 1 ¾ cups all-purpose flour
– 1 ¾ cups granulated sugar
– ¾ cup unsweetened cocoa powder
– 1 ½ teaspoons baking soda
– 1 teaspoon baking powder
– 1 teaspoon salt
– 2 large eggs
– 1 cup buttermilk
– ½ cup vegetable oil
– 2 teaspoons vanilla extract
– 1 cup boiling water
Equipment Needed
– 13×18-inch rimmed baking sheet or jelly roll pan
– Large mixing bowl
– Electric mixer (or whisk)
– Measuring cups and spoons
– Wire cooling rack
– Offset spatula (for frosting)
Step-by-Step Instructions
To begin, preheat your oven to 350°F (175°C) and prepare your baking sheet by greasing it lightly with cooking spray or butter. In a large mixing bowl, combine the flour, granulated sugar, cocoa powder, baking soda, baking powder, and salt. I love the way the cocoa powder adds a rich color to my mixture as I stir! Next, add the eggs, buttermilk, vegetable oil, and vanilla extract to the dry ingredients. Mix until smooth, and then carefully pour in the boiling water. This step makes the batter thin, but don’t worry—it’s supposed to be! (See the next page below to continue steps…)
Once your batter is ready, carefully pour it into the prepared baking sheet. Make sure to spread it evenly, so it bakes uniformly. Pop it in the oven and allow it to bake for about 25-30 minutes or until a toothpick inserted into the center comes out clean. The scent of chocolate wafting through my home at this point is utterly delightful! Once baked, let the cake cool in the pan for at least 15 minutes before transferring it to a wire rack.
Now, let’s move on to the milk chocolate frosting! In a separate bowl, beat together softened butter and cocoa powder until well blended. Gradually add powdered sugar and milk, alternating and mixing until you achieve the desired consistency. I sometimes tweak the amount of milk based on how creamy I want the frosting to be. Once your cake is completely cooled, spread the frosting generously over the top. To finish off, I like to sprinkle some chocolate shavings or a few chopped nuts for texture.
Pro Tips for Best Results
I always recommend using high-quality cocoa powder for the best flavor. I tested this recipe three ways, and the results were a delightful reminder that using premium ingredients makes all the difference. If you want a richer chocolate flavor, consider adding a tablespoon of espresso powder to the dry ingredients. It really enhances the chocolate!
Also, don’t rush the cooling process; let the cake cool completely before adding the frosting. I once made the mistake of frosting a warm cake, and let me tell you—it turned into a melting chocolate river that was delicious, but not very visually appealing! It’s all about patience in baking.
Finally, I suggest making the frosting while the cake cools. It saves time and keeps the frosting from setting too much. I always make sure my butter is softened to room temperature; it makes for a smoother, creamier frosting that’s easy to spread.
Common Mistakes to Avoid
While this recipe is pretty straightforward, there are some common pitfalls I’ve learned through trial and error. First, avoid over-mixing your batter after adding flour; this can make the cake tough instead of light and fluffy. When I first started baking, I didn’t realize that gluten development could ruin the texture of a cake. (See the next page below to continue…)
Another mistake is not measuring ingredients correctly. I can’t stress enough the importance of using proper measuring cups and spoons. When my measurements were off, I ended up with a cake that was either too dense or didn’t rise properly.
Also, don’t skip the buttermilk! It’s essential for moisture and flavor. If you have no buttermilk, you can make a quick substitute by mixing regular milk with a bit of vinegar or lemon juice; just let it sit for a few minutes before using.
Finally, always check your oven’s accuracy. Unbeknownst to me, my oven ran hot for years, leading to burnt cakes. An oven thermometer is a great investment to ensure everything bakes evenly and as expected.
Serving Suggestions
This chocolate sheet cake is a show-stopper on its own, but I love to enjoy it alongside a scoop of vanilla ice cream. The contrast of the warm cake and cold ice cream is pure bliss! You could also serve slices with a dollop of whipped cream or fresh berries for a light and fruity touch.
Another fun idea I play around with is serving it at birthday parties with colorful sprinkles on top of the frosting. It always brings a smile to everyone’s face when they see a big slice of chocolate cake topped with sprinkles.
And let’s not forget about coffee! A slice of this cake with a hot cup of coffee is my favorite pick-me-up in the afternoon. The richness of the chocolate pairs beautifully with a robust brew, creating a little moment of happiness in my day.
Variations & Customizations
If I’m feeling adventurous, I sometimes add chocolate chips into the batter for a gooey surprise with each bite. Semi-sweet or dark chocolate chips work beautifully, and they add another layer of richness to the cake.
I’m also a fan of incorporating flavors! A splash of peppermint extract mixed in with the frosting gives it a refreshing spin, perfect for the holidays. You can even fold in crushed candy canes on top for that festive touch!
Lastly, for anyone who enjoys a kick of spice, consider adding a teaspoon of cinnamon or a dash of cayenne pepper to the batter. It brings a wonderful warmth to the chocolate that elevates the overall taste experience!
How to Store, Freeze & Reheat
Once I have baked and frosted my chocolate sheet cake, I make sure to store it properly to keep it fresh. I simply cover it with plastic wrap or store it in an airtight container. It will stay delicious on the counter for up to four days, but let’s be honest—it rarely lasts that long in my house!
If I want to prepare ahead, I usually bake the cake and freeze it without frosting. Once completely cooled, I wrap it tightly in plastic wrap and then in aluminum foil. It can be frozen for up to three months. When I’m ready to enjoy it, I let it defrost overnight in the refrigerator before frosting it on the day of serving.
When reheating leftovers, I often slice a piece and pop it in the microwave for about 15-20 seconds. The warmth revives the rich chocolate flavors beautifully; it’s like having a freshly baked cake all over again!
Conclusion
Whether you’re celebrating a special occasion or simply treating yourself, this Chocolate Sheet Cake with Milk Chocolate Frosting is sure to bring joy and smiles all around. I hope you give this recipe a try in your own kitchen, and that it becomes a favorite among your family and friends, just like it has for me! Happy baking!