
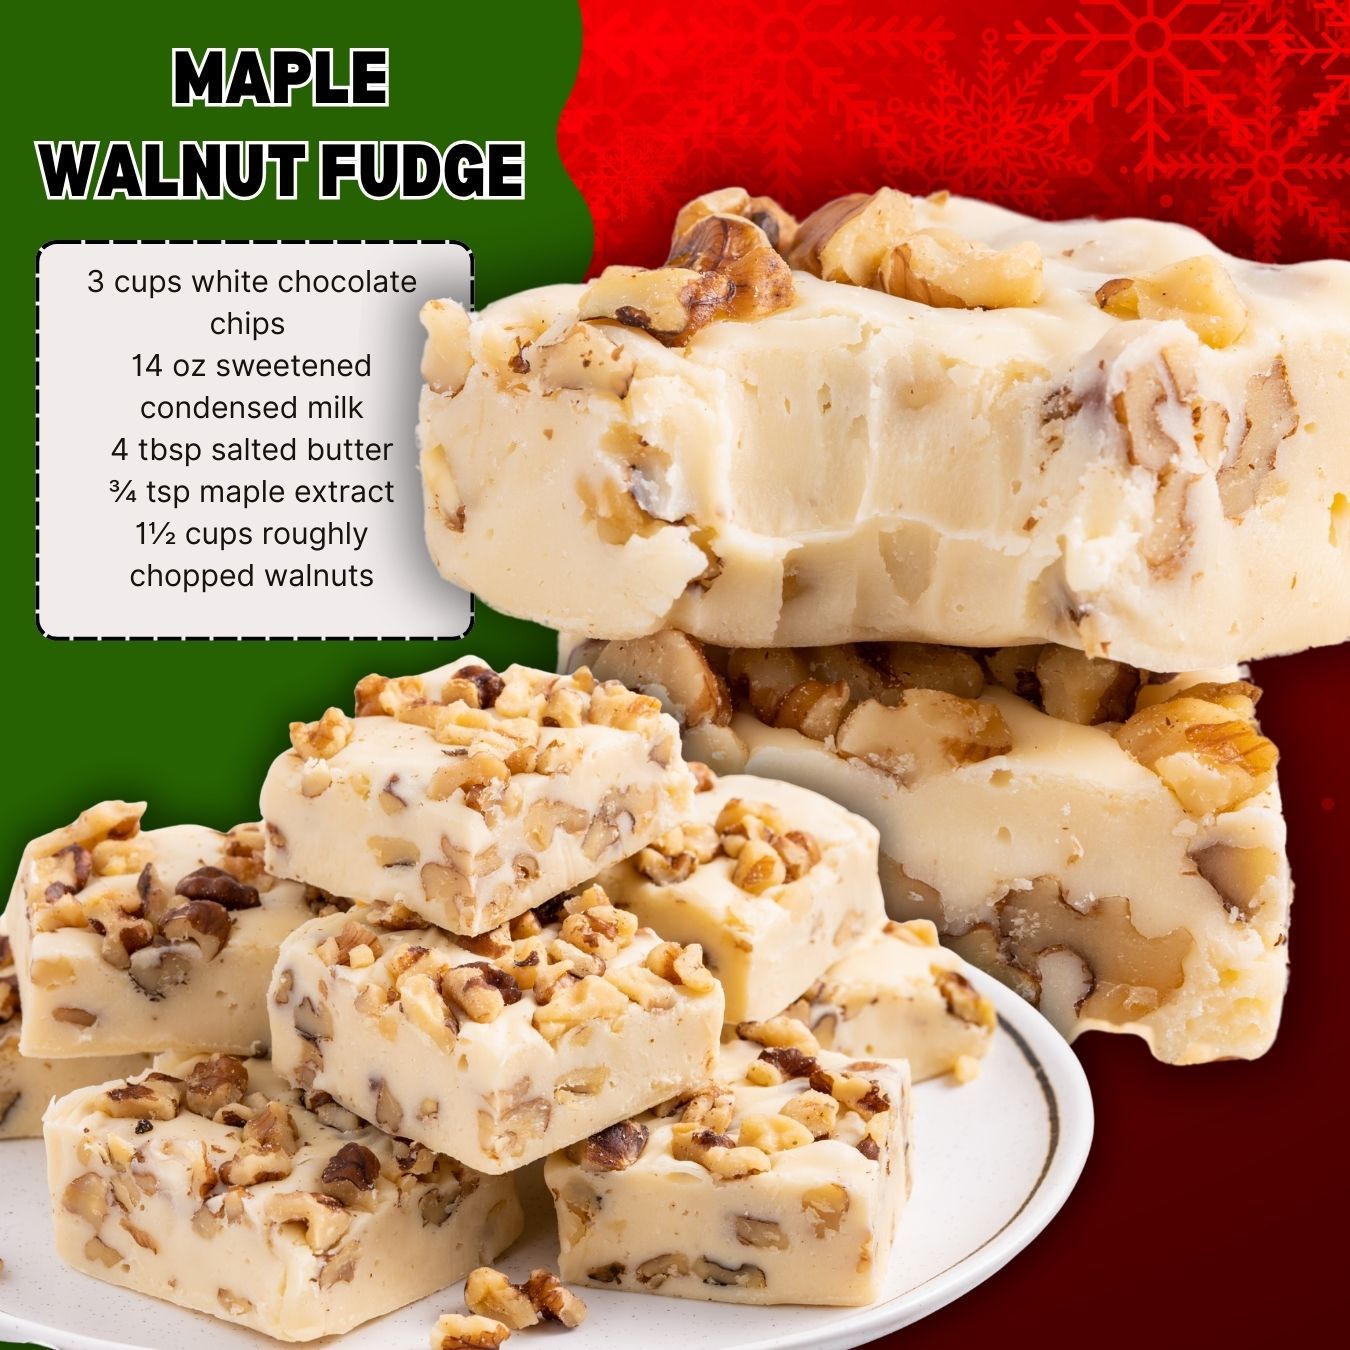
I first tried my hand at Maple Walnut Fudge on a crisp autumn afternoon, craving a treat that tasted like the essence of fall. As the white chocolate slowly melted with the sweetened condensed milk and butter, my kitchen filled with a rich, sugary scent that was pure comfort. The moment I stirred in the maple extract, the entire room transformed—it smelled like a pancake breakfast and a cozy cabin all at once. Pouring that thick, glossy mixture over the chopped walnuts and watching it set felt like a small kitchen miracle. That first buttery, nutty, maple-kissed square confirmed it: this was the easiest, most satisfying fudge I’d ever make.
Why You’ll Love This Recipe
You will absolutely adore this recipe because it is the ultimate foolproof fudge. With just five simple ingredients and no candy thermometer or tricky sugar stages to navigate, it delivers a decadent, creamy, and perfectly sweet result every single time. It’s a stunning homemade gift that looks professional, a guaranteed hit at any holiday party or cookie exchange, and it comes together in under 15 minutes of active work. The combination of sweet white chocolate and real maple flavor with the crunch of walnuts is simply irresistible.
Ingredients
- 3 cups (about 18 oz) high-quality white chocolate chips
- 1 (14 oz) can full-fat sweetened condensed milk
- 4 tablespoons salted butter
- ¾ teaspoon pure maple extract (not imitation)
- 1 ½ cups walnuts, roughly chopped, plus extra for topping (See the next page below to continue…)
Equipment Needed
- 8×8 inch square baking pan
- Parchment paper
- Medium saucepan
- Heatproof spatula or wooden spoon
- Measuring cups and spoons
Step-by-Step Instructions
The entire process begins with a little prep that makes all the difference. First, I line my 8×8 pan with parchment paper, leaving some overhang on two sides. This “sling” is a lifesaver—it lets you lift the entire slab of fudge out in one piece for perfect, clean cutting. I learned this the hard way after trying to pry my first batch out with a knife, resulting in cracked and crumbly edges. Once the pan is ready, I spread about a cup of the chopped walnuts evenly across the bottom. This creates a delicious walnut layer that ends up on top when you flip it out later.
Now, for the cooking—which is more like gentle coaxing. In your medium saucepan, combine the white chocolate chips, sweetened condensed milk, and salted butter. Place it over the lowest heat setting on your stove. This is crucial: we are melting, not cooking. White chocolate is notoriously finicky and can scorch or seize in an instant if the heat is too high. I stir almost constantly with my spatula, watching as the chips slowly lose their shape and everything melds into a smooth, thick, creamy lava. This usually takes about 5-7 minutes. Patience here is your best ingredient.
Once the mixture is completely smooth with no visible lumps, I immediately remove the pan from the heat. This is when I stir in the maple extract. And here’s my biggest flavor tip: use pure maple extract, not imitation. I’ve tried both, and the pure extract gives a deep, authentic maple flavor that imitation just can’t match. It smells absolutely heavenly. Give it a vigorous stir to make sure the flavor is fully incorporated throughout the entire pot of creamy fudge. (See the next page below to continue…)
Finally, I carefully pour the hot fudge mixture over the walnuts in the prepared pan. I use my spatula to spread it into an even layer, making sure it gets into all the corners. Then, I take the remaining ½ cup of chopped walnuts and sprinkle them evenly over the top, gently pressing them in just slightly. Now, the test of willpower begins. The fudge needs to set at room temperature for about 2 hours, then I transfer it to the refrigerator for at least another 2 hours (or overnight) to fully firm up. Rushing this step leads to a fudge that’s too soft to slice cleanly. The wait is worth it.
Pro Tips for Best Results
My number one tip is all about the white chocolate. I’ve tested this with cheap chips, high-quality chips, and white chocolate baking bars. High-quality white chocolate chips (like Ghirardelli or Guittard) make a noticeably creamier, smoother fudge with a better flavor. Cheap chips can have a waxy mouthfeel. If you use a baking bar, chop it into uniform pieces so it melts evenly. The quality of your chocolate is the foundation of your fudge, so don’t skimp here.
The second critical tip is controlling your heat. I cannot stress this enough: use the lowest possible heat on your burner. Even medium-low can be too aggressive for delicate white chocolate. If you see any hint of browning at the bottom of the pan or smell anything other than sweet melting chocolate, your heat is too high. If the mixture starts to look grainy or separates, you’ve likely overheated it. Low and slow, with constant stirring, is the only way to guarantee that velvety-smooth texture.
Finally, be generous with your walnuts and toasting them is a game-changer. While the recipe works with raw walnuts, toasting them first unlocks their full potential. I spread the walnuts on a baking sheet and toast them at 350°F for 7-9 minutes until fragrant. Let them cool before chopping. This deepens their flavor, adds a wonderful crunch, and prevents any bitter notes. That toasted nuttiness against the sweet maple and white chocolate is what makes this fudge truly special.
Common Mistakes to Avoid
The first mistake I made was using imitation maple flavoring. I thought, “It’s just extract, how different can it be?” The result was a fudge that tasted artificially sweet and chemical, with none of the warm, woodsy depth of real maple. Pure maple extract is more expensive, but you only use a little, and the flavor payoff is immense. It’s the star of the show—don’t undermine it with an imitation. (See the next page below to continue…)
Another error is trying to speed up the melting process with high heat. In my early fudge-making days, I was impatient and cranked up the stove. The bottom scorched before the top chips melted, giving the entire batch a burnt, bitter undertone. White chocolate doesn’t melt like milk chocolate; it’s more delicate. If you’re worried about double-boilers, just trust the lowest stove setting and your patience. Stirring constantly is your best defense.
Adding the walnuts directly to the hot fudge mixture in the pot is a common misstep. If you stir all the nuts into the fudge before pouring, they can make the mixture too thick and difficult to spread, and you lose that beautiful layered look with nuts on top and bottom. By placing a layer in the pan first and sprinkling more on top, you ensure even distribution and perfect presentation. It also makes the fudge easier to slice, as the knife glides through the creamy center.
Finally, not letting the fudge set completely is a recipe for a messy, gooey situation. I’ve been guilty of trying to cut into it after just an hour at room temperature. The knife dragged, the squares were misshapen, and they slumped on the plate. The fudge needs that full, undisturbed chill in the fridge to achieve its signature firm-yet-creamy texture. For the cleanest cuts, I even pop the whole slab (once chilled) out of the pan and use a large, sharp knife wiped clean between slices.
Serving Suggestions
I love presenting this fudge on a simple ceramic plate or a rustic wooden board. After cutting it into neat squares (I aim for 64 small, bite-sized pieces or 36 larger ones), I arrange them with the walnut-studded top facing up. For a festive touch during the holidays, I’ll stack them in a pyramid or place them in mini paper candy cups inside a decorative tin. It looks incredibly professional and gift-worthy.
This fudge is the perfect companion to a hot beverage. I love serving it alongside a strong cup of black coffee, a mug of rich hot chocolate, or a pot of spiced chai tea. The sweetness of the fudge is beautifully balanced by the bitterness of the coffee or the spices in the tea. It’s an elegant yet easy way to finish a dinner party or to enjoy as a special afternoon treat.
For gift-giving, I place the squares in a cellophane bag tied with a ribbon and a little tag, or I layer them in a festive tin between sheets of parchment paper. It travels beautifully and keeps for weeks, making it the ultimate homemade holiday gift for neighbors, teachers, or coworkers. I always make a double batch in December—one for us and one for gifting.
Variations & Customizations
This recipe is wonderfully adaptable. For a different nut, try using pecans instead of walnuts. Pecans have a buttery sweetness that pairs exquisitely with maple. For a nut-free version, you can omit the walnuts entirely or replace them with a cup of toasted coconut flakes for a “maple macaroon” twist. You could even stir in a half cup of dried cranberries or chopped dried apples for a fall-inspired fruit and nut version.
To change up the chocolate base, you can use semi-sweet or dark chocolate chips for a “maple nut” fudge that’s less sweet and more intense. Just follow the same melting method. For a marbled effect, you can melt the white chocolate mixture as directed, pour half into the pan, mix a few tablespoons of cocoa powder into the remaining half, and then swirl them together before adding the final walnut topping.
For a boozy, adult twist, you can add a tablespoon of bourbon or rum along with the maple extract. Just reduce the maple extract to ½ teaspoon so the flavors don’t compete. The alcohol adds a wonderful warmth that complements the maple perfectly. You can also add a teaspoon of cinnamon or a pinch of flaky sea salt sprinkled on top before it sets for a sweet-and-salty dimension.
How to Store, Freeze & Reheat
This fudge stores brilliantly. Once completely set and cut, I layer the squares between sheets of parchment paper in an airtight container. It keeps perfectly at cool room temperature for about a week, and in the refrigerator for up to 2 weeks. The flavors actually improve after a day or two. If your kitchen is very warm, I’d opt for fridge storage to maintain its firm texture.
You can also freeze this fudge for long-term storage. Arrange the cut squares in a single layer on a baking sheet to flash-freeze for an hour, then transfer them to a freezer-safe bag or container. They will keep for up to 3 months. The texture remains excellent after thawing. To serve, simply thaw the squares in the refrigerator overnight or at room temperature for an hour.
There is no need to reheat this fudge—it is meant to be enjoyed cold or at room temperature. If it has been in the fridge and seems too hard, let it sit on the counter for 15-20 minutes before serving to soften slightly. Microwaving it will melt it back into a gooey state. Its beauty is in its firm, creamy, sliceable form, so gentle thawing is the only “reheating” you’ll ever need.
Conclusion
This Maple Walnut Fudge is more than just candy; it’s a little square of edible autumn warmth that never fails to bring a smile. Its incredible simplicity and stunning results have made it my most trusted recipe for homemade gifting and impromptu treats. I hope it finds a special place in your kitchen, filling your home with the scent of maple and providing the perfect sweet bite for any occasion. Now, go grab that saucepan and get ready for the easiest, most delicious fudge of your life.