
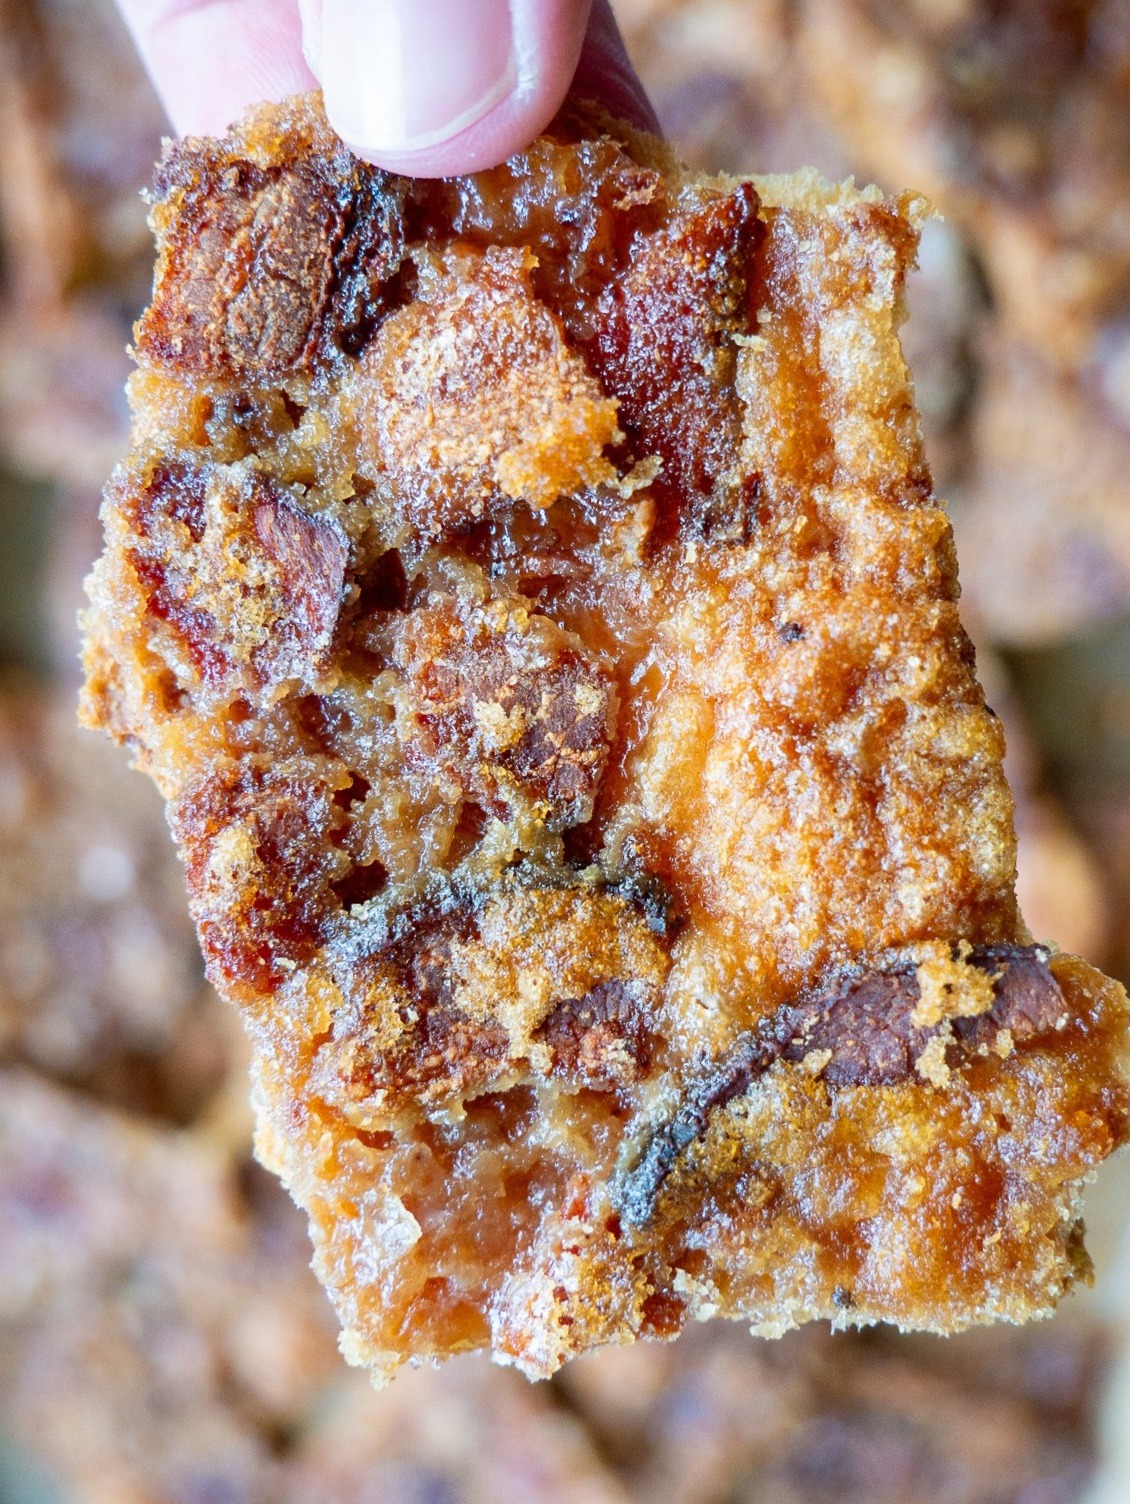
The first time I made Maple Bacon Snap, my kitchen was filled with an intoxicating, smoky-sweet perfume that promised pure indulgence. The scent of thick-cut bacon sizzling in the oven mingled with the rich, warm aroma of real maple syrup bubbling into a crackly toffee. I remember the nervous excitement of pouring the molten candy over the crisp bacon, and the satisfying snap when I finally broke a piece off the chilled slab. That first bite—a perfect collision of salty, smoky bacon, buttery toffee, and the deep sweetness of maple—was a revelation. It was the ultimate sweet and salty treat, dangerously addictive and utterly impressive.
Why You’ll Love This Recipe
You will love this recipe because it creates a show-stopping, gourmet candy that is surprisingly simple to make, yet tastes like it came from a specialty food shop. It’s the perfect conversation starter for parties and the ultimate homemade gift for the foodie who has everything. From my experience, this confection has a magical way of winning over even the most skeptical guests—once they try it, they can’t stop. It’s a fun, rewarding project that combines the cozy comfort of maple with the irresistible savoriness of bacon, all wrapped up in a shiny, snappy toffee that delivers the most satisfying crunch.
Ingredients
- 1 lb thick-cut bacon
- 1 cup unsalted butter (2 sticks)
- 1 cup pure maple syrup (do not use pancake syrup)
- 1 cup granulated sugar
- ¼ teaspoon sea salt, plus more for finishing
- 1 teaspoon pure vanilla extract
- ½ teaspoon baking soda
- 1 cup good-quality dark or semi-sweet chocolate chips (optional)
Let’s talk ingredients, because quality is everything here. The bacon must be thick-cut; thin bacon will burn and turn into hard, unpleasant bits. The maple syrup is non-negotiable—you must use 100% pure maple syrup. The flavor of “pancake syrup” is artificial and will ruin the subtle, woodsy sweetness we’re after. Trust me, it makes a huge difference. For the chocolate, if you choose to use it, a good dark chocolate (60-70%) balances the sweetness perfectly. The baking soda is your secret weapon; it aerates the toffee as it cooks, making it lighter and giving it that signature brittle “snap” instead of a hard, tooth-breaking texture. Don’t skip it!(See the next page below to continue…)
Equipment Needed
- Large rimmed baking sheet
- Parchment paper or a silicone baking mat
- Medium to large heavy-bottomed saucepan (3-quart is ideal)
- Candy thermometer
- Whisk
- Wooden spoon or heatproof spatula
Step-by-Step Instructions
My journey always begins with the bacon. I line a large baking sheet with foil for easy cleanup, place a wire rack on top, and lay out the thick-cut bacon strips. I bake it in a 400°F oven until it’s deeply browned and very crisp, about 20-25 minutes. I’ve learned that baking yields the most evenly crisp bacon without the fuss of splattering grease. Once it’s cool enough to handle, I chop it into small, bite-sized pieces—some fine, some chunky for texture. I set aside about a quarter of it for the topping. The smell of that oven-crisped bacon is a promise of the savory delight to come.
While the bacon cools, I prepare my candy station. I line another baking sheet with parchment paper and scatter about three-quarters of the chopped bacon evenly over it, creating a savory bed for the toffee. Having everything ready is crucial because once the candy is cooked, you have to work fast. Now, for the heart of the recipe: the toffee. In my heavy-bottomed saucepan, I combine the butter, pure maple syrup, granulated sugar, and sea salt. I clip on my candy thermometer. Over medium heat, I stir constantly with a wooden spoon until the butter melts and the mixture comes to a boil.
This is where patience is key. Once boiling, I stop stirring and let the mixture cook, swirling the pan occasionally for even heating. I keep a close eye on the thermometer. The goal is to reach 300°F (the hard crack stage). This can take 10-15 minutes. The syrup will darken to a beautiful amber color and smell richly of caramelized sugar and maple. The moment it hits 300°F, I immediately remove it from the heat. Working quickly, I whisk in the vanilla extract and then the baking soda. The mixture will foam up dramatically and become lighter in color—this is the magic happening!(See the next page below to continue…)
Without a second to spare, I carefully pour the hot, bubbling toffee over the bed of bacon on my prepared sheet. I use the back of my spoon to gently spread it into an even layer, working fast as it begins to set. If I’m using chocolate, I immediately sprinkle the chocolate chips over the hot toffee. The residual heat will melt them in about 3 minutes; then I spread the melted chocolate into a thin layer with an offset spatula. Finally, I sprinkle the reserved chopped bacon and a tiny pinch of flaky sea salt over the top. I let it cool completely at room temperature until it’s hard and snappy, which takes a couple of hours. The sound of breaking it into pieces is music to a candy-maker’s ears.
Pro Tips for Best Results
I tested the bacon prep three different ways: frying (splattery and uneven), microwaving (quick but chewy), and baking on a rack. Baking on a rack was the clear winner. The hot air circulates all around, rendering the fat perfectly and yielding bacon that is uniformly crisp without being greasy. Greasy bacon will make your toffee oily and prevent a clean snap. Taking the time to bake it properly is foundational.
Here’s what I learned the hard way about the candy cook: altitude and humidity matter. I once made this on a very humid day and the toffee never fully hardened, staying slightly chewy. Now, I only make it on dry days. If you live at high altitude, you may need to cook the syrup to a slightly lower temperature (about 295°F), as the lower boiling point means water evaporates differently. Always trust your thermometer and the hard crack test (a drop in cold water should solidify into a hard, brittle thread).
For the cleanest break and most professional look, score the toffee while it’s still slightly warm. After it has set for about 20-30 minutes (when the chocolate, if using, is set but the toffee underneath is still a bit warm), I use the tip of a sharp knife to lightly score lines where I want to break it later. This guides the fractures and prevents random, jagged pieces when you finally break it up after it’s fully hardened.
Common Mistakes to Avoid
My first batch was a sticky, teeth-pulling mess because I didn’t cook the syrup to a high enough temperature. I got nervous and pulled it off at 280°F (soft crack stage). Don’t do what I did! You must have the courage to take it all the way to 300°F (hard crack). This ensures the water has cooked out sufficiently for the toffee to set up hard and snappy. A candy thermometer is your best friend and removes all the guesswork.(See the next page below to continue…)
Another critical error is using a thin, lightweight saucepan. The sugar syrup can scorch easily on the bottom, leading to a bitter taste. A heavy-bottomed pan distributes heat evenly and prevents hot spots. I also avoid using a non-stick pot for candy making, as high heat can damage the coating. A good-quality stainless steel or enameled cast iron saucepan is ideal.
Don’t stir the syrup once it comes to a boil. Stirring can cause the sugar to crystallize, resulting in a grainy texture instead of a smooth, glassy toffee. After the initial stir to combine, let it boil undisturbed, only swirling the pan gently if you see uneven browning. This was a tough habit to break, but it’s essential for that perfect glossy finish.
Finally, avoid pouring the toffee onto a cold or ungreased surface. The parchment paper is perfect. I once poured it directly onto a cold marble slab, and it set so fast I couldn’t spread it, and it stuck terribly. The parchment allows for easy spreading and release. Also, don’t try to move or break the toffee until it is completely cool to the touch. Patience here prevents crumbling.
Serving Suggestions
I love presenting this candy piled high on a rustic wooden board or in a elegant glass bowl. The contrasting textures and colors look stunning. It’s the perfect finale to a brunch spread or a sophisticated addition to a holiday dessert table, offering a bold flavor that cuts through the sweetness of other treats.
For gifting, I break it into generous shards and package them in clear cellophane bags tied with twine or ribbon. It makes an incredibly impressive and thoughtful homemade gift for neighbors, coworkers, or hostesses. I always include a note about what’s in it, as the bacon surprise is part of the fun!
On a cozy night, I’ll break a few pieces to serve alongside a strong cup of black coffee or a neat bourbon. The bitterness of the coffee or the oakiness of the bourbon complements the sweet, salty, smoky flavors of the snap perfectly, making for a truly grown-up treat.
Variations & Customizations
While the classic is hard to beat, you can play with the flavors. For a spicier kick, add ¼ teaspoon of cayenne pepper or smoked paprika to the syrup as it cooks. For a different nutty element, sprinkle chopped toasted pecans or almonds over the bacon base before pouring the toffee.
If you want to experiment with the chocolate, try using white chocolate or a chili-infused dark chocolate. You could also omit the chocolate altogether for a pure maple-bacon experience. A sprinkle of flaky sea salt over the finished chocolate is always a good idea to heighten all the flavors.
For a completely different twist, replace the bacon with an equal amount of very well-toasted coconut flakes for a tropical “Maple Coconut Snap.” The technique remains identical; you’re just swapping the savory element for a different kind of crunch and flavor.
How to Store, Freeze & Reheat
Storing this candy is simple. Once completely cooled and broken into pieces, I store it in an airtight container at cool room temperature. It will keep perfectly for up to 2 weeks. I separate layers with parchment paper to prevent sticking. Do not refrigerate, as condensation can make the toffee sticky and the chocolate can bloom.
It freezes beautifully for long-term storage. Place the pieces in a single layer on a parchment-lined tray to freeze solid, then transfer to a freezer bag. It will keep for up to 3 months. You can eat it straight from the freezer—it has a fantastic cold snap—or let it thaw for 10 minutes at room temperature.
There is no need to reheat Maple Bacon Snap. If it has softened in a warm room, simply placing it in a cool spot or the fridge for 15 minutes will re-harden it. Never microwave it, as the chocolate will melt and the toffee can become a sticky puddle.
Conclusion
Maple Bacon Snap is more than a recipe; it’s an edible adventure that challenges the boundaries of sweet and salty. It’s a testament to how a few quality ingredients, treated with a bit of candy-making courage, can create something truly spectacular. I hope you embrace the process and experience the immense satisfaction of that first perfect, shattering bite. It’s a surefire way to become the most talked-about cook at any gathering. Now, go grab that thick-cut bacon and your best maple syrup—it’s time to make some sweet, smoky, snappy magic.