Equipment Needed
Step-by-Step Instructions
- When I start making this ice cream, the first thing I do is prepare the mango. If I’m using fresh mango, I peel and cut it into chunks. If it’s frozen, I let it sit for a few minutes to soften slightly. Then I place the mango into a blender.
- Next, I add the coconut milk and honey to the blender. As it blends, the mixture becomes smooth, creamy, and beautifully golden in color. I always taste it at this stage to adjust the sweetness depending on how ripe the mango is.
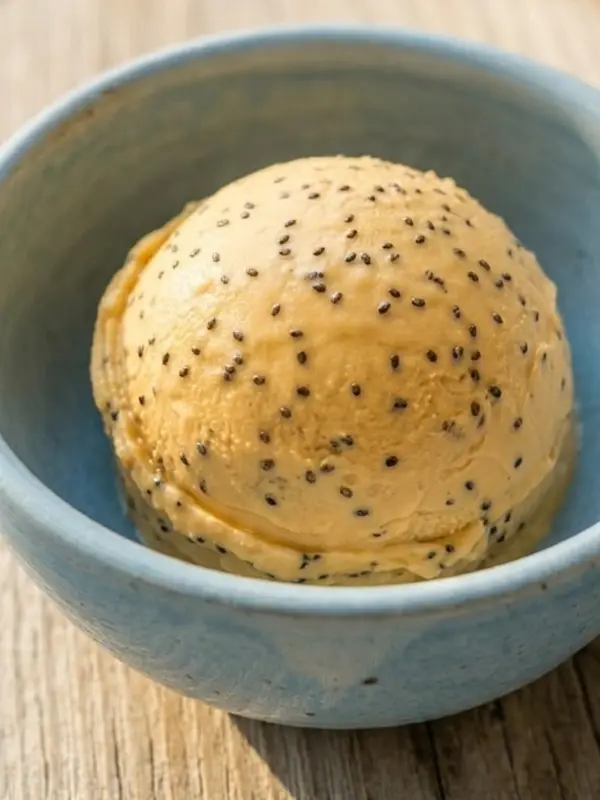
- Then I pour the mixture into a bowl and stir in the chia seeds. I like this step because the chia seeds add a subtle texture and help thicken the ice cream as it sets.
- Finally, I transfer everything into a freezer-safe container and freeze it for about 3–4 hours. I usually stir it once or twice during freezing to keep the texture smooth. When it’s ready, it scoops like a soft, creamy ice cream.
Pro Tips for Best Results
One thing I’ve learned after making this recipe a few times is that ripe mangoes make all the difference. The sweeter the mango, the better the flavor.
Another tip is to use full-fat coconut milk. It creates a creamier texture compared to lighter versions.
I also like blending the mixture really well to avoid any chunks, which helps achieve a smoother final result.
Common Mistakes to Avoid
The first mistake I made was using underripe mango. The flavor turned out less sweet and slightly tart.
Another mistake is skipping the stirring step while freezing. Without stirring, the ice cream can become too icy instead of creamy.
I also learned not to add too much honey at once. It’s better to taste and adjust gradually.
Finally, avoid freezing it for too long without covering it properly, as it can develop ice crystals.
Serving Suggestions
When I serve this mango ice cream, I love scooping it into a bowl and enjoying it right away while it’s still slightly soft.
Sometimes I top it with fresh mango cubes or shredded coconut for extra texture.
It also pairs beautifully with other tropical fruits like pineapple or passion fruit.
Variations & Customizations
One variation I enjoy is adding a squeeze of lime juice for a refreshing citrus twist.
I’ve also tried blending in a bit of banana for extra creaminess.
Another version I like is adding a pinch of vanilla extract to enhance the flavor.
How to Store, Freeze & Reheat
Whenever I make this ice cream, I store it in an airtight container in the freezer for up to a week.
If it becomes too firm, I let it sit at room temperature for a few minutes before scooping.
There’s no reheating needed—just soften slightly and enjoy.
Conclusion
Every time I make this Mango Sugary Ice Cream, I’m reminded how simple ingredients can create something refreshing and delicious. The natural sweetness of mango, combined with creamy coconut milk, makes it a perfect warm-weather treat. I love how easy it is to prepare and how customizable it can be. Once you try it, it might become your go-to homemade ice cream recipe.