
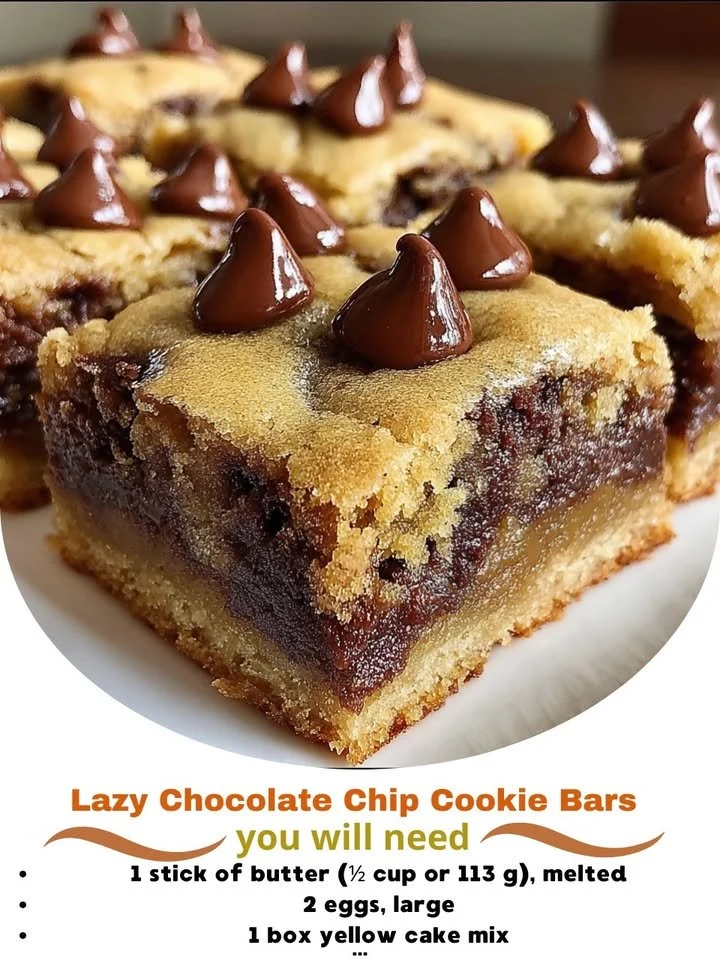
There’s something undeniably comforting about the aroma of fresh-baked cookies wafting through the house. It brings me back to my childhood, stirring memories of family gatherings and warm afternoons spent in the kitchen. That’s why I’m excited to share one of my ultimate go-to recipes: Lazy Chocolate Chip Cookie Bars. These bars are the perfect solution for when I want a sweet treat without the fuss of individual cookies. They are delicious, easy to make, and perfect for sharing (or keeping all to myself, which I might just do!).
Why You’ll Love This Recipe
One of the things I love most about these Lazy Chocolate Chip Cookie Bars is how quick they are to whip up. With simple ingredients that I usually have in my pantry, I can have a warm batch of bars ready in no time. Plus, they have that classic chewy texture and rich chocolatey flavor that makes everyone swoon. You can slice them into big squares or small bites, making them perfect for any occasion. I guarantee you will love them just as much as I do! (See the ingredients in the next page below…)
Ingredients
– 1 cup unsalted butter, softened
– 1 cup brown sugar, packed
– 1/2 cup granulated sugar
– 2 large eggs
– 2 teaspoons vanilla extract
– 3 cups all-purpose flour
– 1 teaspoon baking soda
– 1/2 teaspoon salt
– 2 cups semi-sweet chocolate chips
– Optional: 1 cup chopped nuts (like walnuts or pecans)
Equipment Needed
– 9×13 inch baking dish
– Mixing bowls
– Hand mixer or stand mixer
– Rubber spatula
– Measuring cups and spoons
– Parchment paper (for easy cleanup, optional)
Step-by-Step Instructions
First things first, preheat your oven to 375°F (190°C). This step is essential because you want those bars to bake evenly and perfectly. While that’s warming up, grab a large mixing bowl and cream together the softened butter, brown sugar, and granulated sugar until it’s light and fluffy. I love to use my stand mixer for this, but a hand mixer works just as well. You’ll notice the sweet smell filling your kitchen – it’s like magic!
Once the sugars are well combined, add in the eggs one at a time, mixing thoroughly after each addition. Don’t forget that splash of vanilla extract; it adds a beautiful depth of flavor! At this point, your mixture should look glossy and inviting. (See the next page below to continue steps…)
Next, in a separate bowl, whisk together your all-purpose flour, baking soda, and salt. This helps ensure that the baking soda and salt are evenly distributed throughout your cookie bars. Gradually add this dry mixture to your wet ingredients, mixing until just combined. I like to do this with a rubber spatula to avoid overmixing. Then, fold in the chocolate chips and any nuts you’re using. The sight of all those gooey chocolate chips is enough to make my heart race!
Now it’s time to prepare your baking dish. Line the bottom with parchment paper or simply grease it lightly with some cooking spray. Pour the batter into the dish, spreading it out evenly with the spatula. It might seem like a lot of batter, but don’t worry; it will bake down beautifully! Bake in the preheated oven for about 20-25 minutes or until the edges are golden brown, and a toothpick inserted into the center comes out clean. I always set a timer, but I also like to peek through the oven window—there’s something so satisfying about watching them rise!
Pro Tips for Best Results
I tested this recipe three ways to perfect it. Firstly, I tried using coconut oil instead of butter for a dairy-free version, and I loved the extra hint of flavor it added! If you’re curious about experimenting, I encourage you to give that a try.
Another tip I have is to let the cookie bars cool completely before cutting them. I know it’s tempting to slice into them while they’re still warm, but trust me, they will hold their shape so much better once cooled, and the texture will be even more enjoyable!
Lastly, I always recommend using quality chocolate chips. You want that rich chocolate flavor to shine through, so splurging on some good semi-sweet or even dark chocolate can make all the difference in taste. It’s a small tweak that elevates the whole experience!
Common Mistakes to Avoid
One of the most common mistakes I’ve made (and still see others make) is measuring flour incorrectly. It’s easy to scoop directly from the bag with a measuring cup, but this can lead to too much flour in your bars, resulting in a dry texture. I always spoon the flour into my measuring cup and level it off for accuracy.
Another thing to watch out for is overmixing the dough once you add the flour. This can make your bars tough instead of soft and chewy. Mix just until you can’t see any more flour. Those swirls of flour should disappear, but don’t go beyond that. (See the next page below to continue…).
Also, keep an eye on your baking time. Every oven is slightly different, and while the recipe suggests 20-25 minutes, checking them a few minutes early can prevent overbaking. I like to start checking at the 18-minute mark just to be safe. Those golden edges should look perfect, but the center may still look a little underbaked, and that’s okay—it will continue to set as it cools.
And finally, don’t skip the parchment paper! I learned the hard way that removing baked goods from a pan can turn into a sticky nightmare without it. Parchment ensures a smooth release—no more broken bars!
Serving Suggestions
These Lazy Chocolate Chip Cookie Bars are incredibly versatile when it comes to serving. I love to enjoy them warm with a scoop of vanilla ice cream on top. The ice cream melts into the bars, creating a deliciously gooey concoction that is pure bliss. It’s like a decadent dessert experience!
Another fun way to serve them is to drizzle a bit of homemade chocolate ganache over the top. It takes just a few minutes to whip up and adds a luxurious touch for special occasions. Your friends and family will be in awe, and they’ll ask you for the recipe!
Finally, for a casual gathering, I like to cut the bars into smaller squares and serve them on a pretty platter with a selection of fruit. The sweetness of the bars pairs perfectly with fresh strawberries, raspberries, or even a slice of apple pie. It makes for a lovely afternoon treat with coffee or tea!
Variations & Customizations
One of the things I adore about these cookie bars is how easy they are to customize. If I’m in the mood for something different, I’ll swap out the chocolate chips for peanut butter chips or butterscotch chips, which adds a delightful twist. You could even mix in dried fruit like cranberries or cherries for a tart contrast to the sweetness.
Sometimes, I’ll take it a step further and add spices like cinnamon or a touch of espresso powder into the batter. The cinnamon gives a warming flavor, while espresso enhances the chocolate, making every bite feel extra special. It’s a fun way to play with flavors!
And let’s not forget about the easy add-ins! Crushed pretzels, toffee bits, or even crushed Oreos have all made a fantastic appearance in my kitchen when baking these bars. They add a fun crunch and unique flavors, turning these simple bars into a delightful adventure!
How to Store, Freeze & Reheat
Storing my Lazy Chocolate Chip Cookie Bars is a breeze. Once they’ve cooled completely, I usually cut them into squares and place them in an airtight container. They stay fresh at room temperature for about 3-5 days—if they last that long, of course!
If I want to make them last longer or if I’ve made a double batch (which I often do), I will freeze some. I like to wrap individual squares in plastic wrap, then pop them in a freezer-safe container or bag. When stored properly, they can last up to 3 months in the freezer.
When I’m ready to enjoy a frozen bar, I take it out and let it sit at room temperature for about 30 minutes, or I’ll pop it in the microwave for about 10-15 seconds to warm it up. It’s back to that freshly-baked goodness in no time—I can nearly smell the chocolate again!
Conclusion
I hope you enjoy making and indulging in these Lazy Chocolate Chip Cookie Bars as much as I do! They truly embody the joy of home baking, combining simplicity with deliciousness. Whether you’re sharing them with friends or keeping them all for yourself, these bars are sure to bring warmth and happiness. Happy baking, and may your kitchen always be filled with laughter and the sweet smell of cookies!