
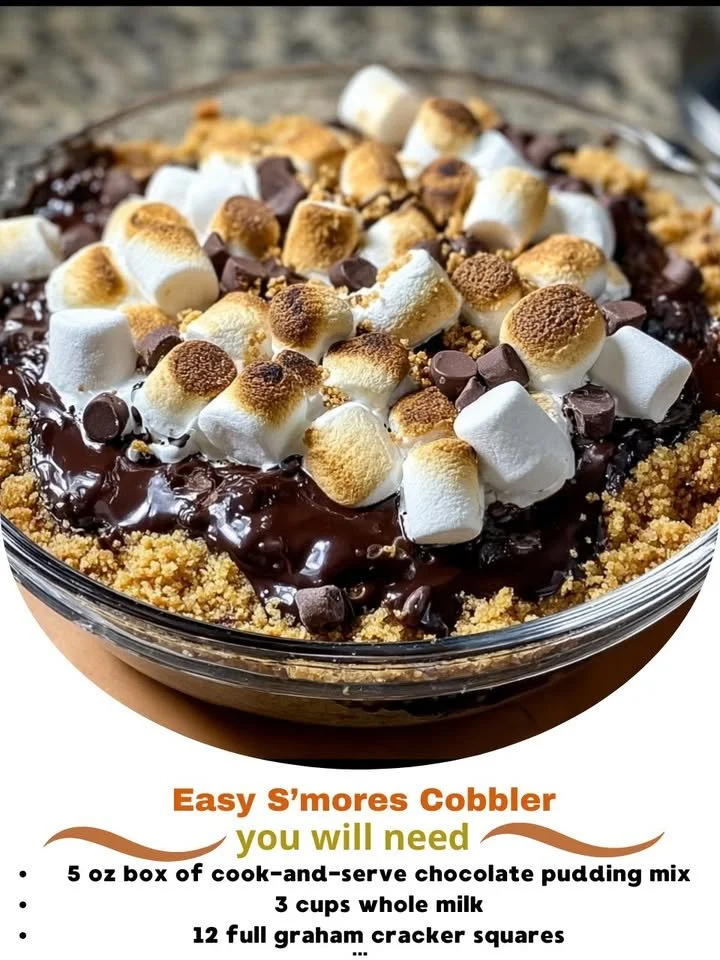
There’s something incredibly nostalgic about a warm, gooey s’mores dessert that takes me right back to summer evenings spent around a crackling campfire. I can almost smell the sweet aroma of toasted marshmallows mingling with chocolate and graham crackers. That’s why I decided to bring those lovely memories into my kitchen with an Easy S’mores Cobbler Recipe. It’s not only a delightful way to enjoy a beloved treat but also simple enough to whip up any time the craving strikes!
Why You’ll Love This Recipe
This Easy S’mores Cobbler combines the beloved flavors of chocolate, marshmallow, and buttery graham cracker crust into a warm, comforting dessert that’s perfect for sharing. It’s gooey, sweet, and just downright delicious, making it a hit at gatherings, family dinners, or even a cozy night in. The best part? You don’t need any fancy equipment to make it happen! Just grab your ingredients, and I’ll guide you through the process of creating this delightful dessert. (See the ingredients in the next page below…)
Ingredients
– 1 cup graham cracker crumbs
– ½ cup unsalted butter, melted
– 1 cup chocolate chips (milk or dark)
– 2 cups mini marshmallows
– 1 cup milk
– 1 cup all-purpose flour
– 1 tablespoon baking powder
– ½ cup granulated sugar
– ½ teaspoon salt
– 1 teaspoon vanilla extract
Equipment Needed
– 9×13 inch baking dish
– Mixing bowls
– Whisk
– Measuring cups and spoons
– Spatula
Step-by-Step Instructions
First, preheat your oven to 350°F (175°C). As the oven warms up, I like to gather all my ingredients and equipment to make the process a breeze. In a mixing bowl, combine the graham cracker crumbs and melted butter. It should feel like damp sand, perfect for creating that beloved crust! Press this mixture into the bottom of your prepared baking dish, and it will create the foundation of our cobbler. (See the next page below to continue steps…)
Next, sprinkle the chocolate chips evenly over the graham cracker crust, followed by a layer of mini marshmallows. It’s at this moment that my kitchen starts to fill with the heavenly scent of potential happiness! In another bowl, whisk together the milk, flour, baking powder, sugar, salt, and vanilla extract until smooth. This mixture will become the cobbler topping that makes everything so wonderfully gooey.
Carefully pour the milk mixture over the layered chocolate and marshmallows. Don’t worry if it looks a bit messy; that’s part of the charm! As it bakes, it will come together beautifully. Now it’s time to pop it into the oven and let it bake for about 30-35 minutes, until it’s golden brown and the marshmallows are getting that perfect toasty hue on top.
As soon as it’s out of the oven, allow it to cool for a few minutes before digging in. I recommend serving it warm, perhaps with a scoop of vanilla ice cream on the side. The combination of textures—crispy, soft, and gooey—will have everyone asking for seconds!
Pro Tips for Best Results
I tested this recipe three ways to ensure it was just right. Initially, I used regular-sized marshmallows instead of mini, which didn’t distribute as evenly and ended up with some toasted and others oddly chewy. Stick to the mini ones for that dreamy texture!
Another secret? If you want an extra layer of flavor, consider adding a pinch of cinnamon to the graham cracker crust—trust me, it elevates the whole experience. I also discovered that making sure your butter is just melted (not hot) when mixing with the graham crumbs helps maintain that perfect crumbly texture without making the crust too soggy.
Lastly, don’t skip the cooling step! I know it’s hard to resist digging in right away, but letting it sit for even just five minutes will make serving easier and enhance the overall enjoyment of every melty bite.
Common Mistakes to Avoid
One of the most common mistakes I encountered when first making this cobbler was overmixing the batter. It’s essential to mix just until everything is combined. Overmixing can lead to a dense topping rather than light and fluffy. (See the next page below to continue…)
Another thing to watch for is the baking time. Every oven is different, and while my cobbler took 35 minutes to bake perfectly, yours might need a few more minutes or slightly less. Keep an eye on it, and look for that golden brown color!
I’ve also noticed that if I add too many chocolate chips, the entire dish can become overly sweet. While I love chocolate, balance is key! Stick to about one cup to ensure a rich but not overwhelming chocolate flavor.
Lastly, always use fresh ingredients—especially the baking powder. Old baking powder can sabotage your lovely cobbler, leaving it flat instead of fluffy. A quick freshness check will save you the heartache later!
Serving Suggestions
When it comes to serving this Easy S’mores Cobbler, I like to keep it simple and delicious. A scoop of vanilla ice cream on top is a classic choice that contrasts beautifully with the warm cobbler and adds a creamy texture that just melts in your mouth. The combination is pure joy!
For an extra touch, consider drizzling homemade chocolate sauce over the top. Who could resist that delightful combination? I love to take a spoonful, letting the chocolate sauce drizzle down over the marshmallow and graham cracker layers.
Don’t forget about garnishing! A sprinkle of crushed graham cracker or even more mini marshmallows on top will add the perfect finishing touch for presentation. Your friends and family will be reaching for their plates before you can say “s’mores!”
Variations & Customizations
The beauty of this recipe is its versatility. If you’re feeling adventurous, why not swap the chocolate chips for other flavors? I’ve experimented with peanut butter chips and even white chocolate for a twist on the classic that left me yearning for more.
You can also add layers of fruit, such as sliced bananas or strawberries, for a fresh and fruity twist. It adds a nice contrast to the rich chocolate and marshmallow mixture, and it feels a bit healthier too!
If you’re a fan of nuts, consider sprinkling some chopped pecans or walnuts on top before baking. They add an extra crunch that pairs wonderfully with the gooey texture. These small changes can really take your cobbler from great to extraordinary!
How to Store, Freeze & Reheat
If you have any leftovers (which is a rare occurrence in my household), I recommend covering the cobbler tightly with plastic wrap or transferring it to an airtight container. It can be stored in the refrigerator for up to three days.
For longer-term storage, you can freeze the cobbler. Just be sure to let it cool completely before wrapping it up properly to prevent freezer burn. It should last in the freezer for about two months. When you’re ready to enjoy it again, simply thaw it overnight in the fridge, then reheat in the oven until warm.
To reheat, I usually place individual servings in the microwave for about 30 seconds. If you prefer the oven, pop them back in at 350°F (175°C) for about 10-15 minutes, keeping an eye on it. Either way, you’ll want to serve it warm—nothing beats that gooey goodness fresh from the oven!
Conclusion
I hope this Easy S’mores Cobbler recipe finds a special place in your kitchen, just as it has in mine. It’s such a joy to bring a bit of summer into my life, no matter the season. With its warm, gooey center and rich flavors, I can guarantee it will become a family favorite in no time! Happy baking, and may your kitchen be filled with delicious scents and laughter as you whip up this delightful treat!