
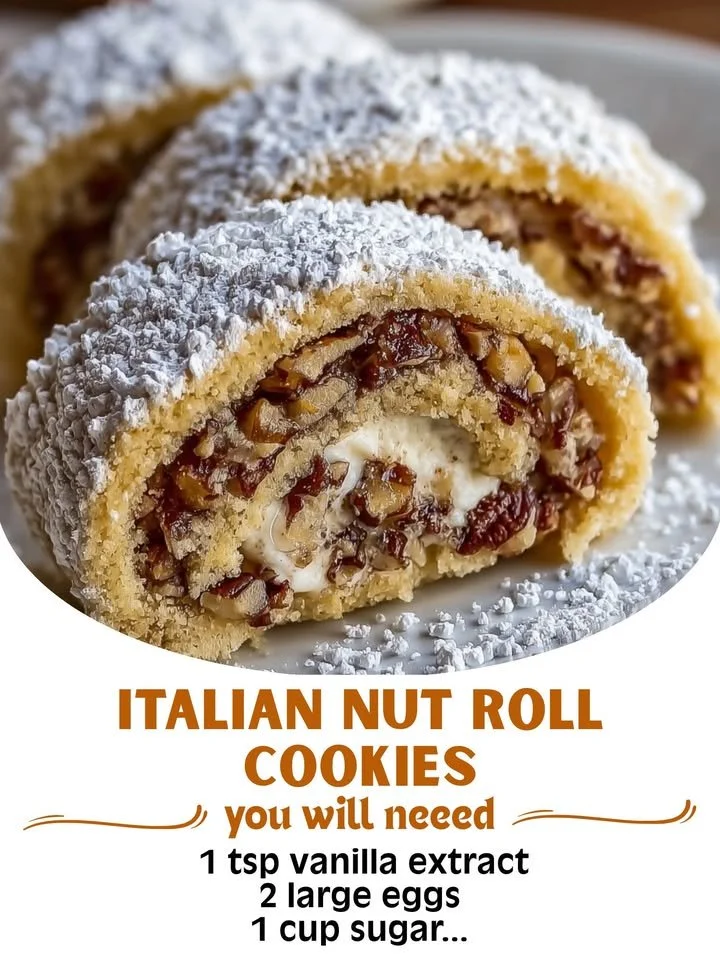
When I first came across the recipe for Italian Nut Roll Cookies, I was immediately drawn to it. The thought of creating these delightful treats transported me to my grandmother’s kitchen, where memories of her baking filled the air with rich, nutty aromas. Picture this: I began mixing ingredients, the scent of vanilla and toasted nuts wafting around me, wrapping me in a warm embrace. Each step felt like a loving tribute to her legacy, making me love this recipe even more. The joy of sharing freshly baked cookies with family and friends is an experience I always cherish.
Why You’ll Love This Recipe
You’re going to love this Italian Nut Roll Cookie recipe because it’s not just about the end result; it’s about the journey. Every step, from mixing the dough to baking, brings with it an anticipation that’s hard to match. The delightful combination of flavors—anyone from your family or friends will be enchanted by them. These cookies are soft, chewy, and filled with a nutty sweetness that hits just the right notes. You can’t help but smile as you bite into one, and trust me, it’s an easy recipe that’s perfect for any occasion, making it a favorite in my kitchen.
Ingredients
- 2 cups all-purpose flour
- 1/2 cup unsalted butter, softened
- 1/2 cup sugar
- 1 large egg
- 1 teaspoon vanilla extract
- 1/2 teaspoon baking powder
- Pinch of salt
- 1 cup finely chopped walnuts or pecans
- 1 teaspoon cinnamon
- Powdered sugar, for dusting (See the next page below to continue…)
Equipment Needed
- Mixing bowl
- Electric mixer
- Measuring cups and spoons
- Rolling pin
- Baking sheet
- Parchment paper
- Cooling rack
Step-by-Step Instructions
I always start by preheating my oven to 350°F (175°C). It’s essential that you do this first so that the cookies can go straight in when they’re ready. In my mixing bowl, I cream together the softened butter and sugar until it’s light and fluffy. This is a crucial step—don’t rush this part! You want the air incorporated for those soft, tender cookies. Once it’s just perfect, I crack in the egg, add the vanilla extract, and just whip it up for a few seconds until combined.
In a separate bowl, I whisk the flour, baking powder, and salt. When I made this recipe for the first time, I didn’t mix the dry ingredients thoroughly enough. Let me tell you—adding salt in random pockets isn’t fun! So mixing them separately ensures an even distribution. I slowly incorporate the dry ingredients into the wet mixture. I remember this dough part being so satisfying, like a gentle embrace coming together beautifully.
Now, here’s where the nutty magic happens. I fold in those finely chopped walnuts or pecans and the cinnamon. The scent of cinnamon always takes me back to my childhood, and I can’t help but sneak a taste of the mixture before it goes in the oven! I cover the dough with plastic wrap and let it chill in the fridge for about 30 minutes. Chilling is vital for the cookies’ consistency; if you skip this step, you could end up with a gooey mess on your baking sheet! (See the next page below to continue…)
Once chilled, I roll out the dough on a floured surface to about 1/4-inch thickness. Using a cookie cutter, I make little circles, which are perfect for rolling. I fill each circle with a spoonful of the nut mixture, then carefully fold them over to create little half-moons. The moment I placed the cookies into a preheated oven, I felt a wave of excitement, knowing that something delicious was about to happen. I bake them for about 12-15 minutes, until they’re just a light golden-brown.
Pro Tips for Best Results
I’ve tested this recipe a few different ways, and let me tell you: chilling the dough really is non-negotiable! The first time I made these cookies, I was tempted to skip that step to save time. Big mistake! The cookies spread too much and turned into a flat, crumbly mess. So please, take the time to chill the dough!
Another tip I swear by is to measure your nuts carefully. When I used 1 1/2 cups instead of 1 cup the first time, the cookies were overpowered by the nutty flavor, and they didn’t hold their shape well. Trust me, it’s all about balance!
Lastly, don’t rush the cooling process. I used to yank them off the baking sheet too soon. Letting them cool for a few minutes before transferring them to a cooling rack not only helps them firm up but also gives you that incredible texture we all love.
Common Mistakes to Avoid
I made this mistake the first time—don’t do what I did when I accidentally forgot the baking powder! The cookies were so dense that I thought they were scones! Just a simple oversight can turn a lovely batch into a total disaster. Always double-check your ingredients before you begin.(See the next page below to continue…)
Another common mishap is over-baking. I used to leave them in for what seemed like just a tad too long because I thought they looked too soft. I’ve since learned that they continue cooking on the baking sheet even after being pulled from the oven, so trust your instincts when they just start to turn golden.
Also, watch your heat settings. I once mistook Fahrenheit for Celsius and ended up with crispy cookies instead of the soft ones I loved. A simple oven thermometer can be a lifesaver to prevent getting baked goods that are either overly brown or undercooked.
Serving Suggestions
I like serving these Italian Nut Roll Cookies with an aromatic cup of coffee or tea. The flavors complement each other beautifully, making for an exquisite afternoon treat. I’ve even taken them to friends’ houses and paired them with desserts after dinner—it’s always a huge hit.
If I’m feeling indulgent, I sometimes drizzle a bit of melted chocolate on top, which adds a delightful extra layer of flavor. I love how it transforms the cookies from simple treats to elegant bites of deliciousness.
And of course, these cookies are perfect for holiday parties or family gatherings. I like to arrange them on festive platters alongside other homemade goodies—nothing sparks joy like sharing freshly baked treats with those I love.
Variations & Customizations
I’ve experimented with this recipe, and one of my favorite variations was substituting almonds for walnuts. The almond flavor adds a unique twist, especially when paired with almond extract instead of vanilla. It creates a beautifully fragrant cookie that’s surprisingly different yet just as satisfying.
You can also play with the spices! Once, I swapped cinnamon for nutmeg, and it brought a cozy warmth that reminded me of winter nights. Adding a dash of nutmeg transformed the flavor profile into something entirely new and delightful.
If you want a touch of fruity flavor, try adding finely minced dried fruits like apricots or cranberries into the nut filling. I came across this version during a family holiday, and it was like discovering a whole new world of flavors in a familiar cookie!
How to Store, Freeze & Reheat
I’ve found that the best way to store these Italian Nut Roll Cookies is in an airtight container at room temperature. They last about a week, although I can guarantee they won’t be around that long! If you notice them getting slightly dry, pop them in an airtight container with a slice of bread—that little trick keeps them fresh and soft for days.
If you’d like to prepare ahead of time, freezing these cookies works beautifully. I simply cool them completely, pack them in layers with parchment paper in between, and then pop them into a freezer bag. They’ll stay fresh for up to three months.
When I’m ready to indulge in a frozen batch, I just pull out a few and let them thaw at room temperature for about an hour. If you want that fresh-out-of-the-oven taste, give them a quick 5-minute bake at 350°F. You’ll feel like you’ve just baked a fresh batch!
Conclusion
Baking Italian Nut Roll Cookies always brings me joy, and I hope it becomes a delightful ritual for you, too. This recipe is filled with memories, warmth, and culinary joy that I’m excited to share with you. So, gather your ingredients, roll up your sleeves, and bring the delightful scent of these cookies into your own kitchen. Enjoy every moment of your baking journey!