
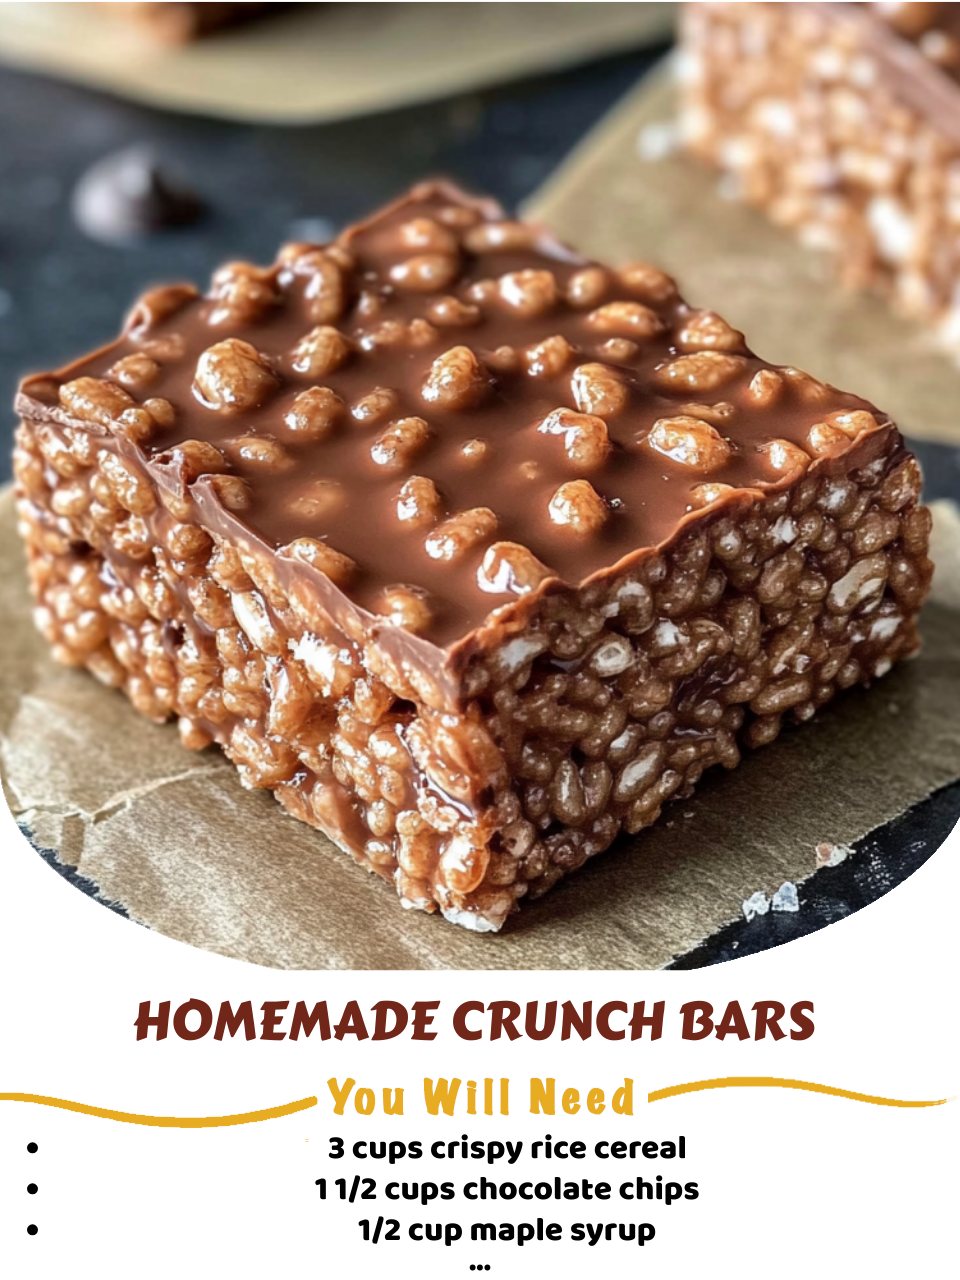
The moment I poured the warm, glossy chocolate over the crispy rice cereal, the most wonderful crackling sound filled my kitchen—a promise of the perfect crunch to come. I was craving that nostalgic candy bar flavor but wanted a version I could make at home with just a few simple ingredients. As I spread the mixture into the pan, the smell of sweet chocolate and toasty cereal was pure, simple joy. After a brief chill in the fridge, I broke off a piece. That first snap, followed by the melt-in-your-mouth chocolate and airy crisp, was a total victory. These homemade bars are a magical, five-minute treat that tastes like childhood, but better.
Why You’ll Love This Recipe
You’ll love this recipe because it turns three basic ingredients into a candy bar clone that’s infinitely better than anything from a wrapper. It’s unbelievably quick, requires zero baking, and is the perfect project to make with kids. You control the quality of the chocolate, and the result is a treat that’s perfectly crisp, deeply chocolatey, and far less sugary than the store-bought kind. From my fridge to yours, I promise this will become your go-to for a fast, satisfying, and impressively delicious homemade sweet.
Ingredients
- 3 cups crispy rice cereal (like Rice Krispies)
- 1 1/2 cups chocolate chips (semi-sweet, dark, or milk chocolate)
- 1/2 cup pure maple syrup (or honey)
- 1/4 cup creamy peanut butter or coconut oil (see note)
- 1 teaspoon pure vanilla extract
- 1/4 teaspoon fine sea salt (optional, but highly recommended)
Let’s talk ingredients. The chocolate chips are your main flavor, so use a brand you love to eat on its own. I prefer semi-sweet for a perfect balance. The binding agent is key: while you can use just maple syrup, adding a fat like peanut butter or coconut oil is a game-changer. It makes the chocolate mixture more fluid for coating and gives the bar a better snap and less sticky texture. I’ve tried it both ways, and trust me, the added fat works better. The salt is non-negotiable; it makes the chocolate flavor pop and cuts the sweetness beautifully. Don’t skip it.(See the next page below to continue…)
Equipment Needed
- 8×8 or 9×9 inch baking pan
- Parchment paper
- Medium-large saucepan
- Heatproof spatula
- Large mixing bowl
- Measuring cups
Step-by-Step Instructions
I always start by lining my baking pan with parchment paper, leaving an overhang on two sides. This creates a sling that lets me lift the whole block of crunch bars out easily for clean cutting. I measure out my three cups of crispy rice cereal into a large mixing bowl. It’s important to do this first because once the chocolate is melted, you need to work quickly. I also make sure my vanilla and salt are measured and ready to go. This “mise en place” prevents any frantic scrambling later.
Next, I combine the chocolate chips, maple syrup, and peanut butter (or coconut oil) in my medium saucepan. I place it over the lowest possible heat on my stove. The goal here is to melt everything gently and slowly. If the heat is too high, the chocolate can seize or burn. I stir almost constantly with my spatula as the chips begin to lose their shape. In just a few minutes, it transforms into a smooth, glossy, and luxurious chocolate sauce. The smell is heavenly. As soon as it’s fully melted and combined, I immediately remove the pan from the heat.
Without delay, I stir in the vanilla extract and the salt. Then, I pour the warm chocolate sauce over the waiting bowl of crispy rice cereal. Using my spatula, I immediately start folding. I work gently but quickly, using a turning and lifting motion to coat every single piece of cereal without crushing it. The sound of the chocolate coating the cereal is so satisfying—a soft, crackly rustle. I keep folding until no dry cereal remains and everything is a uniform, chocolatey brown. This takes less than a minute.(See the next page below to continue…)
I quickly scrape the mixture into my prepared pan. Using the back of my spatula, I press it down into a smooth, even layer. I don’t press too hard—just enough to make it level and compact. If I press too firmly, I’ll crush the cereal and lose that wonderful airy crunch. Then, the hardest part: I walk away. I place the pan in the refrigerator to set for at least 2 hours. This allows the chocolate to fully harden so the bars will have that signature, clean snap when I break them.
Pro Tips for Best Results
I tested the melting method three different ways: in a double boiler, directly on low heat, and in the microwave. Direct low heat on the stove, with constant stirring, is the simplest and most foolproof. The double boiler works but feels like extra dishes, and the microwave can easily overheat the chocolate in seconds, causing it to seize. Low and slow on the stove gives you the most control.
Here’s what I learned the hard way about the cereal: it must be very fresh. I once used a box that had been open in the pantry for a few weeks, and the cereal had lost its signature snap. The bars were still tasty but disappointingly soft. For the best crunch, use cereal from a freshly opened box or bag. Stale cereal makes stale-tasting bars.
Don’t skip the step of pressing the mixture into the pan. If you just dump it in and don’t press, the bars will be too crumbly and won’t hold together when you try to cut or pick them up. A firm, even press ensures they hold their shape as proper bars. However, remember the gentle touch—we’re compacting, not pulverizing.
Common Mistakes to Avoid
My biggest first-time mistake was trying to cut the bars before they were fully set. I was too eager and tried after just 30 minutes in the fridge. The chocolate was still soft, my knife dragged through it, and I ended up with a messy, smeared block instead of clean bars. Patience is absolutely essential. Wait the full two hours, or even longer if you can. A perfectly set bar will cut with a clean crack.(See the next page below to continue…)
Another pitfall is overheating the chocolate mixture. If you see the chocolate starting to look grainy, oily, or clumpy, it’s a sign it’s getting too hot or that a tiny bit of steam/water got in (which causes seizing). If this happens, you can sometimes save it by immediately removing it from the heat and vigorously stirring in an extra tablespoon of maple syrup or coconut oil until it smoothes out again.
Don’t substitute the maple syrup with a liquid like agave without adjusting. Maple syrup has a specific thickness and flavor. If you must substitute, honey is the closest match. Using a thinner liquid like plain corn syrup can result in bars that never fully harden. The maple syrup provides sweetness, flavor, and the right binding consistency.
Finally, avoid stirring the cereal too vigorously. You want to coat the pieces, not turn them into dust. Use a folding motion. If you crush the cereal, you lose the delightful airy texture that makes a crunch bar what it is. Gentle is the keyword from melting to mixing.
Serving Suggestions
I like breaking the chilled block into rustic, uneven pieces and piling them high on a plate. They’re perfect for a quick after-school snack, a lunchbox treat, or a light dessert with a cup of coffee. Their simple, handheld nature is part of their charm.
For a more elegant presentation, I’ll score the top of the set chocolate block with a knife before breaking it, or I’ll cut it into neat, uniform squares or rectangles. Drizzling a little extra melted white chocolate over the top before cutting looks beautiful and adds another layer of flavor.
When I’m serving them at a party, I might stick a small decorative flag or toothpick in each one and arrange them on a tiered stand. They’re a fantastic gluten-free option that everyone can enjoy, and they always surprise people with how delicious something so simple can be.
Variations & Customizations
This recipe is a wonderful canvas. My favorite variation is a “Peanut Butter Crunch” bar. I use milk chocolate chips, and when I melt the chocolate and syrup, I also add 1/3 cup of creamy peanut butter. After pressing into the pan, I’ll sometimes drizzle more melted peanut butter on top before chilling. It’s like a crispy peanut butter cup!
For a different mix-in, try adding 1/2 cup of mini marshmallows, chopped nuts, or even crushed pretzel pieces to the cereal before coating. For a “Cookies and Cream” twist, use white chocolate chips and stir in 1/2 cup of crushed Oreo cookie pieces.
If you want to make it vegan, use dairy-free chocolate chips, coconut oil instead of peanut butter (or a vegan nut butter), and ensure your cereal is vegan-friendly (some are fortified with vitamin D3 from animal sources). The method is exactly the same, and they turn out perfectly.
How to Store, Freeze & Reheat
These bars store perfectly in an airtight container in the refrigerator. The cool temperature keeps the chocolate firm and the crunch intact. They will keep for up to 2 weeks this way. I don’t recommend storing them at room temperature if your kitchen is warm, as the chocolate will soften.
They freeze beautifully for long-term storage. Wrap the whole block or individual pieces tightly in plastic wrap, then place in a freezer bag or container. They will keep for up to 3 months. You can eat them straight from the freezer for a fun, frozen treat, or let them thaw in the fridge for 15 minutes.
There is no need to reheat these bars. They are meant to be enjoyed cold and crisp. If they ever seem too soft, simply pop them back in the fridge for 30 minutes to firm up. Their charm is in their cool, snappy texture.
Conclusion
These Homemade Crunch Bars are a joyful reminder that the simplest treats are often the most satisfying. With just a bowl, a pan, and a few minutes of effort, you can create a nostalgic candy that’s even better than the original. I hope this recipe brings as much easy, crunchy delight to your kitchen as it has to mine. Give them a try—you might never buy the packaged version again. Happy no-baking, friends.