
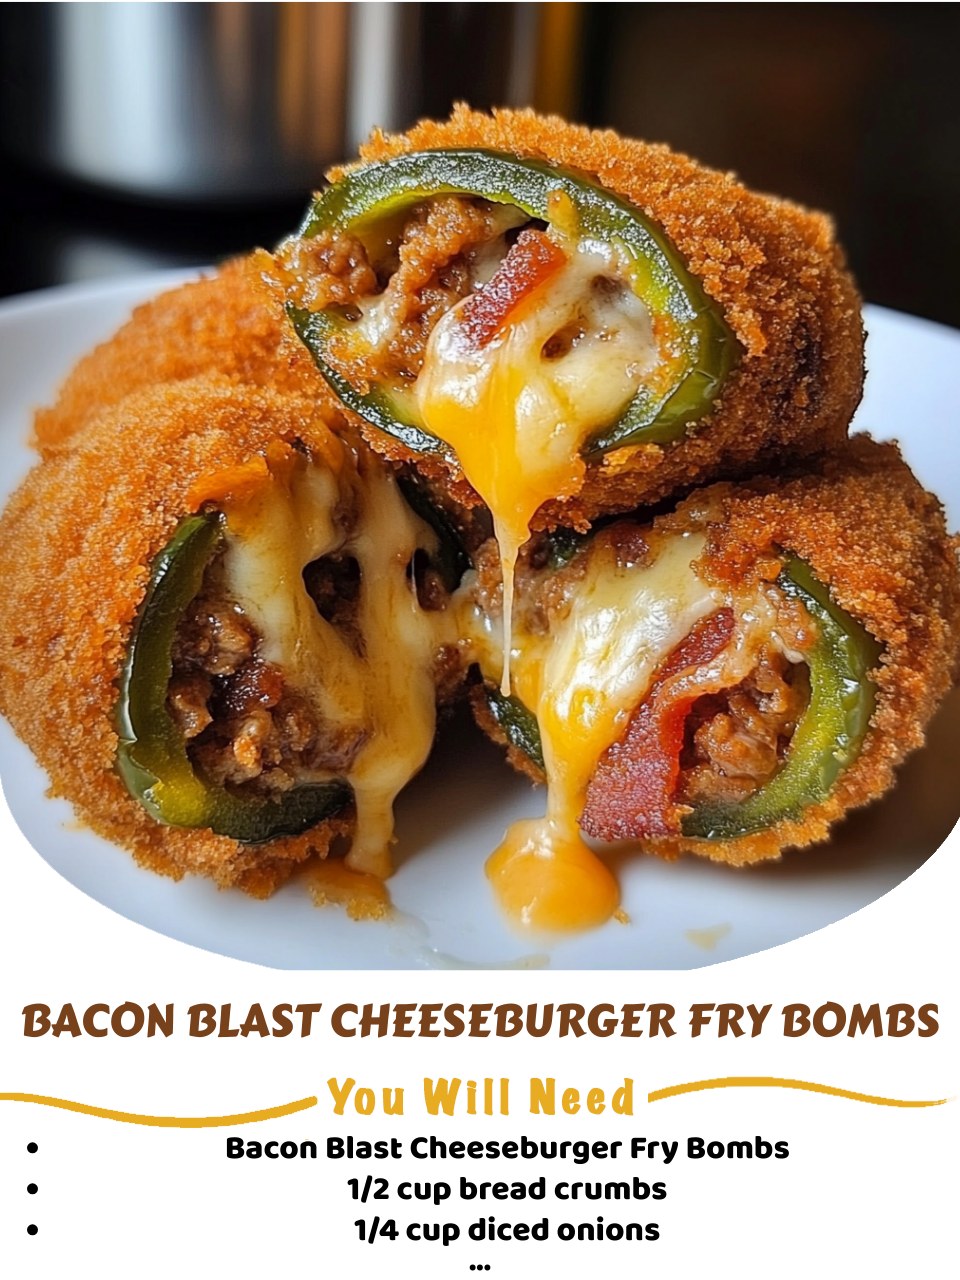
I still remember the first time I tried a Bacon Blast Cheeseburger Fry Bomb. I was looking for a fun, over-the-top appetizer for game day, something that would make everyone stop scrolling on their phones and actually talk. What I created was pure, golden-brown magic. My kitchen filled with the sizzle of bacon and the irresistible aroma of frying cheeseburger goodness. The moment we bit into that crispy, gooey, savory explosion, I knew this recipe was a forever favorite. It’s not just food; it’s an experience, a conversation starter, and the ultimate comfort food all rolled into one perfect, handheld bite.
Why You’ll Love This Recipe
You’re going to love this recipe because it delivers that iconic, crave-able cheeseburger flavor in the most fun and shareable form possible. It’s the perfect fusion of a juicy burger, melty cheese, crispy bacon, and golden fries, all without needing a bun. They’re fantastic for parties, they satisfy the pickiest eaters, and honestly, making them is just a blast. From my kitchen to yours, I promise these little bombs are worth every single minute of prep.
Ingredients
- 1/2 cup bread crumbs
- 1/4 cup diced onions
- 1 pound ground beef (80/20 blend for best flavor)
- 1 teaspoon garlic powder
- 1 teaspoon onion powder
- 1/2 teaspoon smoked paprika
- 1/2 teaspoon salt
- 1/4 teaspoon black pepper
- 4 slices of American cheese, torn into small pieces (trust me, American melts best here!)
- 6 strips of bacon, cooked until crispy and crumbled
- 1 cup frozen shoestring fries, partially thawed and roughly chopped
- 1 large egg, lightly beaten
- Oil, for frying (I use canola or peanut oil for a high smoke point)
- Optional for serving: ketchup, mustard, special sauce, pickles
Now, about those ingredients. Using 80/20 ground beef is my non-negotiable tip; the extra fat keeps the bombs juicy inside. I’ve tried this with cheddar, and while it’s tasty, American cheese gives you that perfect, creamy, diner-style melt. Don’t skip the smoked paprika—it adds a subtle depth that makes all the difference. And for the fries? Using frozen ones is the secret hack for the right texture; just chop them a bit so they incorporate easily.(See the next page below to continue…)
Equipment Needed
- Large mixing bowl
- Baking sheet
- Parchment paper
- Deep fryer, Dutch oven, or heavy-bottomed pot
- Slotted spoon or spider strainer
- Paper towel-lined plate
- Instant-read thermometer (for checking oil temp – a game-changer!)
Step-by-Step Instructions
First, let’s build our flavor base. In my large mixing bowl, I combine the ground beef, diced onions (the finer you dice them, the better they’ll bind), garlic powder, onion powder, smoked paprika, salt, and pepper. I use my hands to mix it gently but thoroughly. Overworking the meat can make it tough, so I stop as soon as everything is evenly distributed. Then, I fold in the torn American cheese and crumbled bacon. The key here is to have everything ready to go so the mixture stays cold.
Next comes the fun, structural part: forming the bombs. I take a generous golf-ball-sized amount of the mixture and press a few pieces of the chopped frozen fries into the center, then carefully encase them with more meat, rolling it into a tight, round ball. The first time I made these, I made them too big and they fell apart in the oil. Aim for about 1.5 to 2 inches in diameter. Once all my bombs are rolled, I place them on a parchment-lined baking sheet and pop the whole tray in the freezer for 15 minutes. This chill time is crucial—it firms them up so they hold their shape when fried.
While the bombs are chilling, I heat my oil. I pour about 3 inches of oil into my Dutch oven and attach my thermometer. I aim for 350°F (175°C). Getting the oil temperature right is everything. Too hot, and they’ll burn on the outside before the beef cooks through. Too low, and they’ll absorb too much oil and become greasy. I wait patiently for it to hit that perfect mark. Then, I set up my station with the beaten egg in one shallow bowl and the bread crumbs in another.(See the next page below to continue…)
Finally, the grand finale: frying. I take a chilled bomb, roll it in the beaten egg, then dredge it thoroughly in the bread crumbs, pressing gently to adhere. Working in batches of 4-5 to avoid overcrowding, I carefully lower them into the hot oil with my slotted spoon. The sizzle is so satisfying! I fry them for about 4-5 minutes, turning occasionally, until they’re a deep, gorgeous golden brown. I pull them out, let the excess oil drip off, and transfer them to my paper towel-lined plate. The smell at this point is absolutely intoxicating.
Pro Tips for Best Results
Chilling the formed bombs before frying is the single most important step for success. I tested skipping this step once, and it was a disaster—they started falling apart the moment they hit the oil. That 15 minutes in the freezer makes the coating process easier and creates a perfect seal for frying.
I can’t stress the oil thermometer enough. Guessing by dropping in a bread crumb is too unreliable. I learned this the hard way with a batch of soggy, undercooked bombs. An instant-read thermometer takes the guesswork out and guarantees a crisp exterior every single time. It’s a small investment for huge results.
For the ultimate flavor, season your bread crumbs! I like to add a pinch of the same garlic and onion powder I used in the meat mixture right into the crumb bowl. It adds an extra layer of seasoning to that delicious crispy shell. It’s a tiny step that makes a noticeable difference.
Common Mistakes to Avoid
The first time I made these, I used meat that was too lean. I thought I was being healthy with 93/7 ground turkey. Big mistake. The bombs turned out dry and a bit crumbly because there wasn’t enough fat to bind and moisten everything. Stick with 80/20 beef for the best texture and flavor. The fat renders as it fries, keeping the inside incredibly juicy.(See the next page below to continue…)
Don’t rush the forming process. If you try to pack the fries in too densely or make the meat layer too thin, you risk a fry bomb… literally. The steam from the fries can cause a mini explosion, creating a leak. I make sure the meat layer is even and I don’t over-stuff the center. A few pieces of fry are plenty.
Overcrowding the pot is a surefire way to drop your oil temperature and end up with greasy, unevenly cooked bombs. I fry in small batches, no more than 4 or 5 at a time, depending on the size of my pot. This gives them plenty of room to float and cook evenly on all sides. Patience is key here.
Skipping the double coating of egg and breadcrumbs is a risk. I tried a lighter coat once, and the crust wasn’t as satisfyingly crunchy or uniform. Make sure each bomb gets a good, thorough dunk in the egg, then a complete roll in the crumbs, pressing them on gently. This creates that perfect, shatter-crisp barrier we all love.
Serving Suggestions
I love serving these straight from the fryer, piled high on a platter with small bowls of dipping sauces. My absolute favorite is a simple copycat “special sauce”—just mix equal parts ketchup and mayo with a tablespoon of sweet pickle relish and a dash of garlic powder. It’s the perfect tangy complement.
For a full meal, I turn these into the main event alongside a crisp, cool coleslaw to cut through the richness. The creaminess and acidity of the slaw balance the savory bombs beautifully. A pile of extra crispy fries or onion rings makes it a truly decadent feast.
If I’m serving them as a party appetizer, I always keep a warm oven (about 200°F) ready. As I finish frying batches, I transfer them to a baking sheet in the oven to keep them warm and crisp until everyone is ready to eat. This way, nobody misses out on that just-fried perfection.
Variations & Customizations
You can absolutely play with the cheese! While American is my top pick for meltiness, I’ve had great success with a sharp cheddar for a more pronounced flavor, or even pepper jack for a little kick. Just know that other cheeses won’t melt quite as seamlessly, but they’ll still be delicious.
For a fun twist, try mixing in different ingredients to the meat. I’ve added a tablespoon of Worcestershire sauce for extra umami, or swapped the bacon for finely chopped jalapeños to make a “jalapeño popper” version. A friend of mine mixed in some blue cheese crumbles, and it was phenomenal.
If you’re not a fan of frying, I’ve tested a baked version. Bake the formed bombs at 400°F on a rack over a baking sheet for about 20-25 minutes. They won’t get quite as evenly golden or as crispy as the fried version, but they’re still incredibly tasty and a great lighter option. Just give them a quick spray with cooking oil before baking.
How to Store, Freeze & Reheat
To store leftovers (if you have any!), let the bombs cool completely, then place them in a single layer in an airtight container in the refrigerator. They’ll keep for up to 3 days. I do not recommend storing them while they’re still warm, as the steam will make the coating soggy.
For freezing, this recipe is a fantastic make-ahead option. After forming and chilling the uncooked bombs, instead of coating and frying, place the tray in the freezer until the bombs are solid (about 2 hours). Then, transfer them to a freezer-safe bag. They can be frozen for up to 2 months. When you’re ready, fry them straight from frozen, adding an extra 2-3 minutes to the cooking time.
The best way to reheat cooked bombs is in the oven or an air fryer. Microwaving will make them soft and soggy—I learned this the hard way. Preheat your oven or air fryer to 375°F and heat them for 8-10 minutes, until hot and re-crisped. This method brings them back to life almost perfectly.
Conclusion
Making Bacon Blast Cheeseburger Fry Bombs is one of those kitchen adventures that always feels worth it. The joy of pulling that first perfectly golden, crispy bomb from the oil and hearing the chorus of “wows” from friends and family is just the best. It’s a recipe that’s as fun to make as it is to eat. I hope you give it a try and that it brings as much delicious, messy, happy chaos to your table as it has to mine. Enjoy every bite