
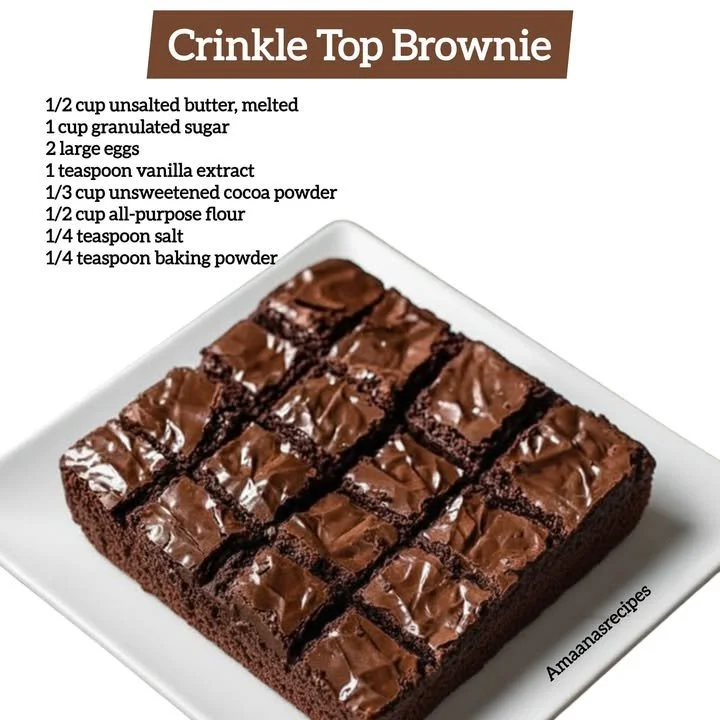
Ah, there’s something simply magical about baking brownies. It’s one of those activities that seems to bring warmth and joy, not only to the kitchen but to the heart. Today, I want to share my go-to recipe for homemade crinkle top brownies. I love how these brownies come out with that irresistible crinkle on top and a chewy texture inside. So, grab your apron and let’s get started!
Why You’ll Love This Recipe
This homemade crinkle top brownie recipe is the ultimate chocolatey treat that balances rich flavors with a delightful fudgy texture. The best part? They’re incredibly easy to make, and I swear you’ll have everyone asking for seconds (and thirds)! Plus, the charming crackled surface is just as fun to look at as it is to eat. What’s not to love? (See the ingredients in the next page below…)
Ingredients
– 1 cup unsalted butter
– 2 cups granulated sugar
– 4 large eggs
– 1 tablespoon vanilla extract
– 1 cup all-purpose flour
– 1 cup unsweetened cocoa powder
– 1/2 teaspoon baking powder
– 1/2 teaspoon salt
– Powdered sugar for dusting
Equipment Needed
– Mixing bowls
– Whisk
– 9×13 inch baking pan
– Parchment paper (optional)
– Rubber spatula
– Measuring cups and spoons
Step-by-Step Instructions
First things first, preheat your oven to 350°F (175°C) because we want to get that cozy baking aroma wafting through the house. While that’s heating up, melt the butter in a saucepan over low heat. This step makes the brownies rich and deliciously fudgy. Once melted, remove it from the heat and stir in the sugar until it’s well combined. I’ve found that mixing the sugar with warm butter really brings out the sweetness! (See the next page below to continue steps…)
Next, add in the eggs, one at a time, mixing well after each addition. It’s essential to incorporate them thoroughly to ensure a lovely moist texture. Trust me, the secret to gooey brownies is in the mixing! Then, add the vanilla extract; it adds a hint of warmth that complements the chocolate beautifully. Now, it’s time to sift together the flour, cocoa powder, baking powder, and salt in another bowl. This step may seem tedious, but it makes a difference in creating a light, even mixture.
Now gently fold the dry ingredients into the chocolate mixture using a rubber spatula. Be careful to not over-mix; this can lead to dense brownies. Once everything is just combined, pour the batter into your greased and lined baking pan, smoothing out the top. Pop it into the oven and let it bake for about 20 to 25 minutes. You’ll know it’s ready when the top looks crackled and a toothpick inserted in the center comes out with just a few moist crumbs.
When they’re done, remove the brownies from the oven and cool in the pan for about 10 minutes. After a little cooling, transfer them to a wire rack. This step is crucial; you want those fantastic crinkles to set as they cool down!
Pro Tips for Best Results
I always recommend using good-quality cocoa powder. I tried a few brands, and the ones with richer flavor completely transformed my brownies! It’s a small change that makes a huge difference. Also, be sure to really let the brownies cool before cutting them. This helps them to hold their shape and enhances that classic fudgy texture.
When it comes to measurement, I’ve tested this recipe several times, and weighing your ingredients gives you a consistent result every time. Seriously, a kitchen scale is your best friend if you’re a baking enthusiast like me.
Lastly, don’t skip the powdered sugar dusting on top! It not only looks incredibly inviting but also adds a touch of a sweet finish to each bite. I like to use a fine mesh sieve for an even dusting. It’s the little details that make a big impact!
Common Mistakes to Avoid
One common mistake I made in the beginning was mixing the batter too vigorously. This can introduce unwanted air into the mixture, resulting in dense brownies instead of the light and chewy ones we’re after! So, gentle folding is key. (See the next page below to continue…)
Another pitfall is overbaking. It’s always better to err on the side of caution! I know it’s tempting to leave them in for a few extra minutes, but brownies will continue to cook a tad even after you’ve taken them out. Keep a close eye on the timer and don’t hesitate to check them a couple of minutes before the suggested bake time.
Also, I learned the hard way that using a pan that’s not the right size affects the texture. If your pan is too small, the brownies might take longer to bake. If it’s too big, they could overbake and become dry. Stick to the recommended 9×13 inch pan for the best results!
Serving Suggestions
These crinkle top brownies are delightful on their own, but why stop there? I love serving them warm with a scoop of vanilla ice cream on top. The contrast of the warm fudgy chocolate against the cold creamy ice cream is just divine!
Another favorite way to serve them is with a drizzle of homemade caramel or chocolate sauce. It adds an extra layer of richness that can make these brownies truly stand out at any gathering. I often bring them to family events, and they disappear in an instant!
For a more elegant touch, you can plate them with a sprinkle of sea salt and fresh berries. It’s a simple yet sophisticated way to elevate this classic dessert, making it perfect for dinner parties or special occasions.
Variations & Customizations
If you’re feeling adventurous, try adding chocolate chips or nuts into the batter! I occasionally add some chopped walnuts or pecans for a little crunch—delicious! You can also experiment with different kinds of chocolate chips, like white or dark chocolate, to give your brownies a unique twist.
Another variation is to throw in a little espresso powder into the mix. It enhances the chocolate flavor without a strong coffee taste. Trust me; it makes the brownies taste more chocolatey! Just keep it to about 1 teaspoon so it doesn’t overpower the other flavors.
For those who love a hint of mint, adding mint extract to your batter can take these brownies to a whole new level! Just a half teaspoon will do the trick, and you’ll have a delicious chocolate-mint combo that’s perfect for the holiday season!
How to Store, Freeze & Reheat
Storing your homemade brownies is super easy! Once they’ve cooled completely, I like to keep them in an airtight container at room temperature for up to five days. Just make sure they’re in a single layer to avoid any sticking.
If you have any leftovers (which is rare in my house), you can freeze them! I wrap each brownie individually in plastic wrap and then place them in a freezer-safe bag. They can last up to three months in the freezer. When you’re ready to enjoy, just let them thaw at room temperature for a few hours or pop them in the microwave for a few seconds to bring that gooey texture back.
Reheating is simple, too! I always recommend putting them in the microwave for about 10-15 seconds. It’s just long enough to warm them up without drying them out, making them feel freshly baked again.
Conclusion
I hope you’re as excited to make these homemade crinkle top brownies as I am! They’re rich, chewy, and perfect for any occasion. There’s nothing better than sharing a delicious dessert with friends and family. Happy baking!