
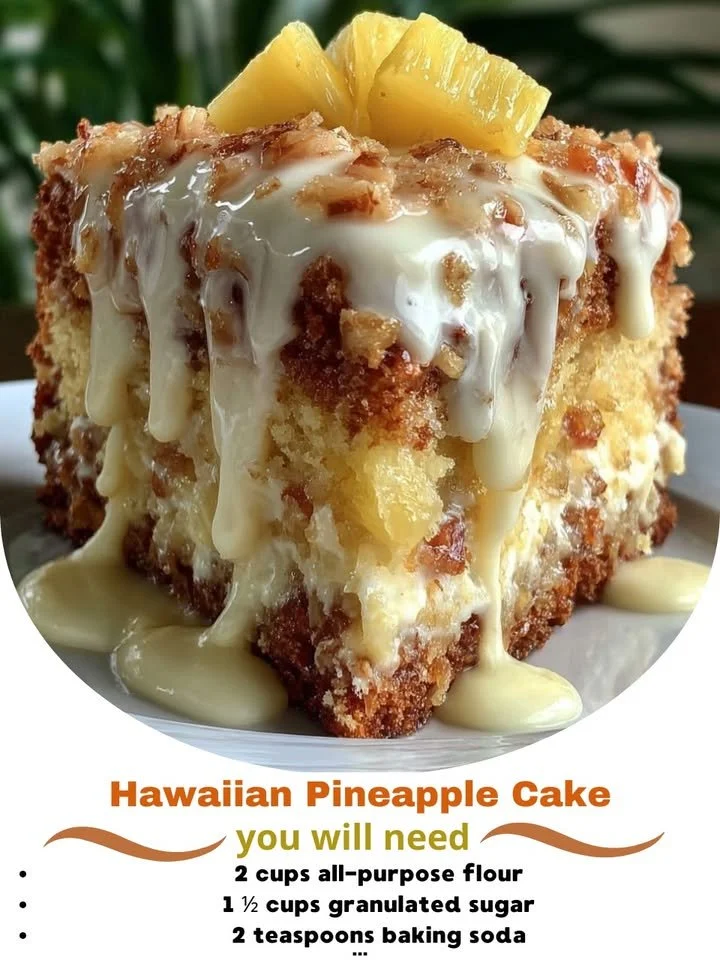
Ah, Hawaiian Pineapple Cake! This delightful treat always takes me back to summer barbecues and family gatherings, where the sweet, tropical flavor of pineapple fills the air. Every time I bake this cake, my kitchen transforms into a warm haven, overflowing with the scent of rich vanilla and the juicy sweetness of fresh pineapples. If you’ve never tried making this cake, let me guide you through my favorite recipe that brings a taste of the islands right to your home.
Why You’ll Love This Recipe
This recipe is perfect for anyone who adores the combination of tropical flavors and moist, fluffy cake. The pineapple adds an irresistible juiciness that makes each bite delightful. It’s not only delicious but also incredibly easy to make, allowing you to whip it up for any occasion or simply to satisfy a sweet tooth. The glaze on top provides a lovely sheen that is as appealing as the cake itself! I can’t help but smile every time I see it on the table. (See the ingredients in the next page below…)
Ingredients
- 2 cups all-purpose flour
- 1 ½ cups granulated sugar
- 1 teaspoon baking powder
- 1 teaspoon baking soda
- ½ teaspoon salt
- 1 cup crushed pineapple (with juice)
- ½ cup vegetable oil
- 4 large eggs
- 1 teaspoon vanilla extract
- ½ cup chopped walnuts or pecans (optional)
- For the glaze:
- 1 cup powdered sugar
- 2 tablespoons pineapple juice
- 1 tablespoon milk
Equipment Needed
- Mixing bowls
- Electric mixer or whisk
- Measuring cups and spoons
- Rubber spatula
- 9×13-inch baking pan
- Cooling rack
- Small bowl for glaze
Step-by-Step Instructions
First, preheat your oven to 350°F (175°C). I like to grease and flour my baking pan beforehand, so it’s ready to go. In a large mixing bowl, combine the flour, sugar, baking powder, baking soda, and salt. Whisk them together until well combined. Then, in another bowl, mix the crushed pineapple (with juice), vegetable oil, eggs, and vanilla extract. The aroma of vanilla in this step is simply heavenly! Pour this wet mixture into the dry ingredients and mix until just combined. If you’d like to add a nutty flavor, stir in the chopped walnuts or pecans at this point. (See the next page below to continue steps…)
Next, pour the batter into your prepared baking pan and smooth out the top with a spatula. Bake for about 30-35 minutes or until the cake is golden brown and a toothpick inserted in the center comes out clean. Be careful not to overbake! While the cake is cooling, let’s prepare the glaze. In a small bowl, whisk together the powdered sugar, pineapple juice, and milk until it’s smooth and pourable. The sweet aroma adds to the excitement of the cake’s completion!
Once the cake is cool, poke a few holes in the top with a toothpick to allow the glaze to seep in beautifully. Pour the glaze over the top, letting it drip down the sides. I love how vibrant and shiny the glaze looks, making it even more appetizing. Then, let the cake sit for about 10 minutes before slicing it into generous squares. The anticipation is the best part, and let me tell you, the first bite is pure bliss!
Pro Tips for Best Results
I tested this recipe three ways—using different types of oil and sweeteners—to see how it changes the flavor. Surprisingly, I found that standard vegetable oil gives the best texture and moisture balance in the cake. Also, if you’re looking to reduce the sweetness, try using less sugar, as the pineapple already contributes its own natural sweetness. Lastly, if you find that your cake seems a bit dry, it might be due to overmixing. Always mix just until combined!
Another tip I love to share is to shop for the freshest pineapple. If it’s in season and you can find a ripe one, use fresh pineapple instead of canned for a more vibrant taste. The difference is astonishing! When you blend that fresh fruit into your batter, your entire kitchen fills with a delicious aroma that just screams “tropical paradise.”
Don’t forget to let your cake cool completely before adding the glaze. I once got too eager and drizzled the glaze over a warm cake, which resulted in a lovely puddle of glaze at the bottom of my pan rather than a beautifully drizzled top. The cake still tasted amazing, but I prefer the neat presentation that comes with a cooled cake.
Common Mistakes to Avoid
One common mistake I see is not measuring the flour correctly. I’ve learned the hard way that scooping flour directly from the bag can lead to an overly dense cake. Instead, I fluff up the flour first, spoon it into my measuring cup, and level it off to ensure I have just the right amount. This makes a big difference in achieving that perfect texture!
Another blunder is baking the cake for too long. My oven has a mind of its own, and I’ve had a few cakes go from perfectly golden to overly browned in what felt like a blink. Set a timer and start checking a few minutes before the recommended baking time. This helps prevent any potential burnt edges and keeps the cake moist.
Finally, don’t skip the cooling step. It’s so tempting to dive into that delicious cake right out of the oven, but giving it time to cool allows it to set properly. Don’t forget about your cake after it’s out of the oven! It deserves to rest, just like you after a long day. (See the next page below to continue…)
Serving Suggestions
I love serving Hawaiian Pineapple Cake with a dollop of whipped cream on the side. The smooth, creamy texture complements the cake’s texture perfectly while adding a wonderful richness that makes each bite even more indulgent. Fresh fruit, such as sliced strawberries or a handful of blueberries, can also add a lovely touch of color and added flavor.
If you’re feeling extra festive, you can also sprinkle some toasted coconut on top for a delightful tropical theme! This adds a nice crunch and enhances the pineapple’s fruity notes. I often serve this cake at parties or potlucks, and I swear it disappears within minutes!
Another way to elevate the experience is to enjoy a slice with a cup of hot tea or coffee. The warm, comforting beverages pair wonderfully with the sweet flavors of the cake, making it an ideal treat for afternoon gatherings or cozy evenings at home.
Variations & Customizations
One of the best things about Hawaiian Pineapple Cake is how adaptable it is. For a fun twist, I sometimes add a teaspoon of coconut extract to the batter, which adds another layer of tropical flavor. You can also swap in other fruits, like mashed bananas or diced mangoes, if you wish. They blend beautifully and offer a different taste adventure!
I’ve also experimented with gluten-free flour blends in this recipe. If you or someone you know has gluten sensitivities, I recommend using a high-quality gluten-free flour to keep the texture light and fluffy. Just make sure to follow the instructions specific to those blends, as they can differ in liquid absorption.
Finally, if you want to mix things up for special occasions, consider transforming this cake into cupcakes. Simply pour the batter into lined cupcake trays and bake for about 18-20 minutes. The personal touch of cupcakes is always a hit at celebrations, and the glaze looks adorable on top!
How to Store, Freeze & Reheat
Storing this delightful cake is a breeze. Once it’s completely cool, I like to cover it tightly with plastic wrap, which keeps it fresh for up to 4 days at room temperature. However, if you haven’t finished it off by then (which is rare!), I recommend storing it in the fridge to maintain its moisture.
If you want to make this cake ahead of time, you can also freeze it! Just wrap it well in plastic wrap and then aluminum foil to prevent freezer burn. It can be stored for up to 3 months. When you’re ready to enjoy, simply thaw it overnight in the fridge and let it come to room temperature before serving. Trust me, it tastes just as fantastic even after freezing!
To reheat, place slices in the microwave for just about 10-15 seconds, or you can put them in a preheated oven at 350°F (175°C) for a few minutes. This will warm the cake nicely, making it feel like it just came out of the oven again.
Conclusion
I hope you feel inspired to try this Hawaiian Pineapple Cake recipe! It’s a slice of paradise that always brings joy to my family and friends, and I know it will do the same for you. Whether you’re baking for a special occasion or just because, this cake is sure to put a smile on your face. Happy baking!