
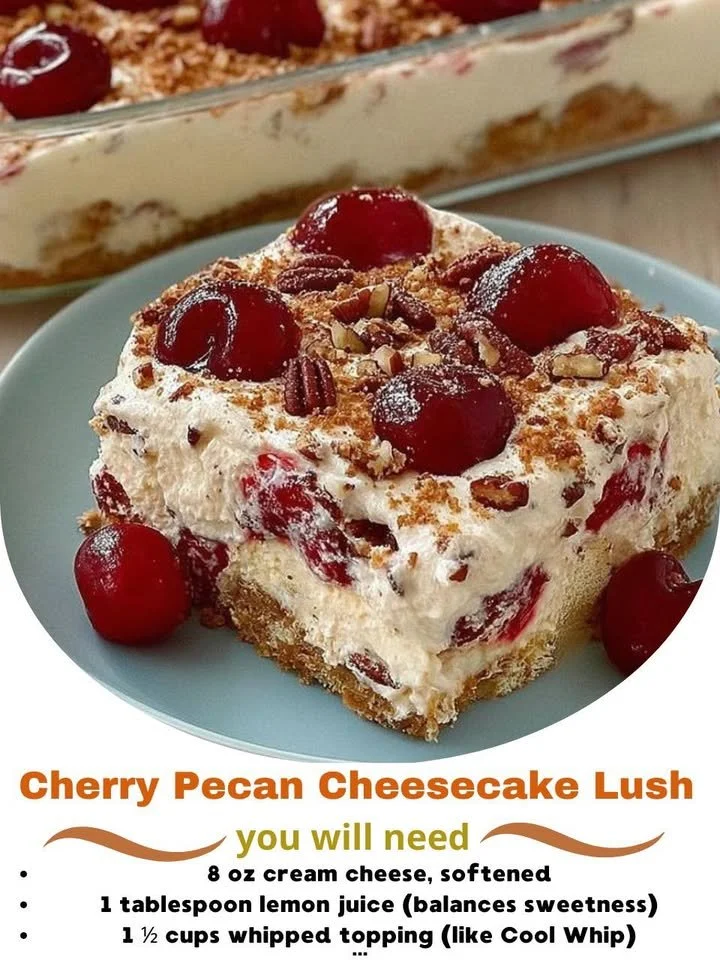
Welcome to my cozy kitchen! Today, I want to share a recipe that has quickly become one of my go-to desserts: Cherry Pecan Cheesecake Lush. Trust me, this luxurious layered treat is not just beautiful—it’s absolutely delicious. With rich cream cheese, crunchy pecans, and a sweet cherry topping, it’s perfect for any occasion or even just a quiet night in with a good book. I’m excited to guide you through each step so you can create this lovely dessert with ease.
Why You’ll Love This Recipe
What makes this Cherry Pecan Cheesecake Lush so special, you ask? It’s the perfect blend of creamy, crunchy, and fruity elements that come together in each delightful bite. The layers of cheesecake filling combined with the cherry topping provide a beautiful visual and textural contrast that you can’t resist. Plus, the pecans add that extra crunch that makes this dessert sing! It’s a hit at parties or just a simple family gathering, and I have no doubt it will become a favorite in your house too. (See the ingredients in the next page below…)
Ingredients
– 1 package (8 ounces) cream cheese, softened
– 1 cup powdered sugar
– 1 teaspoon vanilla extract
– 1 cup heavy whipping cream
– 1 cup crushed graham crackers
– 1/2 cup pecans, chopped
– 1 can (21 ounces) cherry pie filling
– 1/2 cup butter, melted
Equipment Needed
– Mixing bowls
– Electric mixer
– 9×13 inch baking dish
– Spatula
– Measuring cups and spoons
– Rubber scraper
Step-by-Step Instructions
Let’s jump right into the heart of the process! First, I start by mixing the softened cream cheese and powdered sugar in a bowl until it’s nice and creamy. The smell of the cream cheese blending with the sugar in the air already gets me excited! Once it’s smooth, I add the vanilla extract for that extra kick of flavor. In a separate bowl, I whip the heavy cream until it reaches stiff peaks, then gently fold it into the cream cheese mixture. It’s this step that gives the cheesecake layer its light and fluffy texture. (See the next page below to continue steps…)
Next, it’s time to prepare the crust. I melt the butter and mix it with the crushed graham crackers and chopped pecans until everything is well combined. I press this mixture into the bottom of my baking dish, creating a solid base that holds all the luscious layers together. Once that’s done, I spread the cream cheese mixture evenly over the graham cracker base and pop it into the fridge to set for at least an hour. As it chills, my kitchen fills with the delightful sweetness of cream cheese.
After the cheesecake layer has set, it’s time for the grand finale. I spread the cherry pie filling over the top, letting those beautiful red cherries peek through. It’s like a cherry glow-up! I then finish it off with a sprinkle of extra chopped pecans for texture and a touch of elegance. Once it’s all layered up and looking pretty, I let it chill for a couple of hours before serving. This chilling time is essential for all those wonderful flavors to meld together beautifully.
Pro Tips for Best Results
I tested this recipe three ways, adjusting the sugar levels in the cream cheese mixture, and I actually found that the original amount was just right to balance with the sweetness of the cherry topping. If you prefer a less sweet version, you can decrease the sugar a bit, but don’t cut it out completely!
Another tip I’ve learned is to let the cream cheese come to room temperature before mixing. It not only makes it easier to blend but also results in a smoother filling. And trust me, a smooth filling is key to that decadent texture we love in a cheesecake lush!
Lastly, when folding the whipped cream into the cream cheese mixture, go gentle! Mixing too aggressively can deflate the whipped cream, making the texture less airy. A rubber spatula works wonders for this, keeping everything light and fluffy.
Common Mistakes to Avoid
One of the biggest mistakes I made the first time I tried this recipe was not letting the layers set properly. I was too eager to dig in! If you rush the chilling time, you’ll end up with a rather messy dessert. Trust me, patience is a virtue here! (See the next page below to continue…)
Another mistake to avoid is over-beating the whipped cream. I learned this the hard way when my lovely fluffy cream turned into butter! Keep an eye on it, and stop whipping as soon as you hit those stiff peaks.
Also, don’t skip the pecans if you can help it! They add wonderful flavor and crunch, and without them, the dessert feels a bit incomplete. If you have a nut allergy, you can certainly omit them, but I highly recommend seeking out some tasty substitutes.
Always use high-quality cream cheese for the best flavor. I once grabbed a low-fat option in a pinch only to be disappointed by the texture and taste of the final product. It’s worth it to go with full-fat cream cheese for that rich and creamy experience!
Serving Suggestions
When I serve this Cherry Pecan Cheesecake Lush, I love to accompany it with a dollop of freshly whipped cream on top. It adds a welcoming touch and elevates the dessert to a whole new level of indulgence! Sometimes, I sprinkle a few extra chopped pecans for a little extra crunch, just to keep things interesting.
You can also pair it with a scoop of vanilla ice cream. The combination of warm and cold creates a delightful texture contrast when you take that first bite. If you’re feeling adventurous, a drizzle of chocolate sauce can add a nice touch, balancing the sweetness of the cherries.
Lastly, it’s perfect for gatherings. I often like to serve it in individual cups for an elegant touch at parties. This brings about a fun buffet vibe while making it easy for folks to enjoy their share without making a mess.
Variations & Customizations
If cherry isn’t your favorite, don’t worry! You can easily swap out the cherry pie filling for any fruit topping of your choice, like blueberry or strawberry. I’ve even made it with raspberries, and it works wonderfully, giving it a delightful tartness that pairs beautifully with the creamy layers.
Another variation I love is adding a hint of chocolate. Sometimes, I mix in finely chopped dark chocolate or chocolate chips into the cream cheese mixture. It brings a rich depth of flavor that can’t be beaten.
For a fun twist, consider adding a layer of lemon curd between the cheesecake and the cherry topping. It adds a burst of citrus that perfectly complements the sweet cherries, making it a refreshing change.
How to Store, Freeze & Reheat
This dessert stores beautifully in the refrigerator. I recommend keeping it covered with plastic wrap or in an airtight container, where it will last for up to four days—if it lasts that long! You’ll find that the flavors actually get better over time as they meld together.
If you want to prep it ahead of time for a gathering, you can freeze it as well! Just be sure to slice it into portions, then wrap each piece in plastic wrap and store them in a freezer-safe container. When ready to enjoy, thaw it in the refrigerator overnight before serving. It’s a lifesaver for busy days!
Reheating isn’t usually necessary since it’s best served chilled, but if you ever find yourself wanting a warm treat, you could gently warm individual portions in the microwave for just a few seconds—though I’d recommend keeping the cherry topping cool for that delightful contrast.
Conclusion
I hope you’re as excited to try this Cherry Pecan Cheesecake Lush as I was when I first made it! Each bite is a perfect balance of textures and flavors that is sure to impress both friends and family alike. Remember, cooking is all about sharing joy, and I can’t wait for you to share this delicious dessert with your loved ones. Happy baking!