
Another mistake is not letting the puff pastry rest after rolling it out. It’s important to give the dough a few moments to relax; this helps prevent shrinkage while baking. When I learned this, my Ham and Cheese Sticks became even better!
Also, beware of baking them too long. Once they start turning golden, keep an eye on them! I’ve left them in just a few minutes too long before, and they came out more crunchy than flaky. You want the balance just right!
Lastly, remember that each oven is different. If you find that yours runs hot, I suggest checking the sticks a few minutes early. You wouldn’t want to miss that perfectly golden moment!
Serving Suggestions
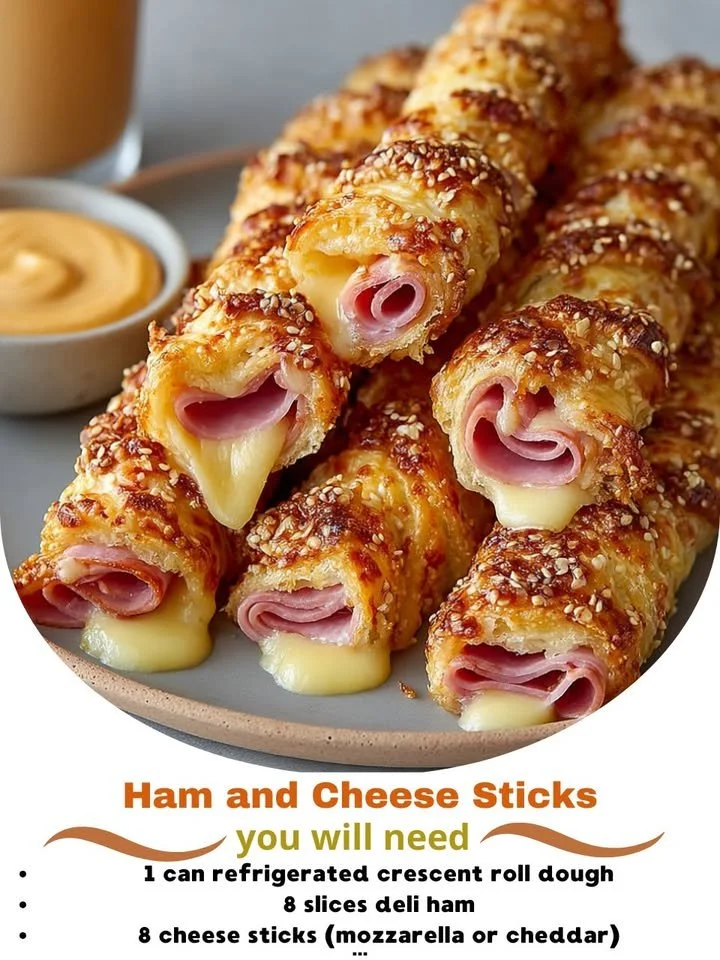
When I serve Ham and Cheese Sticks, I love to pair them with a zesty dipping sauce. A simple mixture of ketchup and Worcestershire sauce makes a fantastic complement, or I often whip up a homemade honey mustard to really enhance those flavors. Kids especially love dipping them!
They are perfect as appetizers at parties, but they also make a fantastic addition to a packed lunch. I often make a batch in the morning and store them for a weekday lunch with a side salad, which adds some freshness alongside the warmth of the sticks.
For a cozy snack, I sometimes enjoy them with a bowl of soup. They are ideal for dipping and make for a comforting meal on chilly days. There’s something so satisfying about breaking apart that warm pastry, don’t you think?
Variations & Customizations
One of the best things about this recipe is how easy it is to customize! If you’re feeling adventurous, you can throw in some sautéed mushrooms or spinach for added flavor and nutrition. I once added a bit of jalapeño to the ham for a spicy kick, and it was a hit with my friends!
You can also experiment with different meats. Instead of ham, turkey or even pepperoni would work wonderfully. I’ve also tried adding a layer of pesto for a Mediterranean twist, and I must say, it was a delightful surprise that everyone loved!
If you’re catering to a vegetarian crowd, swap out the ham for roasted vegetables like zucchini or bell peppers. Layer in some fresh herbs like basil or oregano to enhance the flavor profile further. The possibilities are genuinely endless!
How to Store, Freeze & Reheat
To store any leftovers (if you have them!), I recommend placing them in an airtight container in the refrigerator. They usually stay good for about 3-4 days, though I doubt they’ll last that long in my house!
If you want to make a batch ahead of time, these Ham and Cheese Sticks freeze beautifully. I often prepare them in advance, freeze them on the backing sheet, and then transfer to a freezer bag once frozen. When I’m ready to enjoy them, I bake straight from the freezer – just add a few extra minutes to the baking time for perfect results!
When reheating, I find that the oven works best. Just pop them in at 350°F (175°C) for about 10-15 minutes until warmed through and crispy again. Microwaving can make them a bit soggy, so I always stick to the oven for that fresh-baked taste.
Conclusion
I hope you’ve enjoyed this little journey through my Ham and Cheese Sticks recipe! I can’t wait for you to try making these in your kitchen. They’re a delightful treat that never fails to impress. Whether you’re making them for a special occasion or just treating yourself to a cozy snack at home, I know they’ll bring joy to your table. Happy cooking, friends!