
Next, I add the shrimp to the skillet in a single layer, allowing them to cook undisturbed for about 2-3 minutes. During this time, they’ll turn a beautiful pink color. Once they’re mostly opaque, I sprinkle in the paprika, salt, and pepper before flipping them over to cook on the other side for another 2-3 minutes. This step is crucial; make sure not to overcook the shrimp, as they can become rubbery.
Once the shrimp are cooked to perfection, I squeeze the fresh lemon juice over them and give everything a good toss to combine those wonderful flavors. At this point, I like to taste a shrimp to ensure it has the right balance of garlic and lemon. Feel free to adjust the seasoning if needed! Finally, I remove the skillet from heat, scoop the shrimp onto a serving platter, sprinkle generously with fresh parsley, and get ready to dig in.
Pro Tips for Best Results
Over the years, I’ve tried this recipe a few different ways, and I’ve found that using fresh shrimp instead of frozen makes a world of difference in flavor and texture. If you can buy shrimp that’s wild-caught, even better! Another tip I’ve discovered is to always, and I mean always, measure the ingredients ahead of time. The garlic and butter combo is the star here, and having them ready to go makes the cooking process smooth and seamless.
When it comes to butter, I prefer to use unsalted to really control the saltiness of the dish. Too much salt can easily overpower the delicate shrimp flavors, so this has been a game-changer for me. Lastly, don’t skip the fresh lemon juice! It elevates the dish and adds that bright, zesty touch that completes the meal.
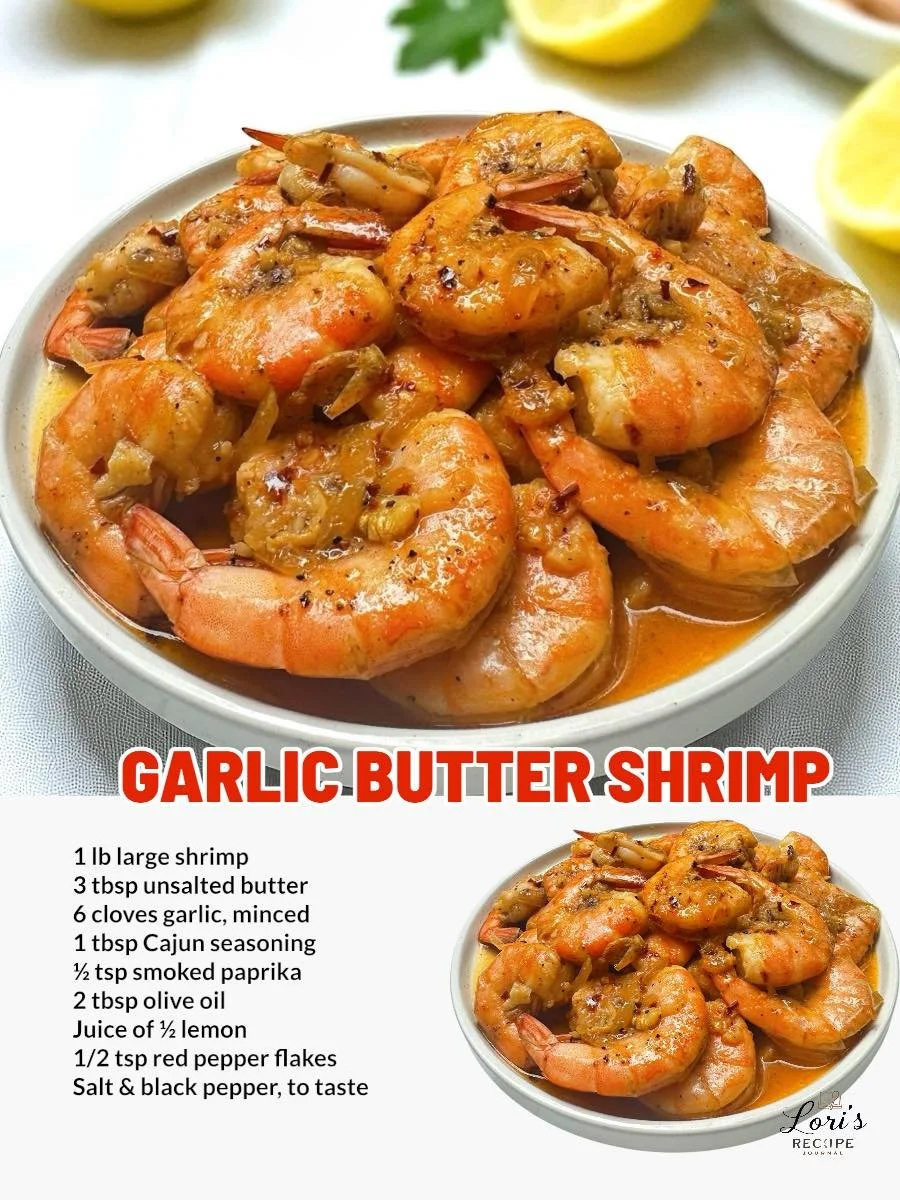
Lastly, if you love a bit of heat, try adding a pinch of red pepper flakes when cooking the garlic! I’ve found that this little tweak adds an extra layer of flavor that really makes the dish pop without overwhelming the palate.
Common Mistakes to Avoid
One mistake I made when I first started cooking shrimp was not patting them dry before cooking. This might seem small, but excess moisture can prevent that lovely sear we all want. Instead, I learned to lightly pat the shrimp with a paper towel before they hit the skillet to ensure a beautiful caramelization.
Another thing to keep an eye on is the temperature of the skillet. If it’s too hot, the garlic can burn quickly, turning that lovely aroma into a bitter scent. Trust me, I’ve been there! Keeping it on medium heat is key to maintaining that fragrant garlic flavor without burning it.
Also, you’ll want to keep an eye on the cooking time for the shrimp. If you allow them to cook too long, they’ll turn rubbery and lose that tender juiciness we love. It’s essential to watch for that shift from translucent to opaque—this will only take about 5-6 minutes in total!
Serving Suggestions
When it’s time to serve my Garlic Butter Shrimp, I love pairing it with a side of garlic bread. There’s something so delightful about mopping up that rich sauce with a warm piece of bread. It’s a simple yet divine way to enjoy every last bite!
For an additional side, a fresh green salad dressed with lemon vinaigrette complements the dish beautifully. The crisp greens add a refreshing balance to the rich, buttery shrimp, creating a well-rounded meal. Plus, it’s easy to throw together!
Sometimes, I even serve this dish over a bed of fluffy white rice or creamy pasta, which is perfect for soaking up all that garlic butter goodness. Whether you choose bread, salad, or a carb, you really can’t go wrong!
Variations & Customizations
If you’re feeling adventurous, you can easily customize this Garlic Butter Shrimp recipe by adding vegetables. I’ve experimented with bell peppers, asparagus, and cherry tomatoes, which not only add a pop of color but also make the dish heartier. Sauté them in the skillet along with the garlic to allow those flavors to meld together beautifully.
Another variation I love is using different herbs! While parsley is classic, I’ve also tossed in some fresh basil or cilantro, depending on what I have on hand. Each herb lends a distinct flavor profile that can change the dish entirely, making it unique every time I prepare it.
For a twist on flavor, consider adding a splash of white wine or even a bit of coconut milk at the end! This elevates the sauce to a whole new level, creating a creamy finish that is simply divine. I like to experiment and see which combination excites my taste buds!
How to Store, Freeze & Reheat
If you happen to have leftovers (which can be a rarity because it’s so delicious!), store them in an airtight container in the refrigerator for up to two days. The flavors actually deepen after sitting overnight, making a second-day meal something to look forward to!
For longer storage, you can freeze the shrimp. Just let the dish cool completely, then place it in a freezer-safe container. I recommend consuming it within a month for the best taste and texture. To defrost, simply transfer it to the fridge overnight, and it should be good to go by dinner!
When reheating, I like to do it gently on the stove over low heat to prevent the shrimp from becoming rubbery. A splash of broth or a little more butter can help bring back that original deliciousness. Always keep an eye on it, though. No one likes overcooked shrimp!
Conclusion
I hope you enjoy making Garlic Butter Shrimp as much as I do! This recipe has a special place in my heart and my kitchen, and I believe it will become a favorite of yours too. From its mouthwatering aroma to its simple preparation, it’s a dish that’s perfect for any occasion. Happy cooking, and enjoy every flavorful bite!