
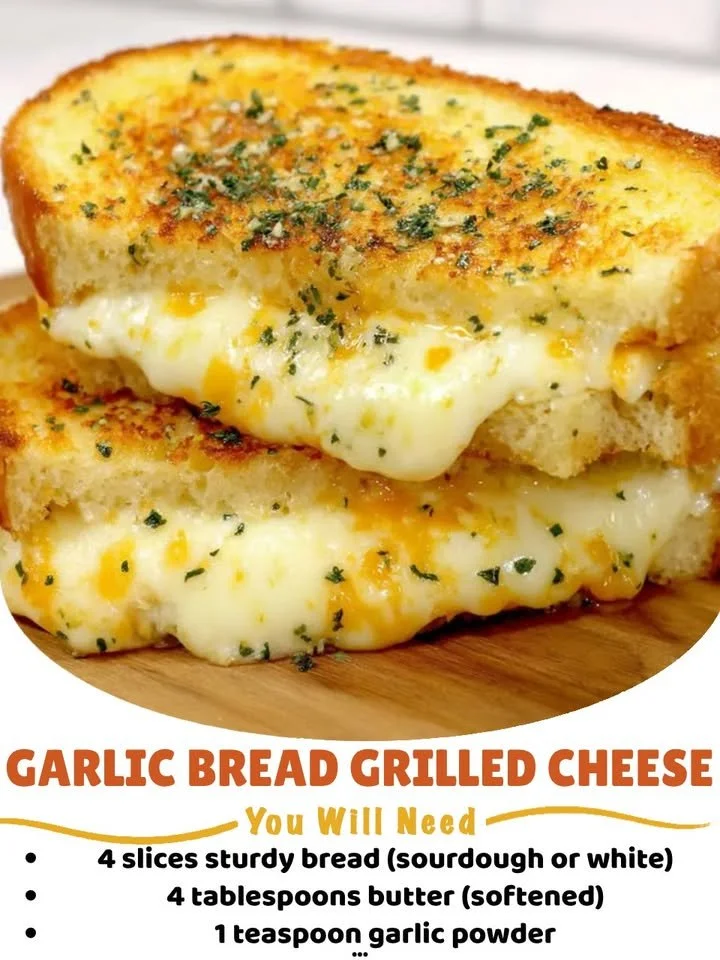
There’s something incredibly comforting about a melty grilled cheese sandwich, and as someone who loves to experiment in my kitchen, I couldn’t resist giving it a twist. Enter garlic bread grilled cheese: a recipe that takes your classic grilled cheese to a new level of deliciousness! Combining the rich flavors of toasted garlic bread with gooey cheese creates an indulgent treat that pairs perfectly with a bowl of tomato soup or can be enjoyed all on its own. Let’s dive into the details of how to make this scrumptious creation!
Why You’ll Love This Recipe
This garlic bread grilled cheese recipe is not just about flavor; it’s about experience. Each bite offers a delightful crunch from the buttery, garlicky bread, while the melted cheese oozes out, warming your heart and soul. It’s quick to make, perfect for a weeknight dinner or a weekend snack, and will impress anyone you share it with. Trust me, it’s a way to elevate a childhood favorite into something truly gourmet! (See the ingredients in the next page below…)
Ingredients
– 4 slices of thick bread (I love sourdough or ciabatta!)
– 2 tablespoons unsalted butter, softened
– 2 cloves garlic, minced
– 1 teaspoon dried parsley (or fresh, if you have it)
– Salt and pepper to taste
– 1 cup shredded cheese (cheddar, mozzarella, or your favorite blend)
Equipment Needed
– Large skillet or frying pan
– Mixing bowl
– Silicone spatula or butter knife
– Measuring spoons
Step-by-Step Instructions
First, start by preparing the buttery garlic goodness that will coat your bread. In a mixing bowl, combine the softened butter, minced garlic, dried parsley, and a sprinkle of salt and pepper. Blend everything together until it’s well mixed and fragrant—trust me, the moment you stir in that garlic, the aroma will be heavenly! Next, spread this mixture generously on one side of each slice of bread. (See the next page below to continue steps…)
Now it’s time to assemble your masterpiece. Place one slice of bread, butter-side down, onto a preheated skillet set over medium heat. Add a hearty handful of shredded cheese on top, then cover it with another slice of bread, butter-side up. Cook for about 3-4 minutes or until the bottom is golden brown and crispy. I recommend gently pressing down on the sandwich with a spatula to help melt the cheese! Carefully flip it and cook the other side until it’s a glorious golden brown and the cheese has fully melted.
Once both sides are beautifully toasted and the cheese is oozing out, transfer the sandwich to a cutting board. Let it sit for a minute or so before cutting it in half. This step is crucial; if you cut it immediately, all that gooey cheese might escape! I love to serve it with a warm bowl of tomato soup, but honestly, it’s great on its own too.
Pro Tips for Best Results
When I was testing this recipe, I tried a few types of cheese and found that a blend of mozzarella and sharp cheddar worked wonders. The mozzarella gives that delightful meltiness, while the cheddar adds a punch of flavor. I also discovered that letting the butter sit out at room temperature for a bit makes it easier to spread. Nobody wants torn bread due to a cold stick of butter!
Another thing to keep in mind is to avoid cooking on too high of heat. I initially cranked up the burner to speed things along, but all I got was burnt bread with unmelted cheese! Keep it at medium heat, and your patience will be rewarded with the perfect crust.
Lastly, I like to add a little sprinkle of garlic powder to the inside of the sandwich for an extra layer of flavor—consider it my secret touch!
Common Mistakes to Avoid
One common mistake I made early on was using the wrong bread type. While you might think any bread will do, I learned that thick, sturdy slices hold up much better when grilling and keep all that delicious cheese contained. A flimsy bread will leave you with a sad, messy sandwich, and that’s the last thing you want after all the effort!
Another pitfall to watch out for is not allowing the butter to soften enough before you start mixing it with the garlic. Cold butter can lead to uneven melting and spreading, which makes for a very subpar grilled cheese experience. Ensure your butter is soft enough to easily blend and spread on the bread!
Also, resist the urge to flip your sandwich too early. Patience is key! Flipping too soon can result in a gluey mess inside while the outside remains undercooked. Give it time to get that nice golden crust, and you’ll be absolutely glad you did! (See the next page below to continue…)
Serving Suggestions
This garlic bread grilled cheese is a crowd-pleaser and pairs beautifully with a simple side salad or a warm bowl of tomato soup. The tangy tomato soup complements the richness of the cheese and the garlic flavors perfectly. Sometimes, I even add a fresh basil garnish to the soup, taking it up another notch!
If I’m feeling a little fancy, I’ll serve it alongside homemade marinara sauce for dipping. There’s something so comforting about the combination, and it turns the sandwich into a full meal that feels a bit gourmet.
On the flip side, if it’s a casual evening, I’ll just grab a plate and enjoy the sandwich right there in the kitchen. Going solo is nice sometimes, too, just me and my delicious creation!
Variations & Customizations
One of the best aspects of garlic bread grilled cheese is how easily it can be customized. If you’re in the mood for something different, try adding cooked bacon or even sliced tomatoes inside the sandwich for a pop of freshness. I once added some wilted spinach, and it not only looked beautiful but also upped the nutritional factor while making it even more filling!
For a touch of heat, consider adding red pepper flakes to the butter mixture or using pepper jack cheese instead of the standard melty ones. I love a bit of spice, and these additions elevate the traditional flavors beautifully.
If you’re looking for a vegetarian twist, how about trying some roasted vegetables? Grilled zucchini or bell peppers can add amazing flavor and texture. Just be sure to dice them small so they fit well within the sandwich.
How to Store, Freeze & Reheat
If you happen to have leftovers—though I doubt you will!—storing them in an airtight container in the fridge works best. I recommend eating the leftovers within two days for optimal taste and quality. When reheating, I like to use a skillet over low heat instead of a microwave to maintain that crispy crust.
If you want to make a batch ahead of time for a busy weekend, you can freeze the fully cooked sandwiches. Wrap them tightly in plastic wrap and then foil to prevent freezer burn. When you’re ready to enjoy, simply thaw in the fridge overnight and reheat in a skillet.
What I love to do sometimes is prepare the garlic butter in advance and store it in a jar in the fridge. It saves time on busy days and makes it so easy to whip up grilled cheese on a whim!
Conclusion
There you have it! My take on garlic bread grilled cheese has become a favorite indulgence in my kitchen, and I truly hope you give it a try. It’s simple to make and packed with flavor, perfect for any occasion. Whether you’re sharing it with family or enjoying it solo, this sandwich brings a little bit of joy to the table. Happy cooking!