
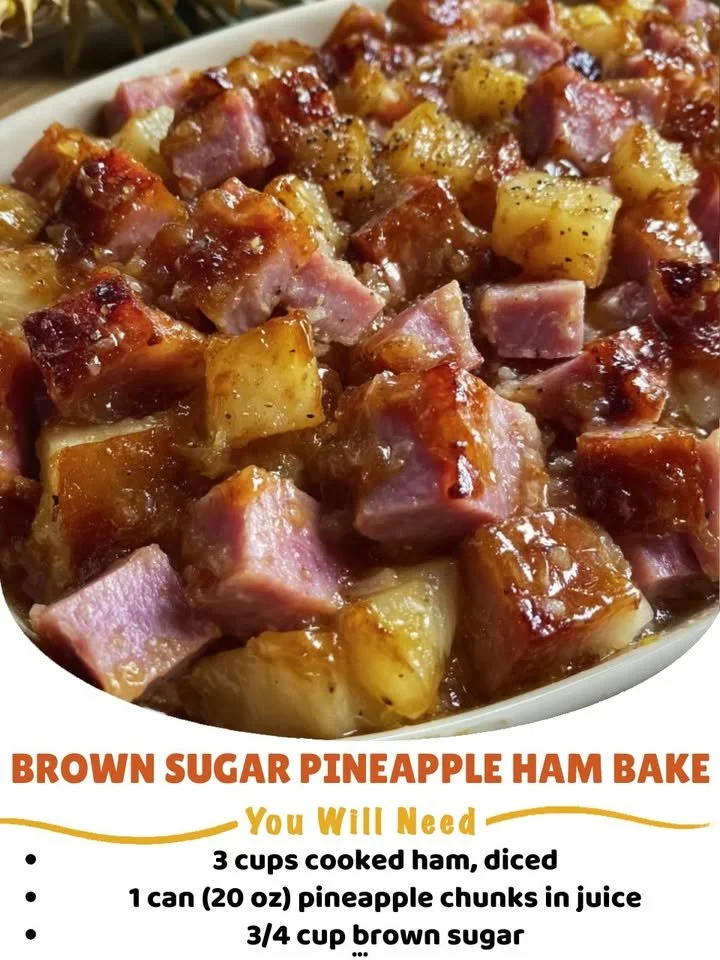
I’ve always had a soft spot for ham, especially when it’s glazed to perfection with a delightful sweetness. One recipe that has become a cherished favorite in my kitchen is the Easy Brown Sugar Pineapple Ham Bake. This dish not only fills your home with a cozy aroma, but it also brings the whole family together around the dinner table. It’s simple, delicious, and has quickly become a staple at our holiday gatherings and Sunday dinners alike.
Why You’ll Love This Recipe
What makes this dish truly special is the beautiful blend of savory and sweet flavors that come together so effortlessly. The brown sugar caramelizes to create a crispy, golden exterior, while the pineapple adds a juicy burst of flavor that complements the ham perfectly. Plus, it’s an easy one-pan recipe that saves on cleanup, meaning more time spent enjoying my family’s company. I promise this will be a hit at your next gathering! (See the ingredients in the next page below…)
Ingredients
– 1 fully cooked ham (about 6-8 lbs)
– 1 cup brown sugar
– 1 can (20 oz) crushed pineapple, drained (reserve juice)
– 1 tbsp Dijon mustard
– 1/2 tsp ground cinnamon
– 1/2 cup honey (optional)
– Whole cloves (optional, for garnish)
Equipment Needed
– Roasting pan or large baking dish
– Mixing bowl
– Measuring cups and spoons
– Brush for glazes
– Aluminum foil
Step-by-Step Instructions
First things first, preheat your oven to 325°F (163°C) while you prepare your ham. In a mixing bowl, combine the brown sugar, crushed pineapple, Dijon mustard, ground cinnamon, and a bit of the reserved pineapple juice. This mixture is going to be the star glaze for your ham, and I promise the aromas wafting from it are wonderful! Next, gently score the surface of the ham in a diamond pattern, if desired, which helps the glaze soak in beautifully. Arrange the ham in your roasting pan and pour the pineapple glaze over the top, ensuring the facets of the ham are thoroughly coated. (See the next page below to continue steps…)
Once covered, cover your roasting pan tightly with aluminum foil to keep the moisture in, and bake it for about 1.5 to 2 hours. The general rule is to heat for about 15 minutes per pound. Halfway through the cooking time, I like to take a moment to check on my ham, baste it with the glaze, and re-cover. This helps to deepen the flavors while keeping the meat juicy and tender. When your ham reaches an internal temperature of 140°F (60°C), take the foil off for the last 30 minutes to let that glorious glaze caramelize and form a beautiful crust.
When it’s got that perfect golden finish, remove it from the oven and let it rest for about 10-15 minutes before slicing. The moment you cut into it, you’ll see how juicy and tender the meat is; that’s when you know you’ve got a winner on your hands. Serve it up on a big platter with some of those luscious glaze drizzled over the top.
Pro Tips for Best Results
I tested this recipe three ways to make sure the flavors really popped. For an extra depth of flavor, I sometimes add a splash of orange juice to the glaze, which complements the pineapple wonderfully and adds a hint of tang. If you’re feeling adventurous, give that a try!
One of my favorite tips is to let your ham sit at room temperature for about 30 minutes before baking. This helps it cook more evenly and keeps the edges from drying out. The way the flavors meld together when you give it time to rest is truly delightful!
Also, if you’re looking for a crunchy topping, consider finishing it off with a sprinkle of toasted pecans or walnuts right before serving. It adds an unexpected texture that everyone loves!
Common Mistakes to Avoid
One of the common pitfalls I’ve encountered is not using enough glaze. If you’re like me and love that sweet topping, make sure you thoroughly cover the ham with the glaze before cooking. I once skimped on this step, and the flavor didn’t quite shine through as it should have; I learned my lesson here!
Another mistake I made early on was not monitoring the temperature closely. Letting the ham bake for too long made it slightly dry, something I truly want to avoid. My advice is to invest in a good meat thermometer so you can catch that sweet spot at 140°F (60°C) without any guesswork.
Finally, don’t forget to allow your ham to rest before carving. This gives the juices time to redistribute, resulting in a way juicier and more flavorful serving. I learned this the hard way, and now I ensure it’s a non-negotiable step in my kitchen!
(See the next page below to continue…)
Serving Suggestions
When it comes to serving this ham, the options are endless! I love pairing it with classic sides like garlic mashed potatoes or roasted Brussels sprouts. The savory sides enhance the sweet ham without overshadowing it.
Don’t overlook the power of a fresh salad, either! A crisp green salad with a tangy vinaigrette offers a refreshing contrast to the richness of the ham. I’ve also served mine with a simple coleslaw, which adds a nice crunch and balances out the flavors beautifully.
And let’s not forget about leftovers! This ham makes for fantastic sandwiches the next day, piled high with fresh veggies and perhaps a smear of mustard. There’s nothing quite like a ham sandwich with a lingering hint of that sweet glaze from the night before!
Variations & Customizations
Feel free to get creative with the glaze! One variation I adore is adding a splash of bourbon to the glaze for an adult twist. The deep flavor complements the sweetness beautifully, giving the dish a cozy warmth, perfect for a winter gathering.
For those who prefer a spicier kick, you might add a dash of cayenne pepper or even some chopped jalapenos to the glaze. It introduces a whole new layer of flavor that will pique everyone’s curiosity and leave them wanting more.
If you’re watching your sugar intake, try substituting the brown sugar with a sugar alternative like coconut sugar or maple syrup. They work wonderfully while still delivering that sought-after sweetness. It’s a small change that doesn’t compromise taste!
How to Store, Freeze & Reheat
Once you’ve enjoyed your delicious ham, it’s essential to store any leftovers properly. I recommend wrapping the sliced ham tightly in plastic wrap or aluminum foil and storing it in an airtight container in the fridge. It should last for 3-5 days, but trust me, it rarely makes it that long in my house!
If you want to prepare ahead or make a big batch, you can freeze the leftovers. Just make sure to wrap the ham tightly to protect it from freezer burn. It can last for up to 2-3 months in the freezer. When you’re ready to enjoy it again, simply thaw it in the refrigerator overnight before reheating.
To reheat, I suggest placing the slices in a baking dish covered with aluminum foil and letting them warm up in a 325°F (163°C) oven for about 20-30 minutes, depending on the thickness. Drizzling a bit of reserved pineapple juice over the top keeps it moist and delicious!
Conclusion
I hope you give this Easy Brown Sugar Pineapple Ham Bake a try in your own kitchen. It truly is effortless, full of flavor, and perfect for any gathering, large or small. Plus, the delightful smells that fill your home while it bakes are just the cherry on top! Here’s to delicious meals and fond memories made around the table! Happy cooking!