
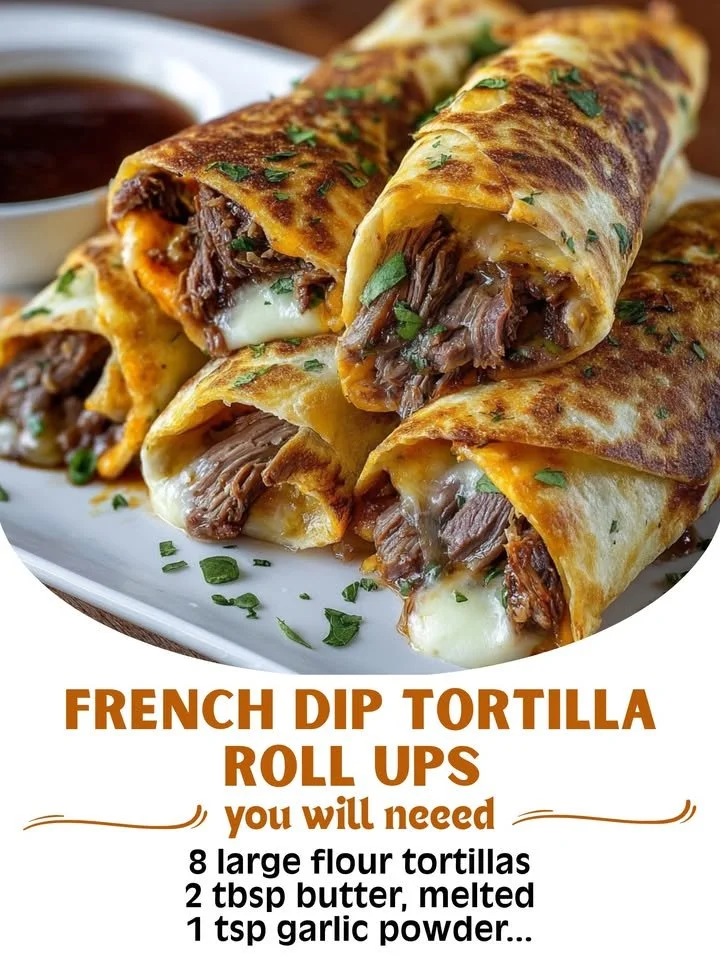
I first stumbled upon the recipe for French Dip Tortilla Roll-Ups during a casual scroll through social media last year. My kitchen filled with the delicious aroma of slow-cooked beef, savory broth, and melted cheese as I set aside my usual dinner plans. I couldn’t help but drool in anticipation. The best part? This delightful dish is incredibly easy to prepare and perfect for sharing. As I rolled up the tortillas, I felt a wave of satisfaction, knowing I had a guaranteed hit on my hands for dinner and beyond.
Why You’ll Love This Recipe
You are going to love these French Dip Tortilla Roll-Ups! They capture all the rich flavors of a classic French dip sandwich but in a fun, bite-sized format. The combination of tender, flavorful beef with gooey cheese wrapped in a soft tortilla is simply irresistible. Plus, they’re perfect for game nights or casual get-togethers, allowing you to enjoy delicious food without spending hours in the kitchen. Trust me, you’ll want this recipe handy!
Ingredients
- 1 lb thinly sliced roast beef
- 1 cup provolone cheese, shredded
- 1 cup cheddar cheese, shredded (See the next page below to continue…)
- 1 cup beef broth
- 1 tablespoon Worcestershire sauce
- 1 teaspoon garlic powder
- 1 teaspoon onion powder
- 4 large flour tortillas
- Fresh parsley for garnish (optional)
Equipment Needed
- Large skillet
- Mixing bowl
- Measuring cups and spoons
- Plastic wrap or foil
- Sharp knife
- Wooden spoon
Step-by-Step Instructions
When I start making these roll-ups, I often heat a large skillet over medium heat to get it warm before adding the ingredients. I gently toss in the thinly sliced roast beef, watching it sizzle and soak up the flavors of the Worcestershire sauce and spices. It’s truly one of my favorite moments, smelling that beef caramelize and soak up the broth. After about 5 minutes, I add the beef broth, allowing everything to simmer and meld together. The sound of bubbling broth is music to my ears, and the flavors deepen beautifully.
Next, I prepare my tortillas on a clean surface. I like to lay out each tortilla and sprinkle a generous layer of provolone and cheddar cheese onto each one. When everything is ready, I carefully spoon some of the beef mixture onto the cheese-covered tortillas. It helps to do this an even amount, so I’ve learned to keep my eye on dividing it just right. Once I’ve added the beef, I roll the tortillas up tightly, ensuring they’re filled and neatly wrapped. Sometimes, I even use plastic wrap to keep them secure during cooking.
With the roll-ups now formed, I return to my skillet, where the remaining juices continue to simmer away. I place the roll-ups seam side down in the skillet, letting each side get golden brown and crispy for about 2-3 minutes. Here’s a tip: Don’t be tempted to flip them too soon, or you’ll risk losing that crispy texture. After a few minutes on each side, I know they’re ready when I see them turn a beautiful golden color. There’s nothing quite like that crispiness—it’s heavenly! (See the next page below to continue…)
Finally, I let the roll-ups rest for a moment on a cutting board. While they’re cooling a bit, I heat the remaining beef broth as a dipping sauce. The warm aroma fills the kitchen again, reminding me that the show isn’t over yet. Slicing them into bite-sized pieces is always a delight, as I can already envision friends grabbing them fast off the plate!
Pro Tips for Best Results
The first time I made these roll-ups, I learned to use fresh, quality roast beef. I tested it with deli-style meat and found that while it worked, it just didn’t have the same depth of flavor. Trust me, don’t cheap out on this ingredient; use the best you can get your hands on!
Also, make sure to get a good amount of cheese in there. Don’t be shy with it! I tried them once with a light hand on the cheese, thinking it might save my waistline. Well, let’s just say the cheese lovers out there won’t appreciate that choice! Cheese is the glue that holds these roll-ups together both literally and flavor-wise.
Lastly, let the roll-ups rest for a few minutes after cooking. I’ve rushed this step before, thinking I could skip it, especially if I was excited to dive in. But those few minutes really allow the filling to settle, resulting in a better bite and flavor.
Common Mistakes to Avoid
I made a classic mistake my first time around: I cooked the beef too quickly and skipped the simmering step. This led to dry meat that lacked flavor and moisture, which is not what you want when you envision that savory, juicy experience. Don’t do what I did—simmer well, and your beef will be tender! (See the next page below to continue…)
Another issue I encountered was rolling the tortillas too loosely. It resulted in excess filling falling out when I was cooking them. After that, I made it a point to roll them nice and tight without overstuffing. A good rule of thumb is to fill them just enough but not so much that they won’t seal properly.
I’ve also seen people opt for small tortillas to make mini roll-ups. While they may look cute, they can be tricky to fill without making a mess. Stick with the large flour tortillas for easier handling; you’ll thank me later!
Serving Suggestions
I like serving these French Dip Tortilla Roll-Ups with a side of crispy fries or a fresh salad for a delightful balance. The crunch of the fries pairs perfectly with the soft interior of the roll-ups, creating an enjoyable texture contrast. If I have some dipping sauce left, I usually drizzle it over the fries for extra flavor; it’s unbeatable!
Another great serving option is to pair these roll-ups with a selection of charcuterie items. I often lay out an assortment of pickles, olives, and mustard alongside the roll-ups on a platter. This way, my guests can snack at their leisure while indulging in all those rich, savory flavors.
You could even transform it into a mini buffet during gatherings! Get some fresh herbs and toppings on the side, letting everyone personalize their roll-ups with a hint of freshness.
Variations & Customizations
Since I first tried these roll-ups, I’ve played with variations. One of my favorites is adding caramelized onions to the beef mixture. I’ll often sauté some onions until they’re sweet and brown, then fold them right in. The sweetness complements the savory beef perfectly.
I’ve also seen friends swap out the cheese for pepper jack for a spicy twist. If you enjoy a kick, this is definitely a route worth exploring! Just be cautious in how much you use, as too much spice can easily overshadow the dish.
Then there are the vegetarian options. I’ve tested using sautéed mushrooms and spinach instead of beef for a lighter version. Don’t skip on the seasonings here; they really elevate the dish and keep it flavorful. You may be surprised at how satisfying the vegetarian variation can be!
How to Store, Freeze & Reheat
These roll-ups can easily be stored in an airtight container in the fridge for up to three days. I always recommend reheating them in the oven for the best results. Microwaving can leave them a bit soggy, and nobody wants that! Simply preheat your oven to 350°F, wrap them in foil, and heat until they’re warmed through.
For freezing, I prefer to wrap each roll-up tightly in plastic wrap and then place them in a freezer bag. They can last up to three months. When it’s time to enjoy them again, let them thaw in the fridge overnight before reheating them in the oven. Trust me, they’ll taste just as good as those you just made!
Conclusion
Making French Dip Tortilla Roll-Ups is a culinary adventure I truly enjoy revisiting time and again. The comfort of the flavors, the versatility of the dish, and the joy it brings during gatherings fill my heart with warmth. I hope you find as much happiness in making and sharing these delightful roll-ups as I do. Happy cooking!