
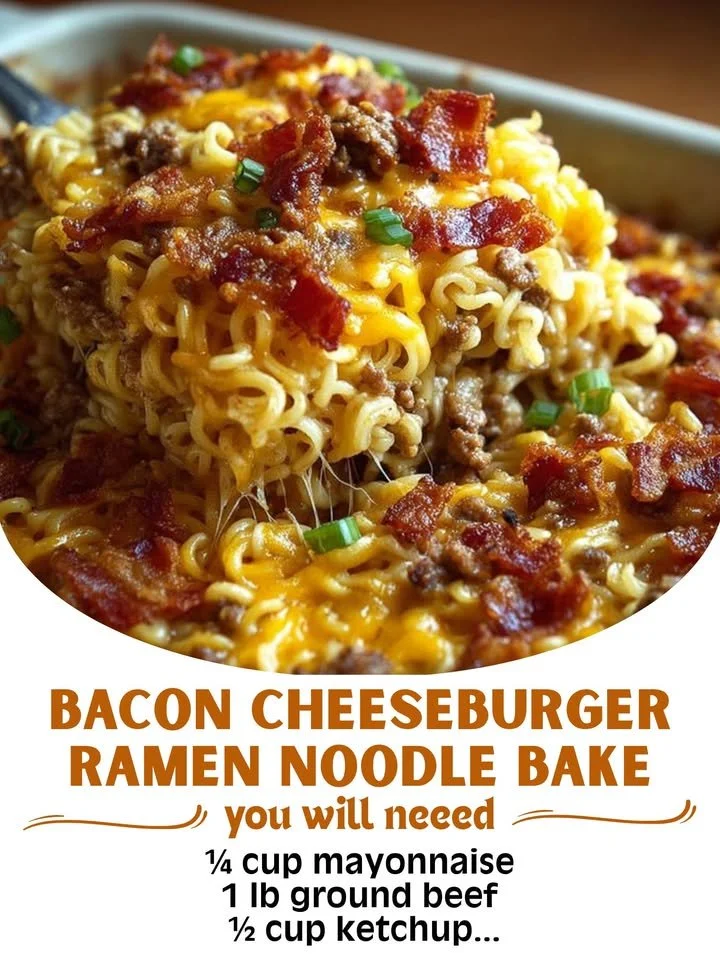
The first time I made Bacon Cheeseburger Ramen Noodle Bake, it felt like a culinary revelation. My kitchen was filled with the mouthwatering aroma of sizzling bacon mingling with the rich scent of melting cheese. As I mixed all the ingredients, the excitement bubbled inside me, knowing that I was about to create comfort-food magic. There’s something genuinely delightful about turning two of my favorite food worlds—bacon cheeseburgers and ramen noodles—into a hearty, baked dish. I’ve made this recipe numerous times since then, and each time it brings a cozy, warm feeling to my home.
Why You’ll Love This Recipe
I truly believe you’ll love this recipe because it hits all the right notes for a comforting meal. Imagine a dish that combines the delightful crunch of crispy bacon, the gooeyness of melted cheese, and the heartiness of ramen noodles. It’s easy to make, perfect for gatherings or a quick weeknight dinner, and it’s undeniably delicious. The best part? It’s totally customizable. You can add your favorite toppings or spices, making this dish your own. I can already hear your taste buds cheering in excitement!
Ingredients
- 3 packs of ramen noodles (discard seasoning packets)
- 6 slices of bacon, chopped
- 1 lb ground beef (See the next page below to continue…)
- 1 cup shredded cheddar cheese
- 1 cup shredded mozzarella cheese
- 1/2 cup sour cream
- 1/4 cup ketchup
- 2 tablespoons mustard
- 1 tablespoon Worcestershire sauce
- 1 teaspoon garlic powder
- 1 teaspoon onion powder
- Salt and pepper, to taste
- 2 green onions, chopped (for garnish, optional)
Equipment Needed
- Large pot for boiling noodles
- Skillet for cooking bacon and beef
- Mixing bowl
- 9×13 inch baking dish
- Baking cover or aluminum foil
- Spatula or spoon for mixing
Step-by-Step Instructions
To start, I boil the ramen noodles in a large pot according to the package instructions but keep an eye on them—overcooking can turn them mushy! I usually set a timer for about 3-4 minutes because they’ll cook further in the oven. While the noodles are boiling, I chop the bacon into small pieces and wait for that savory scent to fill my kitchen as it sizzles away in the skillet. Once crispy, I remove the bacon and set it on a paper towel-lined plate to drain while I cook the ground beef in the same pan, allowing those tasty bacon bits to flavor the meat.
Once the beef is no longer pink, I blend it with the crispy bacon in a mixing bowl. This step is where the flavors of the bacon and beef come together perfection! I add in my drained ramen noodles and fold everything gently to prevent breaking too many noodles. Now, it’s time to add the real stars of the show—those creamy ingredients. I mix the sour cream, ketchup, mustard, Worcestershire sauce, garlic powder, and onion powder in, ensuring that each noodle gets coated with that creamy goodness. (See the next page below to continue…)
After mixing, I transfer everything into my greased 9×13 inch baking dish and layer it under a generous helping of cheddar and mozzarella cheese. I cover the dish with foil to keep it moist in the oven, then pop it into a preheated oven at 350°F. I usually bake it for about 20 minutes, removing the foil for the last 10 to achieve that golden cheese crust on top. When I pull it out, it’s like a cheesy beacon of comfort food, and I can hardly wait to dig in!
Pro Tips for Best Results
I tested this recipe three different ways and found that using a mix of both cheddar and mozzarella cheeses really provides the best flavor and texture. Cheddar brings sharpness, while mozzarella contributes that lovely stretchy quality. Trust me when I say don’t skip the combination; it makes a huge difference in the end result! Another tip is to reserve some bacon bits to sprinkle on top just before serving for an extra crunch and a punch of flavor straight off the bat.
Here’s something else I’ve learned the hard way: don’t over-mix your noodles. While it can be tempting to stir everything vigorously to ensure even distribution, I’ve found that this leads to mushy noodles. Instead, use a gentle folding motion so each noodle stays intact and maintains its delicious chewiness. This is essential for the bake to be truly heavenly, so take your time with that step!
Finally, be cautious with the amount of seasoning. Adding salt and pepper to taste is important, but since the bacon and the Worcestershire sauce are inherently flavorful, I always recommend tasting before you add any extra salt. It’s much easier to add more than to try to reverse over-seasoning. I’ve made this mistake before, and it’s no fun to fix a salty dish!
Common Mistakes to Avoid
I made this mistake the first time I tried this recipe—overcooking the ramen noodles. When I wasn’t watching closely, I ended up with a mushy mess in my baking dish. So, remember to keep an eye on those noodles while they’re boiling! Stick to around 3-4 minutes for that perfect texture. Also, if you follow the method of cooking the noodles in advance, be sure to rinse them under cold water after draining to stop the cooking process. (See the next page below to continue…)
Another thing to steer clear of is using flavored or bouillon ramen packets. They can clash with the other flavors in your bake. My best advice is to stick with classic, plain ramen noodles for this dish—you want those noodles to take on the delicious flavors of the bacon and beef without any competition!
Lastly, don’t rush the baking time. I’ve experienced the disappointment of pulling my bake out too early only to realize that the cheese hadn’t melted properly. Always make sure the cheese is bubbly and slightly golden before serving. It may take an extra few minutes, but trust me, it’s worth the wait.
Serving Suggestions
I like serving my Bacon Cheeseburger Ramen Noodle Bake with a crisp side salad. The freshness of the greens and a tangy vinaigrette provide a nice contrast to the heavier bake. Sometimes I even add sliced cucumbers or cherry tomatoes to the salad for an extra crunch. It balances the meal perfectly!
Another great side is a classic coleslaw. The creamy, tangy elements of coleslaw complement the hearty ramen bake so well. I usually enjoy a few scoops on the side, and it adds a refreshing bite that cuts through the richness of the dish.
For those who like a little extra indulgence, I enjoy serving it with pickles and extra ketchup on the side. It brings that classic cheeseburger vibe to the table, making each bite even more delicious!
Variations & Customizations
I’ve experimented with this recipe and found that adding chopped jalapeños gives it a fun kick! The heat balances nicely with the creamy cheese and savory bacon. If you’re like me and enjoy a little spice, this version will surely be a hit.
Another idea I love is to incorporate veggies. Diced bell peppers or sautéed mushrooms mixed in gives you an added crunch and flavor depth. If you choose to go this route, just be sure to cook the vegetables before adding them in to ensure they soften well.
For a lighter version, I’ve substituted ground turkey for the beef and used Greek yogurt in place of sour cream. It turned out delicious and still very comforting! In my opinion, you can’t go wrong with any customizations you make!
How to Store, Freeze & Reheat
When it comes to storing leftovers, I recommend keeping them in an airtight container in the fridge. It should last about 3-4 days—though I doubt it will last that long because it’s that good! If you want to save it longer, this dish freezes surprisingly well. Just make sure to tightly cover it with foil or transfer it to a freezer-friendly container. It can store well for up to two months in the freezer.
When you’re ready to enjoy it again, I usually thaw overnight in the fridge before reheating. I pop it back in the oven at 350°F for about 20-25 minutes until it’s piping hot. You could also microwave individual portions, but I find the oven helps retain that lovely texture of both the noodles and the cheese better.
Conclusion
This Bacon Cheeseburger Ramen Noodle Bake has confidently carved a special place in my heart and my kitchen. Its comforting, cheesy goodness has made it a go-to recipe for me, whether I’m cooking for family or craving something indulgent myself. I hope you enjoy making this dish as much as I do, and may it bring warmth and joy to your home just as it has to mine! Happy cooking!