Equipment Needed
Step-by-Step Instructions
- When I start making these Ferrero Rocher truffles, the first thing I do is crush the wafers into fine crumbs. Sometimes I use a food processor if I want it done quickly, but most of the time I just crush them with my hands because it’s simple and works perfectly. Once the wafers are finely crushed, I place them in a bowl and add the two large spoonfuls of Nutella.
- Next, I mix everything together until the crumbs and Nutella combine into a thick, moldable paste. The mixture should feel similar to cookie dough—soft but able to hold its shape when pressed. If it feels too dry, I sometimes add just a small extra spoon of Nutella to help it come together.
- To assemble the centers, I take a small amount of the wafer mixture and flatten it in my palm. Then I place a tiny drop of Nutella and one whole toasted hazelnut right in the center. I carefully fold the mixture around the hazelnut and roll it between my palms until it forms a smooth ball.
- Once all the balls are formed, I place them on a tray lined with parchment paper and transfer them to the fridge for about 30 minutes. I’ve learned that this chilling step is really important because it helps the truffles hold their shape when they’re dipped into the melted chocolate later.
Pro Tips for Best Results
After making these several times, I’ve realized that finely crushed wafers work best for the base. If the crumbs are too chunky, the balls can crack when rolling them. A smooth crumb texture helps everything stick together more easily.
Another tip I’ve learned is to make sure the hazelnuts are toasted before using them. Toasting brings out their natural oils and gives them that deep nutty flavor that makes Ferrero Rocher so special.
I also like chilling the balls long enough before dipping them in chocolate. I once skipped this step because I was in a hurry, and the truffles started falling apart in the warm chocolate.
Common Mistakes to Avoid
The first mistake I made with this recipe was adding too much Nutella to the wafer crumbs. While Nutella tastes amazing, too much can make the mixture too soft to shape properly.
Another mistake is skipping the chilling step before dipping. When the centers aren’t cold enough, they soften quickly in the melted chocolate and lose their round shape.
I also learned that overheating the chocolate can ruin the coating. Chocolate should be melted slowly, either in short microwave bursts or using a double boiler.
Finally, avoid using very large hazelnuts in the center. If they’re too big, the truffle becomes difficult to seal properly.
Serving Suggestions
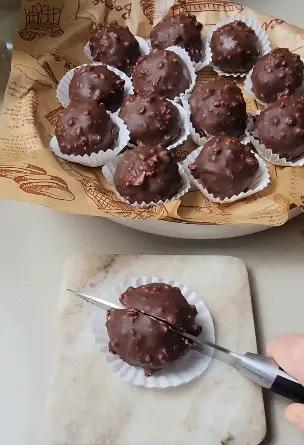
When I serve these homemade Ferrero Rocher, I like placing them in small paper candy cups so they look like little chocolate shop treats. It instantly makes them feel more special.
Sometimes I arrange them on a dessert platter alongside other small sweets like brownies or cookies. They always disappear quickly because everyone recognizes that classic hazelnut chocolate combination.
They also make fantastic edible gifts. I’ve packed them into small boxes for holidays and they always look impressive even though they’re surprisingly simple to make.
Variations & Customizations
One variation I’ve tried is using dark chocolate instead of milk chocolate for the outer coating. It creates a slightly richer flavor that pairs beautifully with the Nutella center.
I’ve also experimented with adding crushed wafer pieces into the chocolate coating for extra crunch. It makes the outer shell even more textured.
Another version I enjoy is adding a little cocoa powder to the wafer mixture for a slightly more chocolatey center.
How to Store, Freeze & Reheat
Whenever I make these truffles, I store them in an airtight container in the refrigerator. They stay fresh for about a week and maintain that perfect crunchy shell.
If I want to keep them longer, I freeze them in a sealed container. They freeze surprisingly well and can last up to two months.
When I want to serve them, I simply let them sit at room temperature for about 10 minutes. This softens the Nutella center slightly while keeping the chocolate shell firm.
Conclusion
Every time I make these homemade Ferrero Rocher, I’m reminded how fun it can be to recreate classic chocolates at home. The crunchy wafer base, creamy Nutella filling, toasted hazelnut center, and chocolate hazelnut coating create that signature texture everyone loves. I love how simple the ingredients are and how impressive they look once finished. If you enjoy hazelnut chocolate treats, this recipe is definitely one you’ll want to try.