
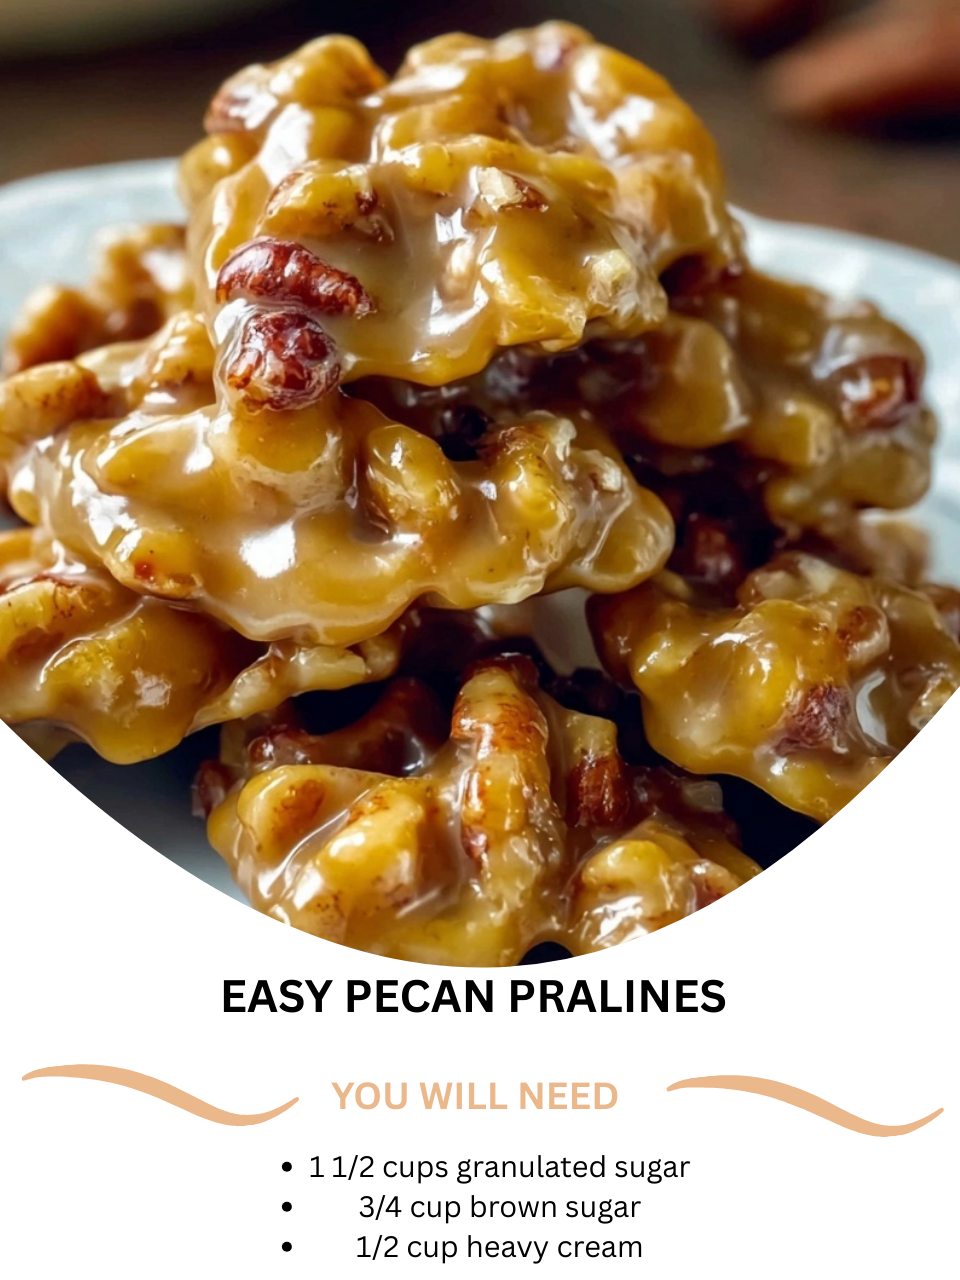
My first attempt at making pecan pralines was a humid Southern afternoon, fueled by nostalgia for a treat I’d only ever bought on trips. As the sugars and cream melted together in my saucepan, my kitchen was enveloped in a warm, caramelized, buttery aroma that felt like a sweet hug. The moment I stirred in the vanilla and pecans, that familiar, heavenly scent of candy shops filled the air. Watching the glossy mixture transform into creamy, speckled dollops on my parchment paper was pure magic. That first bite—crisp on the edges, creamy in the center, and packed with toasted pecans—was a triumph. I’d unlocked the secret to homemade praline bliss.
Why You’ll Love This Recipe
You are going to fall in love with this recipe because it demystifies the classic Southern praline, turning it into an approachable, home-candy-making adventure. While it requires attention, it needs no fancy thermometer—just your eyes, a spoon, and a bit of patience. The combination of brown and white sugars creates a complex, caramel-like depth, and the heavy cream ensures a luxuriously smooth, not gritty, texture. In about 30 minutes, you can create glossy, jewel-like candies that are crisp, creamy, and loaded with buttery pecans. It’s the ultimate impressive-yet-homemade gift or holiday treat.
Ingredients
- 1 ½ cups granulated sugar
- ¾ cup packed light brown sugar
- ½ cup heavy cream (whipping cream)
- 4 tablespoons (½ stick) unsalted butter
- 2 cups pecan halves, toasted
- 1 teaspoon pure vanilla extract
- ¼ teaspoon fine sea salt (See the next page below to continue…)
Equipment Needed
- Heavy-bottomed, medium saucepan (at least 3-quart capacity)
- Candy thermometer (highly recommended, but you can use the cold water test)
- Wooden spoon or heatproof spatula
- Baking sheets
- Parchment paper or silicone baking mats
- Two spoons or a small cookie scoop
Step-by-Step Instructions
My journey always starts with meticulous preparation because candy-making waits for no one. I line two baking sheets with parchment paper and have them ready by the stove. I toast my pecan halves in a 350°F oven for 7-8 minutes until fragrant, then let them cool slightly. Toasting is non-negotiable—it unlocks their oils and deep, nutty flavor. I measure out my vanilla, salt, and butter, and have my spoons ready. Having everything in place is crucial because once the cooking starts, you can’t step away to search for a tool. I learned this the hard way during a frantic, sugar-burning moment.
In my heavy-bottomed saucepan, I combine the granulated sugar, brown sugar, heavy cream, and butter. I clip my candy thermometer to the side, making sure it doesn’t touch the bottom. Over medium heat, I stir constantly until the butter melts and the sugars dissolve completely. This initial stirring prevents scorching. Once the mixture is smooth and begins to bubble, I stop stirring and let it cook, undisturbed. I keep a close eye on the thermometer as it climbs. The goal is the soft-ball stage, between 235°F and 240°F (113°C to 116°C). This can take 10-15 minutes of gentle boiling.
The moment the syrup hits 238°F, I immediately remove the pot from the heat. I carefully stir in the vanilla extract and salt—it will bubble up vigorously. Then, I let the mixture cool, without stirring, until the thermometer drops to about 200°F (93°C). This cool-down period is essential for achieving the perfect creamy, not sugary, texture. I used to skip this, pouring it out right away, and ended up with a pan of sugary, crystallized pecans instead of pralines. Patience here makes all the difference.(See the next page below to continue…)
Once it’s cooled to 200°F, the magic happens. I add the toasted pecans and begin beating the mixture vigorously with my wooden spoon. I watch as it transforms from a glossy syrup to a thick, matte, creamy mass that holds onto the pecans. This takes about 2-3 minutes of steady beating. As soon as it thickens and loses its sheen, I work quickly. Using two spoons, I drop rounded tablespoonfuls onto the prepared parchment paper, spacing them apart. They will spread a little. If the mixture in the pot starts to harden before I’m done, I can gently re-warm it over low heat for a few seconds to make it pliable again.
Pro Tips for Best Results
My first pro tip is to use a candy thermometer. I’ve tried the cold water test (dropping a bit into ice water to see if it forms a soft ball), but a thermometer removes all guesswork. Accuracy is everything for the perfect soft-yet-set texture. Before you start, test your thermometer in boiling water; it should read 212°F. If it’s off, adjust your target temperature accordingly.
Second, don’t stir the syrup while it’s boiling. Once it comes to a boil and you’ve ensured the sugars are dissolved, leave it alone. Stirring can introduce sugar crystals into the syrup, which can seed crystallization throughout the entire batch, resulting in grainy pralines instead of smooth ones. Just let it bubble and watch the thermometer climb.
Finally, beat the mixture at the right temperature. Beating it while it’s too hot (above 210°F) won’t allow it to crystallize properly, and it will stay runny. Beating it when it’s too cool (below 190°F) will cause it to set up too fast in the pot. Waiting for it to cool to that 200°F sweet spot gives you the perfect window to achieve that creamy, fudge-like consistency that defines a great praline.
Common Mistakes to Avoid
The most common mistake is not using a heavy-bottomed pot. A thin pot will have hot spots that cause the sugar to burn before it reaches the correct temperature. I made this mistake with a cheap saucepan, and the entire batch had a bitter, scorched taste. A Dutch oven or heavy-bottomed saucepan distributes heat evenly and is your best defense.(See the next page below to continue…)
Don’t skip toasting the pecans. Raw pecans are bland and can taste slightly bitter. Toasting them amplifies their flavor tenfold and gives the pralines their signature nutty depth. Just be sure to let them cool before adding them to the hot syrup, or they can cause the mixture to seize or become oily.
Avoid humid days if you can. I attempted this on a rainy day once, and the pralines absorbed moisture from the air, becoming sticky and never fully setting with that perfect snap. Candy-making prefers dry, cool weather. If it’s humid, turn on your air conditioner or a dehumidifier in the kitchen.
Finally, don’t walk away from the boiling syrup. It can go from 220°F to 250°F (and into the hard-crack stage) in what feels like seconds. If it gets too hot, your pralines will be hard and brittle instead of creamy. Stay by the stove, watch that thermometer like a hawk, and be ready to pull it off the heat the moment it hits 238°F.
Serving Suggestions
I love presenting these pralines piled high on a rustic wooden board or in a vintage candy dish. They look so beautiful with their golden color and pecan pieces peeking through. For gifting, I wrap each one in a small square of wax paper or cellophane and place them in a decorative box or tin—it feels incredibly special and old-fashioned.
These pralines are the perfect ending to a rich meal. I’ll serve one or two on a small plate alongside a cup of strong black coffee or a glass of bourbon. The sweetness of the candy with the bitterness of the coffee or the warmth of the bourbon is a classic, sophisticated pairing.
For a holiday twist, I sometimes drizzle the set pralines with a little melted dark chocolate or sprinkle them with a tiny bit of flaky sea salt right after dropping them onto the parchment. It adds another layer of flavor and makes them look even more gift-worthy.
Variations & Customizations
For a richer, deeper flavor, use dark brown sugar instead of light. You can also add a tablespoon of bourbon or a ¼ teaspoon of maple extract along with the vanilla for a grown-up twist. The alcohol cooks off, leaving behind a wonderful, complex aroma.
You can play with the nuts. While pecans are traditional, I’ve made delicious versions with walnuts or a mix of pecans and almonds. Just make sure to toast them first. For a truly decadent version, stir in ½ cup of chopped dark chocolate or toffee bits along with the pecans.
If you love a hint of spice, add a pinch of cinnamon, nutmeg, or even a tiny pinch of cayenne pepper to the sugar and cream mixture at the beginning. It adds a warm, unexpected note that cuts through the sweetness beautifully.
How to Store, Freeze & Reheat
Pralines store best in a single layer in an airtight container at cool room temperature. I separate layers with parchment paper. They will keep for up to two weeks. If your kitchen is warm, you can store them in the refrigerator, but let them come to room temperature before serving to enjoy their full flavor and texture.
They freeze very well for long-term storage. Wrap each praline individually in plastic wrap, then place them in a freezer bag or airtight container. They will keep for up to 3 months. Thaw in the refrigerator overnight, then bring to room temperature.
There is no need to reheat pralines. They are meant to be enjoyed at room temperature. If they become too sticky, you can briefly place them in the refrigerator to firm up, but avoid microwaving, as it will melt the sugar and ruin their texture.
Conclusion
These Easy Pecan Pralines are more than just candy to me; they’re a delicious link to tradition, a satisfying kitchen project, and little edible pieces of Southern sunshine. They have brought joy to cookie exchanges, gratitude as gifts, and a deep sense of accomplishment to my own kitchen. I hope this recipe gives you the confidence to create your own batch of sweet, nutty magic, filling your home with that incredible caramel scent and your gatherings with smiles. Now, go grab that heavy pot—a batch of creamy, crunchy bliss is waiting.