
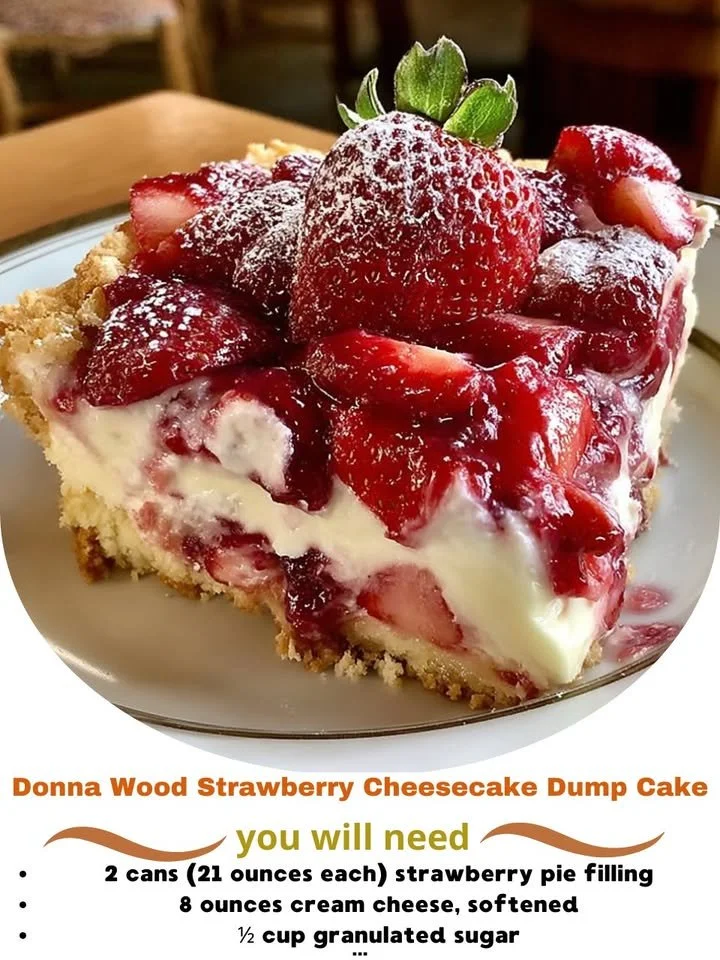
I love a dessert that’s simple yet delightful, and Donna Wood’s Strawberry Cheesecake Dump Cake fits the bill perfectly. This recipe is one of those magical concoctions that combines the creamy richness of cheesecake with the sweet, vibrant flavors of strawberries in a wonderfully easy-to-make cake. As I mixed everything together, I couldn’t help but feel excited by how quickly it all came together. It’s a fantastic dessert for gatherings, family dinners, or just a comforting treat at home.
Why You’ll Love This Recipe
You’ll adore this dump cake for its ease and deliciousness; it practically makes itself! With minimal prep and cook time, you’ll have a stunning dessert ready to impress anyone (including yourself!). The best part? The delightful aroma that fills my kitchen while it’s baking; it’s the kind of warmth that wraps around you like a favorite sweater. I promise this will become one of your go-to recipes for both special occasions and casual get-togethers. It’s truly a crowd-pleaser! (See the ingredients in the next page below…)
Ingredients
– 2 cups fresh strawberries, hulled and sliced
– 1 can (15 ounces) of strawberry pie filling
– 1 package (8 ounces) cream cheese, softened
– 1 cup granulated sugar
– 1 teaspoon vanilla extract
– 1 box (15.25 ounces) yellow cake mix
– 1/2 cup unsalted butter, melted
– 1/2 cup powdered sugar (for dusting, optional)
Equipment Needed
– 9×13 inch baking dish
– Mixing bowls
– Electric mixer (or a whisk for hand mixing)
– Spatula
– Measuring cups and spoons
Step-by-Step Instructions
First, preheat your oven to 350°F (175°C). This is where the magic starts! In a mixing bowl, cream together the softened cream cheese, granulated sugar, and vanilla extract until smooth and fluffy. There’s something truly satisfying about watching the mixture transform into a luscious batter. Once combined, gently fold in the fresh strawberries and strawberry pie filling. That’s when the colors really pop, and I can already smell the sweet goodness wafting through my kitchen. (See the next page below to continue steps…)
Next, spread this delightful strawberry mixture evenly in the bottom of your baking dish. It’s a glorious sight! Sprinkle the dry cake mix generously over the strawberry layer, making sure to cover it entirely. It may seem a little odd at this point, but that’s the beauty of a dump cake. Drizzle the melted butter evenly over the cake mix. Don’t stress, it doesn’t need to be perfect; just get it on there, and it will bake beautifully!
Now, pop the baking dish into the preheated oven and let it bake for about 45-50 minutes, or until the top is golden brown and bubbly. The scent that fills my home during this time is simply divine; it’s hard to resist the urge to peak in! When it’s done, allow the cake to cool for a few minutes before dusting with powdered sugar if you like. The final result is an inviting, warm cake that beckons you to take a slice and enjoy.
Pro Tips for Best Results
I tested this three ways: using fresh strawberries, frozen strawberries, and store-bought pie filling. Each gave a slightly different taste and texture, but my favorite was definitely using fresh berries. They not only add vibrant color but also a fresh, juicy flavor that really shines through!
Also, I find that letting the cake cool a bit before serving allows the flavors to meld together beautifully. It’s hard to wait, but trust me, it’s worth it! Lastly, if you’re like me and can’t get enough of the cheesecake flavor, simply double the cream cheese for an even cheesier delight. Your taste buds will thank you!
And always keep an eye on your cake towards the end of the baking time. Every oven is different, and since the top should be a lovely golden brown, it’s best not to risk it becoming too dark or dry.
Common Mistakes to Avoid
One common mistake I made on my first try was assuming I needed to mix everything together more than necessary. Remember, this is a dump cake! Over-mixing can lead to a dense texture instead of the light fluffiness we’re aiming for. Just a gentle fold is all you need to incorporate the ingredients! (See the next page below to continue…)
Another mishap occurred when I forgot to preheat my oven. I thought I could save time, but my cake suffered for it—baking from a cold start can lead to uneven cooking and a sad cake! Always take that moment upfront to get everything nice and ready.
Don’t forget to use a good-quality baking dish. I once used a smaller pan thinking it wouldn’t make much difference, but my cake ended up being too thick, and the middle didn’t cook through properly. Choose wisely, my friends!
Serving Suggestions
When it comes to serving this delightful dessert, I love topping it off with a scoop of vanilla ice cream. The contrast between the warm cake and the cold ice cream creates a fantastic combination that I find hard to resist. Alternatively, a dollop of whipped cream on top is just as delightful.
If you’re looking to elevate it just a bit more, fresh mint leaves make a lovely garnish. They not only look beautiful on the plate but also add a refreshing note that pairs nicely with the strawberry flavor.
And if I have any leftovers (which is rare!), I love enjoying chilled slices the next day for breakfast—yes, I said breakfast! There’s something comforting about that creamy, fruity slice with my morning coffee.
Variations & Customizations
I’ve experimented with different fruit fillings, and I have to say, using blueberries or raspberries instead gives an incredible twist to this classic recipe. Switching fruits allows for seasonal variations, and you can even mix and match depending on what you have on hand.
Another fun variation I’ve tried involves adding a layer of crushed graham crackers between the strawberry layer and the cake mix. It gives a little crunch and reminds me even more of classic cheesecake.
And for those who are gluten-free, substituting the yellow cake mix for a gluten-free blend works beautifully. I’ve made it a point to include a gluten-free option because I want everyone to enjoy this scrumptious cake without restrictions.
How to Store, Freeze & Reheat
To store the leftovers (if any ever last!), let the cake cool completely, then cover it with plastic wrap or aluminum foil and keep it in the refrigerator for up to 3-4 days. I promise it remains just as delicious!
If you decide to make this cake ahead of time, you can freeze it as well. Just wrap it tightly in plastic wrap and aluminum foil, and it should be good for up to three months. When you’re ready to enjoy, simply thaw it in the fridge overnight and reheat in the oven for about 15-20 minutes at 350°F. It’s as good as fresh!
Reheating slices in the microwave works too, but I suggest doing it in short bursts to avoid drying out the cake. Perhaps 20-30 seconds will get it just warm enough while preserving that delightful texture.
Conclusion
I hope you find as much joy in making and sharing Donna Wood’s Strawberry Cheesecake Dump Cake as I have! It’s a delightful, easy-to-make treat that’s perfect for any occasion. I’m sure it’ll become a favorite in your family just like it has in mine. Happy baking, and enjoy every sweet slice!