Equipment Needed
Step-by-Step Instructions
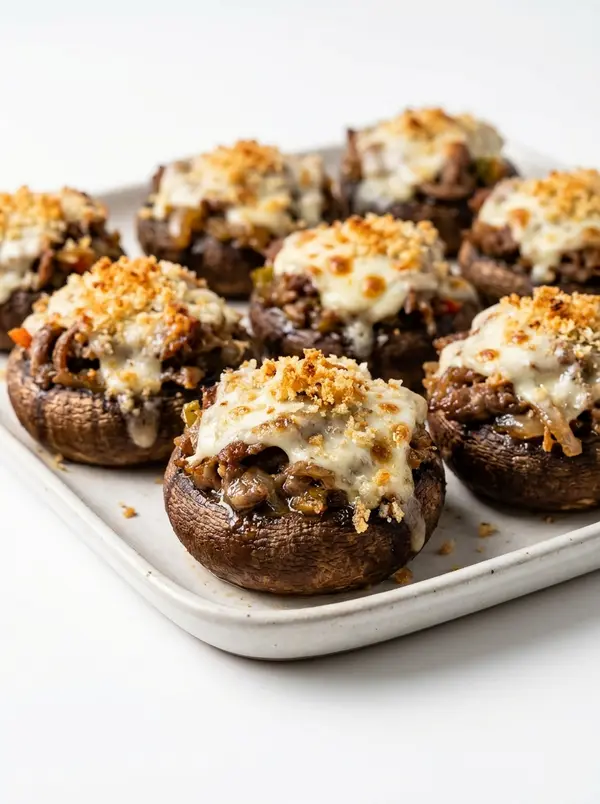
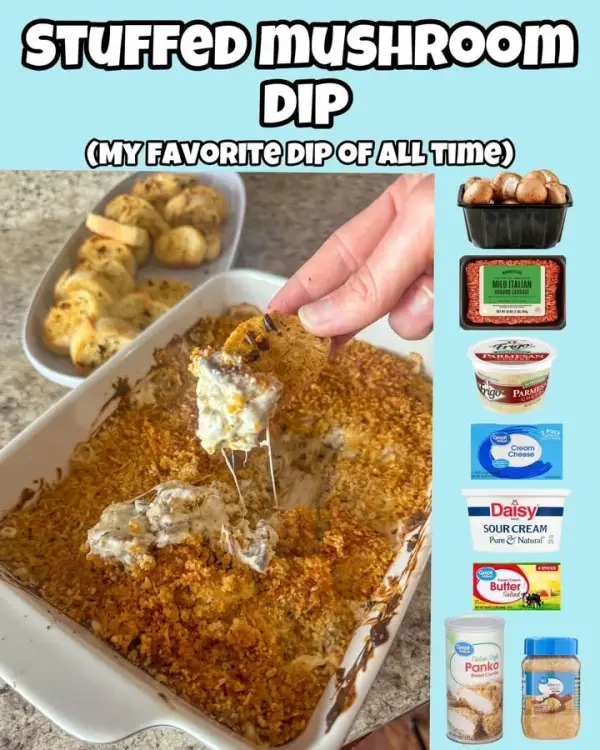
- Let’s start with the mushrooms. When I make this dip, I always choose the freshest ones I can find. I usually wash them quickly and dry them thoroughly. I’ve tried skipping this step before, but trust me, excess moisture can ruin the dip. After that, I carefully remove the stems—sometimes, I’ll chop them up and include them in the filling for extra flavor. I set the caps aside on a baking sheet for later use.
- Next comes the filling. In a large mixing bowl, I combine the softened cream cheese, shredded mozzarella, grated Parmesan, mayonnaise, minced garlic, parsley, salt, and pepper. The first time I made this, I whipped it all together with a fork, but I found that using a mixer gives a smoother and creamier texture. I mix until everything is well blended, and I can’t help but sneak a taste of the mixture—it’s irresistible!
- Now, it’s time to fill those mushroom caps. I use a spoon to pack the filling into each cap generously. You want to mound it a bit on top; that peak will crisp up beautifully in the oven. After stuffing the mushrooms, I make sure they’re all lined up neatly on my baking dish. I feel like a proud artist when I look at my creations—each mushroom is like a tiny work of art, just waiting to be devoured.
- Finally, I preheat the oven to 350°F and bake the mushrooms for about 15 to 20 minutes. I love watching them puff up and turn golden brown on top. A little tip I’ve learned—don’t rush the cooking time. The mushrooms need adequate time to soften and soak in those cheesy flavors. When they come out of the oven, I can barely resist digging in right away!
Pro Tips for Best Results
Over the years, I have tested this recipe a few different ways—each time refining it for better results. For instance, I’ve found that adding some chopped spinach makes the dip feel richer and gives a lovely color pop. If you decide to go this route, just make sure to sauté the spinach first to get rid of any excess water—nobody wants a soggy dip!
Another tip I can’t stress enough is to let your cream cheese soften at room temperature. I’ve tried mixing it straight from the fridge, and it leads to a lumpy mixture that isn’t appealing. Since then, I always take it out at least an hour before I start cooking. It makes a world of difference!
Lastly, consider the cheese blend. While mozzarella and Parmesan are my go-to choices, I’ve tested using smoked Gouda, which adds a delightful depth of flavor. If you’re feeling adventurous, don’t be afraid to switch it up—you might just discover your new favorite version of this dip!
Common Mistakes to Avoid
I made a huge mistake the first time I made this dip—I didn’t chop the mushroom stems finely enough. The resulting dip was chunky, and not in a good way. Since then, I make sure to finely chop the stems, and it creates a much more cohesive filling. You want each bite to be a harmonious mix of flavors!
Also, don’t skip on seasoning. The first time around, I was a bit shy with salt and pepper and ended up with a bland dip. I learned that the blend of cheeses needs proper seasoning to shine. So, taste as you mix, and don’t be afraid to adjust those seasonings to your preference.
Another common pitfall is overcooking the mushrooms. They should be tender but not mushy. I’ve let them bake a little too long before, and the dip ended up being a sad, overcooked mess. I now set a timer and keep a close eye on them—results are worth every second!
Serving Suggestions
I like serving my stuffed mushroom dip warm, right out of the oven, alongside sliced baguette and crispy pita chips. Just watching others dive in and enjoy is such a joy for me! The way the lush cheese clings to the bread pieces is nothing short of magical. You can even offer a veggie platter on the side for those who want a lighter option—they dip raw veggies into that gooey mixture with delight!
For gatherings, I often take this dip to parties in a slow cooker. I prepare it in advance and keep it warm on low. That way, everyone can scoop at their own pace, and I don’t have to worry about it getting cold. But let me tell you, it’s hard to leave some behind—even if I mean to!
If I’m feeling creative, I like to whip up a spicy version by adding diced jalapeños or red pepper flakes. This simple tweak transforms the dip into something with a kick that pairs beautifully with tortilla chips or sturdy crackers. Your guests will be begging for the recipe!
Variations & Customizations
One of the best things about stuffed mushroom dip is its versatility. I’ve played around with adding different ingredients, and my favorite twist is to include crumbled cooked sausage. The savory meat adds such a hearty touch and makes it even more satisfying. Just remember to adjust your seasonings accordingly because sausage is often quite flavorful on its own.
Recently, I discovered a vegetarian version where I swapped out cheese for a delicious cashew cream. It’s surprisingly creamy and has a nutty flavor that pairs well with the mushrooms. If you’re looking for a dairy-free option, this is a great path to explore!
Lastly, consider adding some sun-dried tomatoes or artichoke hearts for an extra burst of flavor. These additions give your dip a gourmet feel, and they complement the mushrooms excellently. Get creative with whatever you have in your pantry!
How to Store, Freeze & Reheat
After making this dip, if I have any leftovers (which is rare!), I store them in an airtight container in the fridge. They usually keep well for about three days. When I’m ready to enjoy some more, I simply pop it in the microwave for about 30 seconds to 1 minute, stirring halfway through to get everything warmed evenly again.
If you decide to make a big batch or prep in advance, freezing is a fantastic option. I recommend freezing the dip before baking it. Just pack it tightly in a freezer-safe container. When you’re ready to bake it, allow it to thaw in the fridge overnight and then bake as directed. It’s like having a comforting dish ready whenever you need a pick-me-up!
One important thing I learned is that reheating it in the oven rather than the microwave ensures it retains that glorious texture. I’ve microwaved it before, and the mushrooms turn a bit rubbery. So, for the best results, go for the oven!
Conclusion
Making this delicious stuffed mushroom dip has been such a rewarding experience for me. Not only does it bring comfort, but it also invites the people I care about to enjoy it together. I hope you give this recipe a try; I promise it will shine in your kitchen, too! Don’t forget to make it your own and add your personal touch—because that’s what cooking is all about!