
Now, I return this lovely mixture back to the saucepan. Over medium heat, I stir continuously until the pudding thickens, which usually takes about 5-7 minutes. The smell of vanilla wafting through my kitchen at this moment is pure heaven! Once thickened, I remove it from the heat and stir in the vanilla extract, letting it cool for a few minutes.
While the pudding cools, I take my 9×9-inch baking dish and begin layering it with a generous base of vanilla wafers. On top of the wafers, I add a layer of sliced bananas, followed by a luscious layer of the warm pudding. I repeat these layers until I run out of pudding, ending with pudding on top. If I have any vanilla wafers left, I like to crumble them over the top for a decorative crunch. Finally, I cover it with plastic wrap and pop it into the refrigerator to chill for at least four hours, though overnight is even better!
Pro Tips for Best Results
I tested this creamy banana pudding recipe three different ways: with homemade pudding, instant pudding, and using store-bought custard. I found that the homemade version not only tasted better, but it also had an incredibly rich and creamy texture that made all the difference!
For the freshest flavor, I recommend using the ripest bananas you can find. Ripe bananas offer just the right amount of sweetness, letting their flavor shine through the creamy layers. I often let my bananas sit out until they have a few brown spots before I slice them for this dessert—they’re just perfect then!
Finally, if you’re prepping this dessert ahead of time, make sure to layer your bananas just before serving. This keeps them from browning and ruining the visual appeal of your beautiful dessert. I once made the mistake of layering them too soon, and it was a lesson learned!
Common Mistakes to Avoid
One common mistake I made on my first attempt was not whisking the milk and sugar mixture together thoroughly enough, which led to clumps in my pudding. It’s essential to whisk vigorously to achieve that smooth, creamy texture we all love. Trust me; those little lumps can turn a stellar dessert into a frustrating one! (See the next page below to continue…)
Another pitfall is the cooking temperature. I’ve discovered that cooking your pudding on too high a heat can lead to scorching. I like to stick with medium heat and a lot of stirring, which ensures an even cook and a velvety finish.
Lastly, storing the banana pudding for too long can lead to the wafers becoming soggy and unappetizing. It’s best enjoyed fresh, within a couple of days, to maintain that fantastic texture contrast between the custard and the wafers.
Serving Suggestions
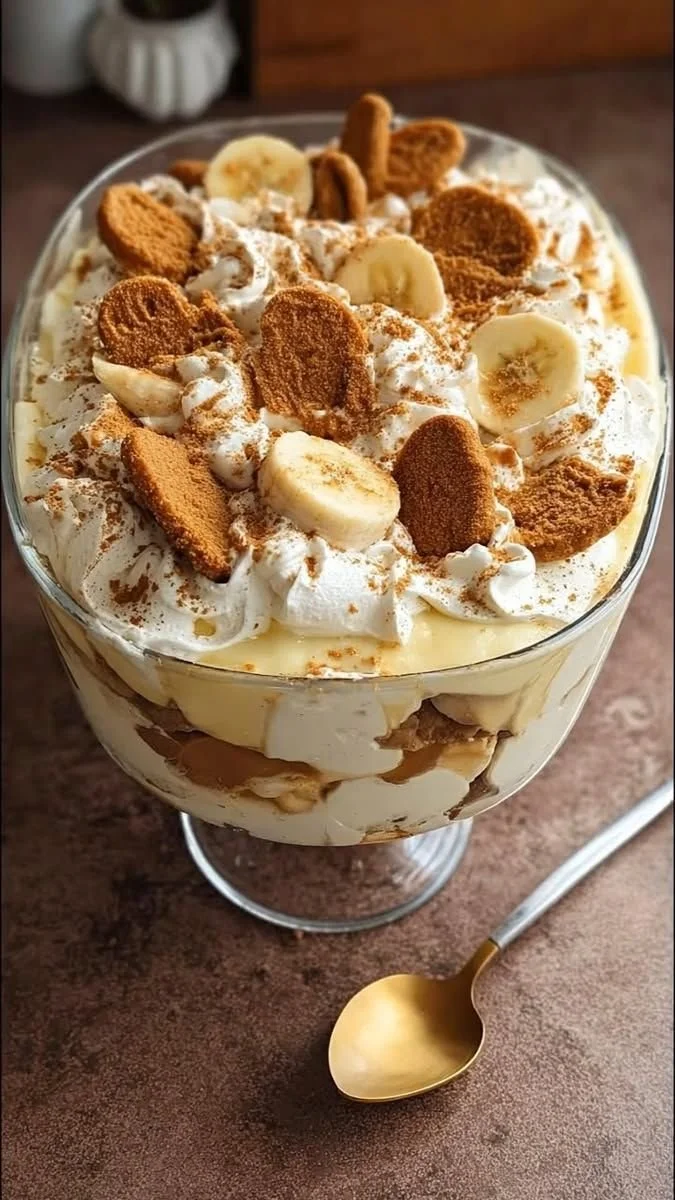
When it comes time to serve my creamy banana pudding, I love adding an extra dollop of whipped cream on top for that little bit of elegance. It’s an optional addition, but the light, airy cream complements the density of the pudding beautifully. I often also sprinkle some crushed vanilla wafers for an extra crunchy texture!
For gatherings, I suggest using a trifle dish to display the beautiful layers. It’s a stunning way to present the dessert and often invites everyone to dig in. Plus, who doesn’t love a dessert that’s as pretty as it is delicious?
Lastly, don’t forget some fresh mint leaves! They add a pop of color and a refreshing hint that balances the sweetness perfectly. A little herbaceous touch really elevates the dish in a delightful way!
Variations & Customizations
If you’re looking to mix things up a bit, there are several fun variations for this banana pudding. One of my favorites is incorporating layers of chocolate pudding for a delightful twist. The chocolate pairs exceptionally well with bananas, creating a decadent dessert that satisfies both chocolate and banana lovers alike.
For a tropical touch, I sometimes add a layer of sliced strawberries or even pineapple chunks. The acidity from the strawberries provides such a delightful contrast to the creamy pudding! Additionally, if you’re feeling adventurous, a splash of rum extract can give it a fun, tropical vibe that’s perfect for summer celebrations.
Lastly, if you’re dairy-free, you can replace regular milk with almond or coconut milk and use cornstarch as a thickener instead of flour. I tested it once and was surprised at how well it worked! Just be sure to tweak your measurements a bit for the best results.
How to Store, Freeze & Reheat
To store your banana pudding, simply cover it tightly with plastic wrap or transfer it to an airtight container. It stays fresh for about 3 days in the refrigerator. Just keep in mind that the wafers will soften as time goes on, so it’s best enjoyed sooner rather than later!
If you want to make it in advance and freeze it, I recommend doing so before adding the banana slices. Assemble the layers up to the pudding, cover it with plastic wrap, and freeze. Thaw it in the refrigerator overnight and add the bananas just before serving.
Reheating isn’t typically necessary since banana pudding is best served chilled. However, if for some reason it’s best to warm it up, I suggest gently warming it in a saucepan over very low heat while stirring until it reaches your desired temperature—though trust me, it’s divine served cold!
Conclusion
In closing, I truly encourage you to take a little time in your kitchen to create this creamy sweet banana pudding. The aroma that fills your space, the delightful layers, and the moans of enjoyment from friends and family will make it all worth it. Enjoy every spoonful, and remember: desserts made with love are always the best!