
Next, in a separate bowl, beat the softened cream cheese with a mixer until it’s smooth and creamy. Gradually add in the cup of sugar for the filling and continue mixing until well incorporated. I can’t get enough of that silky texture! Then, add the eggs one at a time, mixing well after each addition. Finally, stir in the fresh lemon juice and lemon zest. The fresh aroma of lemon invigorates my kitchen, making it feel so bright and cheerful!
Pour the lemon cream cheese mixture over the graham cracker crust in your baking dish, spreading it into an even layer. Bake for about 30-35 minutes, until the filling is set but still slightly jiggly in the center. Let it cool at room temperature for a bit, then refrigerate for at least 2 hours before slicing into bars. The wait can be hard, but trust me, it’s worth it!
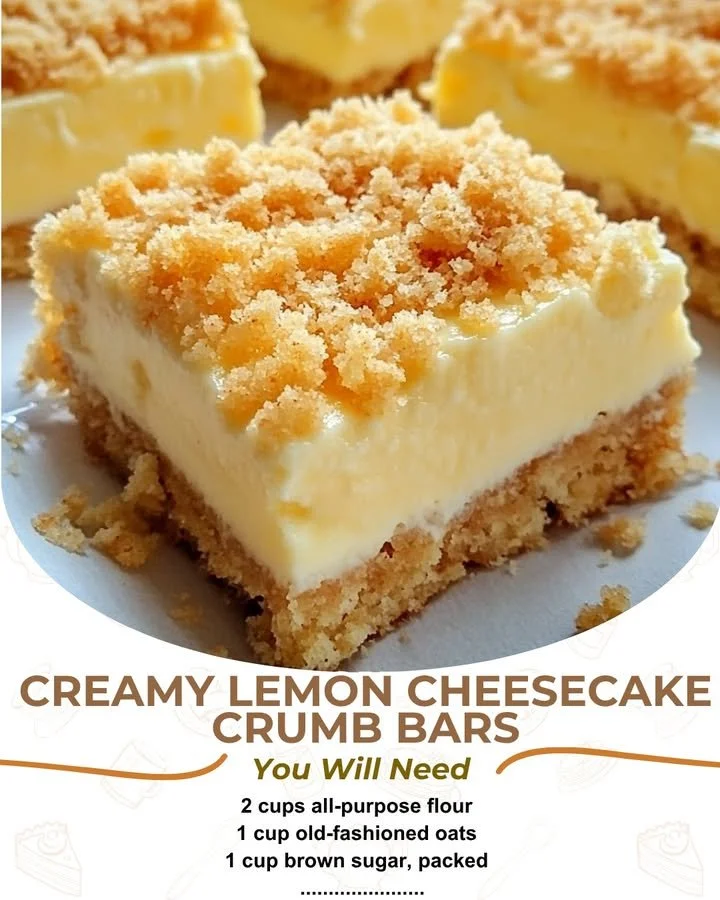
Once chilled, lift the cheesecake out using the parchment paper and cut it into squares. I love to serve these with a sprinkle of powdered sugar on top and a little extra lemon zest for garnish. These creamy lemon cheesecake crumb bars are not just a treat—they’re a visual delight!
Pro Tips for Best Results
I’ve made these bars a few times, experimenting with a couple of small tweaks. One thing I’ve learned is to make sure your cream cheese is really softened before you start; it’ll blend much more smoothly, resulting in that luscious texture we’re looking for. I usually take it out of the fridge about an hour ahead of time.
Don’t skip on the zest! It may seem like just a little extra effort, but the fresh lemon zest makes all the difference in flavor. I often get my kids involved in zesting—it’s a fun way to bond and get them excited about baking.
Lastly, I recommend using fresh lemon juice instead of bottled. The freshness brings an incredible brightness to the flavor profile of the cheesecake, and trust me, you can taste the difference!
Common Mistakes to Avoid
One major mistake I’ve made in the past is overbaking the bars. It’s tempting to leave them in longer, especially if they look a little jiggly in the center. Remember, they’ll continue to set as they cool, so take them out once they’re just slightly firm in the middle! (See the next page below to continue…)