
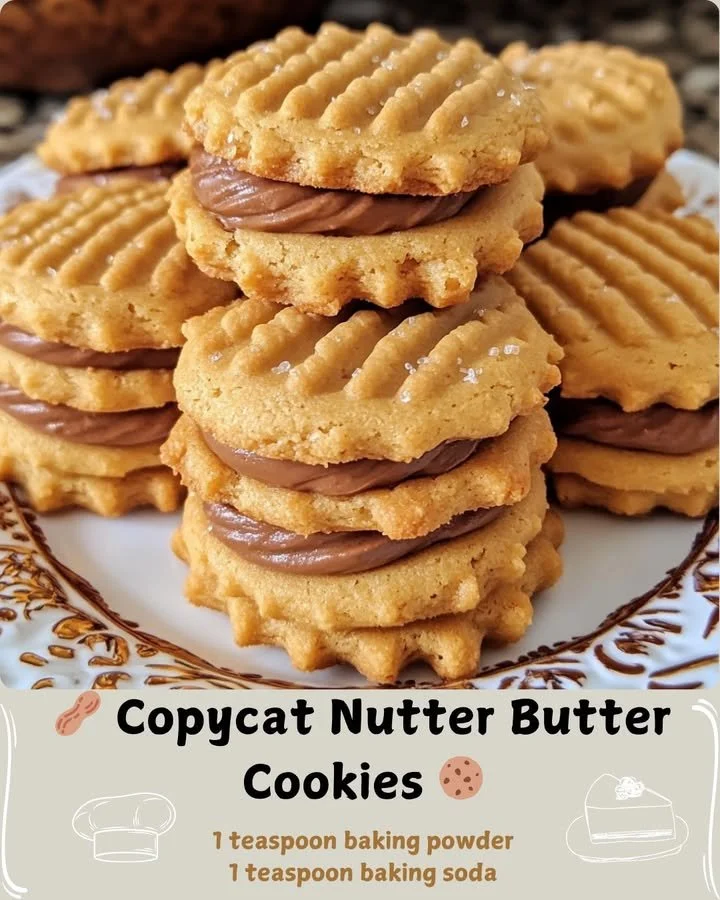
Hey there! Today, I’m excited to share with you a delightful recipe that brings back so many childhood memories: Copycat Nutter Butter Cookies! These cookies are perfect for anyone who loves the blend of peanut butter and a little sweetness in their snacks. They remind me of opening a package after school, the crispy cookies with their signature peanut butter cream filling were always my favorite treat. So, let’s dive into my kitchen and whip up a batch of these delicious goodies together!
Why You’ll Love This Recipe
What I love about making Copycat Nutter Butter Cookies at home is the joy of recreating that nostalgic taste with fresh ingredients. These cookies are crunchy on the outside, creamy on the inside, and you can adjust the sweetness to your preference. Plus, they make for fantastic gifts or just a tasty treat for yourself during your coffee break. Baking these truly brings a smile to my face! (See the ingredients in the next page below…)
Ingredients
- 1 cup creamy peanut butter
- 1 cup granulated sugar
- 1 cup brown sugar, packed
- 2 large eggs
- 2 teaspoons vanilla extract
- 3 cups all-purpose flour
- 1 teaspoon baking soda
- 1/2 teaspoon salt
- 1 cup powdered sugar (for the filling)
- 5 tablespoons unsalted butter, softened (for the filling)
- 1 teaspoon vanilla extract (for the filling)
Equipment Needed
- Mixing bowls
- Electric mixer or whisk
- Measuring cups and spoons
- Baking sheets
- Parchment paper
- Cookie cutter (or a knife if you prefer to shape them by hand)
- Cooling rack
Step-by-Step Instructions
First things first, let’s preheat our oven to 350°F (175°C). In a large mixing bowl, I combine the creamy peanut butter, granulated sugar, brown sugar, eggs, and vanilla extract. I find that using an electric mixer makes this part super easy and effective – just mix until it’s beautifully blended! It should be smooth and slightly fluffy in texture. After that, I fold in the flour, baking soda, and salt until everything is well mixed. The dough will be thick, but that’s exactly what we want for that perfect cookie crunch! (See the next page below to continue steps…)
Next, I line my baking sheets with parchment paper to prevent sticking. Using a cookie scoop or a tablespoon, I drop rounded balls of dough onto the sheets, leaving enough space between them for spreading. Here’s where I like to get a little creative: I gently flatten each dough ball with the back of a fork to create that classic Nutter Butter shape, but feel free to use a cookie cutter if that’s more your style! Then, it’s time to bake them for about 10-12 minutes until the edges are golden.
While the cookies bake and fill my kitchen with a tantalizing aroma, I prepare the creamy peanut butter filling. In a separate bowl, I mix the softened butter, powdered sugar, and a teaspoon of vanilla extract until it’s airy and smooth. I can’t resist sneaking a taste—you know, just to make sure it’s perfect! Once the cookies are cool, I spread a generous spoonful of the creamy filling on the flat side of one cookie and gently press another cookie on top. Voila! Instant Nutter Butter cookies, ready to be devoured.
Pro Tips for Best Results
I tested this recipe three ways to figure out the ideal consistency for the cookies. I found that if you’re looking for a crisper cookie, bake them a minute or two longer. For a softer cookie, try taking them out just as the edges start to brown. This small tweak can make a huge difference!
Also, I recommend chilling the dough for about 30 minutes before baking. Chilling helps firm up the dough, which not only makes it easier to shape but also prevents the cookies from spreading too much while baking. Trust me; it’s a game-changer!
If you want to make the cookie filling even more exciting, consider adding a hint of honey or a sprinkle of cinnamon. I gave this a shot during one of my baking sessions, and it added a delightful twist to the flavor profile!
Common Mistakes to Avoid
One common mistake I often see is overmixing the dough. It’s essential to mix just until everything is combined. Overmixing can lead to tough cookies, and no one wants that! I learned this the hard way during my first attempt, and my cookies turned out more like little rocks than a cozy treat! (See the next page below to continue…)
Another pitfall is underbaking the cookies. It’s tempting to pull them out if they look a bit soft, but remember they continue to cook on the baking sheet after you remove them from the oven. Always err on the side of slightly overbaking rather than underbaking for that perfect crunch.
Lastly, make sure all your ingredients are at room temperature, especially the butter and eggs. Using cold ingredients can disrupt the creamy texture you’re aiming for, and I’ve learned this lesson every time I rush through the prep!
Serving Suggestions
These Copycat Nutter Butter Cookies are as versatile as they are delicious. I often enjoy mine with a glass of cold milk, but they’re also fabulous paired with a steaming cup of coffee or tea. Just picture yourself settling down with your favorite beverage, a cozy blanket, and a cookie (or two!) in hand. It’s one of life’s simple pleasures.
If you’re hosting a gathering or a playdate, why not arrange the cookies on a pretty platter? They always make a great centerpiece, and trust me, your guests will drool over them. Pair them with some fresh fruit or popcorn for a snack table that everyone will love.
And let’s not forget about the kids! These cookies are perfect for lunch boxes or as after-school snacks. They are a sweet way to say “I’m thinking of you!” and definitely put a big smile on their faces.
Variations & Customizations
While I adore the classic Nutter Butter flavors, there’s so much room for creativity! One of my favorite variations is to swap out some of the peanut butter for almond butter. It gives the cookies a slightly different flavor and is a fun twist if you want to try something new.
You could also mix in some chocolate chips for an extra sweet treat. The combination of peanut butter and chocolate is one of the best duos out there, in my opinion. I sometimes create a half-and-half situation: one batch with filling and another with chocolate chips!
Don’t shy away from adding a dash of sea salt on top of each cookie before they bake. It enhances the flavors beautifully and brings a savory depth to the sweetness. After all, a pinch of salt makes everything taste better!
How to Store, Freeze & Reheat
To store these cookies, I recommend allowing them to cool completely, then placing them in an airtight container. They’ll stay fresh at room temperature for about a week, but I can guarantee they’ll be gone long before then!
If you want to make a large batch or plan ahead for a special occasion, you can freeze the cookies. Just layer them between sheets of parchment paper in a freezer-safe container. They’ll keep well for up to three months. When you’re ready to enjoy them, simply take out however many you need and let them thaw at room temperature.
To reheat, pop them in the microwave for just a few seconds—trust me, a warm cookie is the ultimate treat! Or, if you prefer, you can warm them in the oven at a low temperature until they are just heated through.
Conclusion
Thanks for joining me on this delightful journey to make Copycat Nutter Butter Cookies! I hope you enjoy these just as much as I do and that they bring a little nostalgia and warmth to your kitchen. Whether you share them with loved ones or keep them all to yourself (no judgment!), these cookies are sure to make your day a little sweeter. Happy baking!