
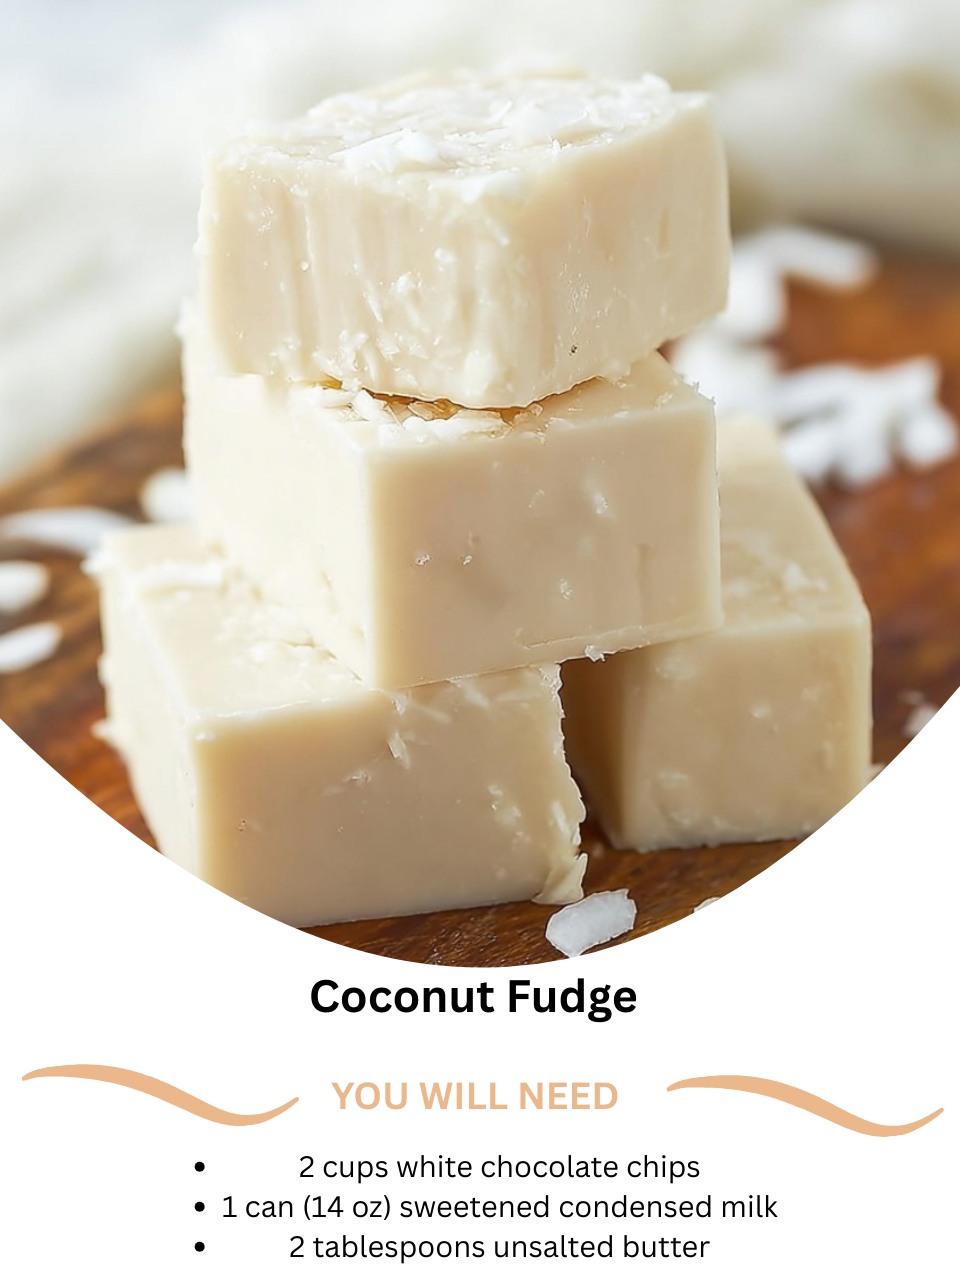
I first made this Coconut Fudge on a dreary winter day, dreaming of tropical sunshine and the taste of a fresh macaroon. As the white chocolate and sweetened condensed milk melted together, I stirred in a heap of toasted coconut, and my kitchen was instantly filled with the most incredible, nutty, sweet aroma that felt like a vacation in a pan. The scent was so warm and inviting, it pulled my family from other rooms, asking what was baking. The resulting fudge, creamy and packed with coconut, was like biting into the most luxurious, melt-in-your-mouth candy bar. It became my instant favorite for bringing a little island escape to any season.
Why You’ll Love This Recipe
You are going to fall head over heels for this recipe because it delivers the rich, decadent flavor of a coconut cream pie or a gourmet Mounds bar in the simplest, most foolproof form. It’s incredibly easy to make with no candy thermometer needed, yet the taste is complex and utterly addictive. From my experience, this is the treat that surprises people the most—the intense coconut flavor against the creamy white chocolate is a match made in heaven. It’s a guaranteed crowd-pleaser that feels both indulgent and wonderfully unique.
Ingredients
- 2 cups high-quality white chocolate chips
- 1 (14 oz) can full-fat sweetened condensed milk
- 2 tablespoons unsalted butter
- 1 teaspoon pure vanilla extract
- ½ teaspoon coconut extract (trust me, do not skip this!)
- A generous pinch of fine sea salt
- 2 cups sweetened shredded coconut, divided
- 1 tablespoon milk or cream (optional, for topping)
(See the next page below to continue…)
Equipment Needed
- An 8×8 inch baking pan
- Parchment paper
- Medium-sized, heavy-bottomed saucepan
- Rubber spatula
- Baking sheet
- Small bowl and spoon
Step-by-Step Instructions
First, let’s unlock the deepest coconut flavor by toasting. I spread 1 ½ cups of the shredded coconut on a baking sheet and toast it in a preheated 350°F oven for 5-7 minutes, stirring halfway, until it’s golden brown and fragrant. I watch it closely—it goes from perfect to burnt in seconds! This step makes a huge difference, transforming the coconut from chewy to crisp and intensely nutty. I let it cool completely on the pan. Meanwhile, I line my 8×8 inch baking pan with parchment paper, leaving overhangs on two sides to create a sling for easy removal later.
Now, for the creamy fudge base. In my heavy-bottomed saucepan, I combine the white chocolate chips, the entire can of sweetened condensed milk, and the butter. I place this over the lowest heat setting my stove offers. Patience is absolutely key here. I stand by the stove with my spatula, stirring almost constantly and scraping the bottom and corners thoroughly. White chocolate is delicate and will seize into a grainy mess if it gets too hot. You’re waiting for it to melt into a completely smooth, glossy, and thick pool of vanilla silk.
When the mixture is velvety and lump-free, I immediately remove the pan from the heat. Off the heat, I vigorously stir in the vanilla extract, the essential coconut extract, and that pinch of fine sea salt. The coconut extract is what gives this fudge its authentic, powerful coconut soul—don’t skip it! Now, I fold in the 1 ½ cups of cooled, toasted coconut. The mixture will become very thick, studded with all that glorious toasted goodness. The aroma at this point is absolutely intoxicating.(See the next page below to continue…)
Working quickly, I pour and scrape the thick fudge mixture into your prepared pan. I use the spatula to press it into a firm, even layer. For a beautiful finish, I take the remaining ½ cup of untoasted coconut, mix it with a tiny splash of milk or cream to help it clump, and press it evenly over the top of the fudge. This gives a pretty, snowy-white finish and a contrasting soft texture. I then let the pan cool completely on the counter before covering it and transferring it to the refrigerator to chill and firm up completely for at least 4 hours, or ideally overnight.
Pro Tips for Best Results
I tested the coconut component three different ways: with all untoasted coconut, with all toasted coconut, and with a mix. Here’s the winning formula: toast most of it for deep flavor in the fudge, but save some untoasted for the topping. Using all toasted coconut can make the fudge a bit too dry. Using all untoasted coconut lacks depth. This combination gives you the best of both worlds: intense flavor inside and a soft, pretty topping.
Here’s what I learned the hard way about the extracts: the coconut extract is non-negotiable for true flavor. Vanilla alone makes a sweet white fudge with coconut bits. Adding the coconut extract transforms it into a coconut-forward masterpiece. I’ve tried this step both ways, and trust me, this one works better. Also, make sure your toasted coconut is completely cool before folding it in. Warm coconut will melt the fudge base slightly, creating oily pockets and affecting the setting texture.
For the absolute smoothest texture, the quality of your white chocolate is paramount. A higher-quality chip or chopped bar with real cocoa butter will melt more smoothly and have a cleaner, less waxy finish than bargain brands. Also, when stirring in the extracts and salt off the heat, do it vigorously. This not only incorporates them fully but also helps cool the mixture down slightly, which is perfect for folding in the coconut without it sinking straight to the bottom.
Common Mistakes to Avoid
The biggest mistake is using high heat to melt the base. Impatience leads to scorched milk and seized, grainy chocolate. I did this on my first attempt, and there was no saving it—the fudge had a burnt taste and a sandy texture. Don’t do what I did! The lowest possible heat is your mantra. If you’re nervous, use a double boiler. It takes a few minutes longer, but it’s a foolproof method for that perfect, silky-smooth base every single time.(See the next page below to continue…)
Don’t skip toasting the coconut. This was my second test, and while the fudge was still sweet and creamy, it lacked the wow factor. Toasting caramelizes the sugars in the coconut, deepening its flavor from mild and chewy to rich, nutty, and complex. It’s the difference between a good fudge and an unforgettable one. It makes a huge difference.
Another error is not lining the pan. I thought a thorough buttering would suffice. The fudge, especially with all the coconut, stuck tenaciously to the corners. The parchment paper sling isn’t just for easy removal; it allows you to lift the entire block onto a cutting board, which is essential for getting clean, beautiful slices without them crumbling apart.
Finally, don’t skimp on the chilling time. I’ve poked it after two hours, lured by the amazing smell, and the center was still too soft to slice neatly, causing the topping to shift. A full four-hour chill is the minimum, but overnight is truly ideal. This slow, cold setting allows the fudge to firm up perfectly, giving you firm, sliceable squares with a flawless, creamy interior that holds the coconut in place.
Serving Suggestions
I love serving this fudge at a cool room temperature. I take it out of the fridge about 10-15 minutes before serving. This brief warming softens it just enough for that ultimate creamy, melt-in-your-mouth texture where the coconut flavor really blooms. Arranged on a light-colored platter or a piece of slate, the white fudge with its snowy coconut topping looks beautifully elegant and inviting.
For a perfect tropical pairing, I like to serve it with a cup of strong coffee or a black tea. The bitterness cuts through the rich sweetness beautifully. It’s also fantastic with a glass of cold milk or, for a special occasion, a piña colada or a coconut rum cocktail. The flavors complement each other wonderfully and make for a fun, themed dessert.
When gifting, which I do often, I stack the squares in a small cardboard box lined with wax paper or in a festive tin. I always add a tag that says “Coconut Fudge” because the flavor is such a delightful surprise. It’s a gift that feels incredibly thoughtful, homemade, and perfect for anyone who loves the taste of the tropics.
Variations & Customizations
For a “Chocolate-Dipped Coconut” version, melt ½ cup of semi-sweet chocolate chips with a teaspoon of shortening. Once the fudge squares are completely set, dip one corner or half of each square into the melted chocolate and let it set on parchment paper. It’s like a homemade Mounds bar and looks stunningly professional.
You can easily create an “Almond Joy” fudge by folding in ½ cup of chopped, toasted almonds along with the toasted coconut. After pressing the fudge into the pan, press a few whole roasted almonds on top for decoration. The combination of almond, coconut, and creamy white chocolate is absolutely divine.
For a “Key Lime Coconut” twist, add the zest of one lime and 1 tablespoon of lime juice to the fudge base along with the extracts. The bright, citrusy tang cuts through the sweetness and pairs magically with the tropical coconut, creating a wonderfully refreshing and complex flavor profile.
How to Store, Freeze & Reheat
For storing, I keep the fudge in an airtight container in the refrigerator, with sheets of parchment paper between the layers to protect the coconut topping. It stays fresh and maintains its perfect texture for up to two weeks. The fridge is essential for keeping it firm. It can sit out during a party, but for longer storage, always return it to the cold.
This fudge freezes beautifully. I wrap the whole block (or individual squares) very tightly in plastic wrap, then seal them in a heavy-duty freezer bag, pressing out all the air. It will keep well for up to 3 months. The coconut may lose a tiny bit of its texture after thawing, but the flavor remains perfectly intact. It’s fantastic for making ahead for holidays or gifts.
To thaw, I transfer the wrapped fudge from the freezer directly to the refrigerator and let it thaw slowly overnight. This prevents any condensation from forming on the surface, which can make the coconut topping soggy. There’s no need to reheat it. Once thawed, it’s ready to slice (if frozen as a block) or serve immediately, tasting just as rich and delicious as the day it was made.
Conclusion
This Coconut Fudge is more than just a candy to me; it’s a little edible escape. The process of toasting the coconut fills the house with happiness, and the creamy, tropical result never fails to bring a smile. I hope this recipe brings as much warmth and joy to your kitchen as it has to mine, creating sweet moments to savor and share. Now, go toast that coconut—your own batch of creamy, tropical bliss is waiting to be made.