
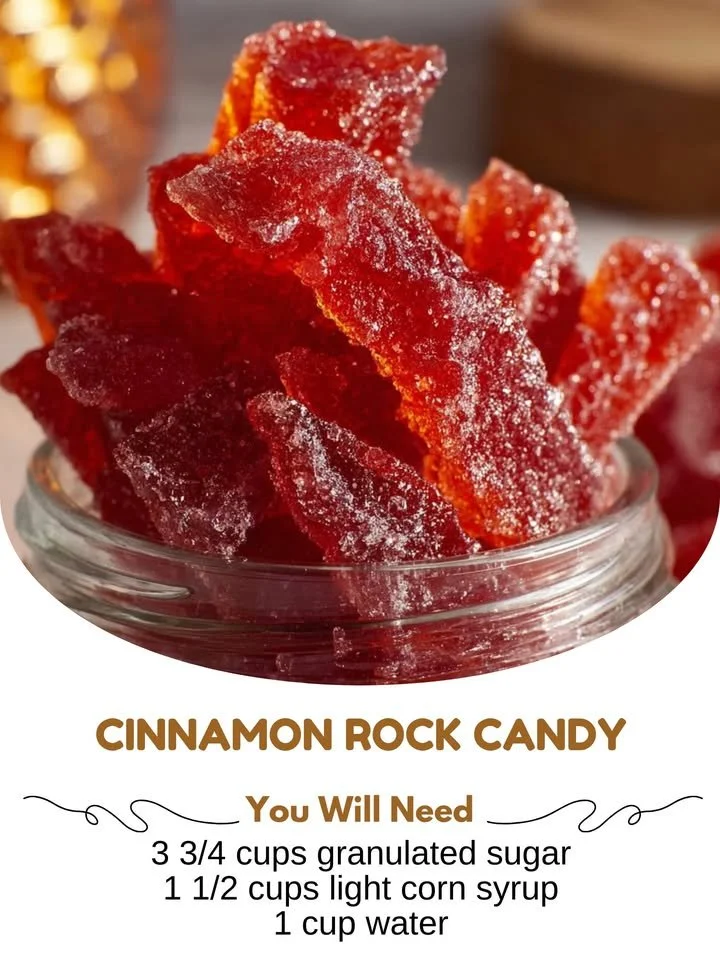
There’s something so magical about making candy from scratch. The warmth of the kitchen, the sweet aroma wafting through the air, and the anticipation of a delicious treat coming to life makes the entire experience enjoyable. Today, I’m excited to share my recipe for Cinnamon Rock Candy, a delightful combination of sweetness and spice that never fails to impress. Whether you’re looking to indulge yourself or make something special for friends and family, this recipe will bring a smile to your face.
Why You’ll Love This Recipe
This Cinnamon Rock Candy is not just a treat; it’s a fun project that takes you back to your childhood when making candy was a big event. The combination of cinnamon’s warm spices with the crisp, hard texture of rock candy is simply irresistible. Plus, it’s a fantastic way to use up some simple pantry staples while creating something extraordinary. Building this candy in my kitchen has always felt like a win-win situation for my sweet tooth and my inner child! (See the ingredients in the next page below…)
Ingredients
– 2 cups granulated sugar
– 1 cup water
– 1 tablespoon corn syrup
– 1 tablespoon ground cinnamon
– 1 teaspoon vanilla extract
– Food coloring (optional)
– Wooden skewers or clean string
Equipment Needed
– Medium-sized saucepan
– Candy thermometer
– Heat-resistant spatula
– Mixing bowl
– Glass jar or container for crystallization
– Parchment paper
Step-by-Step Instructions
To start, gather all your ingredients and equipment. In a medium-sized saucepan, combine the sugar, water, corn syrup, and ground cinnamon. Over medium heat, stir until the sugar is fully dissolved. This is such a satisfying process to witness—the sugar transforms into a syrup that smells divine! Once the mixture starts to bubble, stop stirring and attach your candy thermometer to the side of the pan, ensuring it does not touch the bottom. You want to bring this to a steady temperature of 300°F (hard crack stage) for that perfect crunch. (See the next page below to continue steps…)
After reaching the right temperature, carefully remove the saucepan from the heat. Stir in the vanilla extract and, if you fancy some color, add a few drops of your chosen food coloring. The mixture will froth and bubble a bit, which is perfectly normal. Allow the syrup to cool slightly for a minute, and then pour it into your prepared glass jar or container to let it crystallize. I usually prep my jars with wooden skewers or clean string for the candy to stick to, giving my rock candy those lovely elongated shapes.
Now comes the hardest part—waiting! Allow your candy to sit undisturbed for about 24 hours at room temperature. This waiting period builds the anticipation, and I always keep peeking at my creation. I love watching the crystals form and grow! After the waiting is over, gently remove your candy from the container, and break it into pieces. You can store it in a cool, dry place, and it’ll last quite a while… if it doesn’t get eaten first!
Pro Tips for Best Results
When I first made this cinnamon rock candy, I tried using less sugar, thinking it would still work. I quickly discovered that sugar is the star of this recipe; anything less compromises the texture and flavor. Stick to the full amounts for the best result—your patience will be rewarded!
I also recommend checking the temperature of the syrup using a reliable candy thermometer. My first attempt without one had me guessing, which led to a batch that was less than perfect. Investing in a good thermometer has made all the difference in my candy-making adventures!
Lastly, if you want to turn up the flavor, consider experimenting with variations in spices. You can replace or add other spices like nutmeg or even clove to give it that extra warmth. It’s amazing how a simple tweak can elevate the entire candy experience.
Common Mistakes to Avoid
One of the biggest mistakes I’ve encountered is rushing the temperature stage. Patience is key! If you’re in too much of a hurry, you’ll likely end up with a syrup that doesn’t reach the hard crack stage, resulting in a sticky mess instead of crunchy rock candy.
Another error I made was not letting the syrup cool slightly before pouring it into the jars. Jumping the gun led to some accidental burns on my hands and an uneven texture. Trust me—let it cool for just a moment!
Additionally, make sure not to cover your candy while it’s crystallizing. I once covered mine with a lid to keep dust away, but this trapped moisture inside and ruined my beautiful candy. Instead, a simple cloth or leaving it open works best.
Lastly, always use a clean jar or container for crystallization. I learned the hard way that even the tiniest residue from an old batch can spoil the flavor or texture of your new creation. A clean slate is essential!
(See the next page below to continue…)
Serving Suggestions
These delectable cinnamon rock candies are perfect as sweet little gifts or party favors. I love to package them in clear bags tied with lovely twine for special occasions. They make a thoughtful treat to bring to friends—everyone appreciates homemade goodies!
You can also serve them as a fun dessert topping if you’re feeling creative. Crushed rock candy sprinkled atop ice cream or cakes adds a delightful crunch and a pop of color. Trust me when I say your guests will be impressed!
Of course, there’s nothing wrong with enjoying them straight out of the jar while watching a movie at home. The crunch and warmth of cinnamon is such a comforting combination; I can hardly resist!
Variations & Customizations
If you want to explore a different flavor profile, why not experiment with flavored extracts? Almond or maple extracts can create a unique twist on the traditional cinnamon flavor. I’ve made variations using peppermint extract for the holidays, and they were a huge hit!
You can also play around with how you shape your candy. Instead of pouring your syrup into jars, try making smaller batches and drizzling it onto a parchment-lined baking sheet for fun, irregular shapes. Each piece will have its own character, which can be a conversation starter when serving!
For those with a sweet tooth for heat, consider infusing your syrup with a hint of cayenne pepper or ginger. It adds a spicy kick that plays wonderfully with the sweetness of the candy.
How to Store, Freeze & Reheat
To store your cinnamon rock candy, be sure to keep it in an airtight container at room temperature. It will stay fresh for weeks, but I can guarantee it’ll disappear long before then!
If you want to double or triple this recipe for a party or event, you can easily make larger batches. Just make sure your container has enough space to avoid any crushing during storage.
While I don’t recommend freezing rock candy due to potential texture changes, if you find yourself with extras, just keep them in a cool, dry place. If it starts to become sticky, you can allow it to air dry before using it again, which usually helps regain its original crunch.
Conclusion
In conclusion, making cinnamon rock candy has been one of the most delightful projects in my kitchen. The burst of flavor and crunchy goodness encapsulated in each piece always brings a sense of happiness. I hope this recipe encourages you to gather your ingredients and create a little bit of sweetness at home. Happy candy making!