
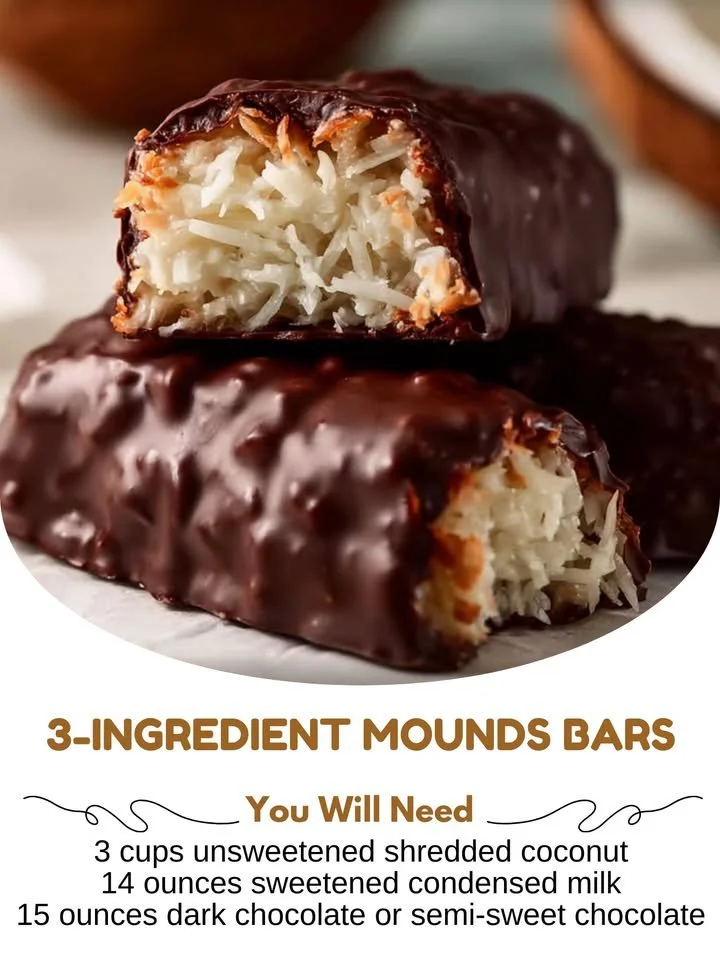
Have you ever craved something chocolatey and coconutty but didn’t want to spend hours in the kitchen? I have the perfect solution for you: 3-Ingredient Mounds Bars! These blissful treats remind me of warm summer days when coconut and chocolate danced together, creating an irresistible flavor combination. With just three humble ingredients, you can whip up a batch that will impress your friends and family, all without breaking a sweat.
Why You’ll Love This Recipe
You’ll love this recipe because it’s unbelievably simple, requires minimal ingredients, and satisfies that sweet tooth without any fuss. In just a few steps, you’ll have delicious homemade treats that taste like they came from a fancy candy store. Plus, these Mounds Bars are perfect for any occasion, whether it’s a casual get-together or a cozy movie night at home. They’re also a great way to involve kids in the kitchen, as the steps are fun and easy! (See the ingredients in the next page below…)
Ingredients
– 2 cups unsweetened shredded coconut
– 1 cup sweetened condensed milk
– 1 cup semi-sweet chocolate chips
Equipment Needed
– Mixing bowl
– Baking sheet
– Parchment paper
– Microwave-safe bowl or double boiler
– Spoon or spatula
– Refrigeration space
Step-by-Step Instructions
To kick off this delicious adventure, start by combining the shredded coconut and sweetened condensed milk in a mixing bowl. You want to mix them thoroughly until the coconut is well-coated and the mixture resembles a sticky dough. It’s such a delight to see everything come together; the coconut smells heavenly as it meshes with the sweetened milk. Once you’ve achieved that perfect consistency, it’s time to form your bars! I find that using my hands helps shape them into small rectangles easily. Just aim for about 1-inch thick bars. (See the next page below to continue steps…)
Next, I line a baking sheet with parchment paper, which keeps the bars from sticking and makes for easy cleanup later. Once your bars are shaped, place them on the prepared baking sheet and pop them into the freezer for about 30-60 minutes. This is where the magic happens; chilling the bars helps them solidify, making the chocolate coating much more effective later. While they’re chilling, melt your chocolate chips in a microwave-safe bowl or a double boiler. I love melting them slowly, stirring occasionally, to achieve that silky-smooth texture—trust me, it makes all the difference!
After your Mounds Bars have successfully set in the freezer, it’s time for the best part: the chocolate coating. Take each bar and dip it into the melted chocolate, making sure to coat it evenly. If you’re like me and enjoy a thick layer of chocolate, don’t hesitate to give it a second dip! Once coated, return the bars to the parchment-lined baking sheet and let them cool for about 10-15 minutes. You’ll adore watching the chocolate harden and create that beautiful, glossy finish.
Pro Tips for Best Results
I tested this recipe three ways to find the perfect ratios and techniques. For an ultra-chewy texture, I recommend using fresh coconut, which adds a delightful bite. On the other hand, dried coconut works well too; it just offers a different mouthfeel. I also found it useful to let the melted chocolate sit for a minute or two before dipping the bars. This extra cooling time prevents the chocolate from being too runny, making it easier to get an even coating.
Another tip is to ensure your coconut and condensed milk mixture is well-combined before forming the bars. I made this mistake once, and some bars turned out crumbly while others were too sticky. When they’re combined well, every bite will be perfectly rich and indulgent. Don’t forget that chilling time! The longer they freeze, the easier they’ll be to dip in chocolate.
Finally, I discovered that using high-quality chocolate really elevates these Mounds Bars. I tried semi-sweet, milk, and even dark chocolate, and each added its own unique flavor profile. But the semi-sweet chocolate was my favorite—it created a lovely balance with the sweetness of the coconut mixture!
Common Mistakes to Avoid
One common mistake I’ve encountered is rushing the preparation. Trust me, patience is key! Not letting the bars freeze for long enough can lead to a messy dipping experience. I made this mistake once and ended up with chocolate-covered hands instead of the neat treat I envisioned. Be sure to give them enough time to chill—it makes all the difference!
Another pitfall is not using parchment paper. I initially thought I could skip this step, and oh boy, did I regret it! The bars stuck to the baking sheet, which made them difficult to remove and completely ruined the look for my dessert platter. So, don’t overlook that parchment paper; it’s a small step that will save you a lot of hassle.
Also, while it may be tempting to hastily melt the chocolate at high power, doing so results in burnt chocolate. Low and slow is the way to go here. Gradually heating it prevents that unpleasant charred taste and gives you a smooth, glossy finish for your bars. Lastly, be mindful of how long you dip each bar into the chocolate; a quick dip will result in uneven coverage, and nobody wants to see a half-naked Mounds Bar!
Serving Suggestions
When it comes to serving these scrumptious Mounds Bars, presentation is key! I love arranging them on a beautiful platter, garnished with a sprinkle of coconut flakes for that added touch. You can also offer them alongside fresh fruit, like strawberries or raspberries, to complement the chocolate and coconut flavors perfectly. The contrast of colors is also visually appealing!
If you’re throwing a party, these bars make for perfect finger food. Just cut them into bite-sized pieces and serve them on toothpicks. This way, your guests can grab and go, making it easy to mingle without sacrificing taste. And believe me, everyone will be asking for the recipe!
For a cozy night in, I love pairing these Mounds Bars with a warm cup of tea or coffee. The slight bitterness of the drink perfectly balances the sweetness of the bars, creating a harmonious experience for your taste buds. You could even serve them as a delightful dessert option alongside a scoop of vanilla ice cream for an extra special treat.
Variations & Customizations
Now, let’s talk about how you can make these Mounds Bars truly your own! One variation I adore is adding a pinch of sea salt on top to enhance the flavors. It offers a wonderful contrast to the sweetness and complements the chocolate perfectly. Just a little sprinkle can take these bars to the next level!
Another fun idea is to mix in some nuts or dried fruit into the coconut mixture if you’re feeling adventurous. Chopped almonds or macadamia nuts add a crunchy texture that works beautifully with the chewy coconut. Similarly, dried cherries or even pineapple bits can add a fruity twist to your treat!
If you’re looking to make these bars healthier, consider swapping out the sweetened condensed milk for a sugar-free alternative. I’ve experimented with reduced-sugar options, and surprisingly, they still tasted great! Just remember, the texture may change slightly, so adjust accordingly to maintain that chewy consistency we all love.
How to Store, Freeze & Reheat
Storing these Mounds Bars is a breeze! Once cooled and set, simply place them in an airtight container and store them in the refrigerator. They’ll stay fresh for about a week, although I bet they won’t last that long! The fridge helps keep that delightful texture and taste intact, allowing you to enjoy them for days.
If you want to make these bars ahead of time, they’re freezer-friendly too! I always prepare a double batch and stash some in the freezer for those surprise cravings. Just wrap each bar individually in plastic wrap or airtight bags for extra protection against freezer burn. They can last up to three months in the freezer—perfect for those moments when you need a quick sweet fix!
Reheating isn’t necessary unless you want that lovely melty chocolate texture again. If that’s the case, simply let them sit at room temperature for a few minutes and enjoy them as if they were just made. Trust me, there’s nothing quite like a smooth chocolate coating meeting that fluffy coconut interior!
Conclusion
I hope you’re inspired to give these 3-Ingredient Mounds Bars a try! The rich, chocolatey, and coconut flavors are simply irresistible. With their ease of preparation and the joy of making them yourself, you’ll find that these delightful treats can brighten any day. Plus, sharing them with loved ones will make you the star of any gathering. Happy baking, and enjoy every sweet bite!