
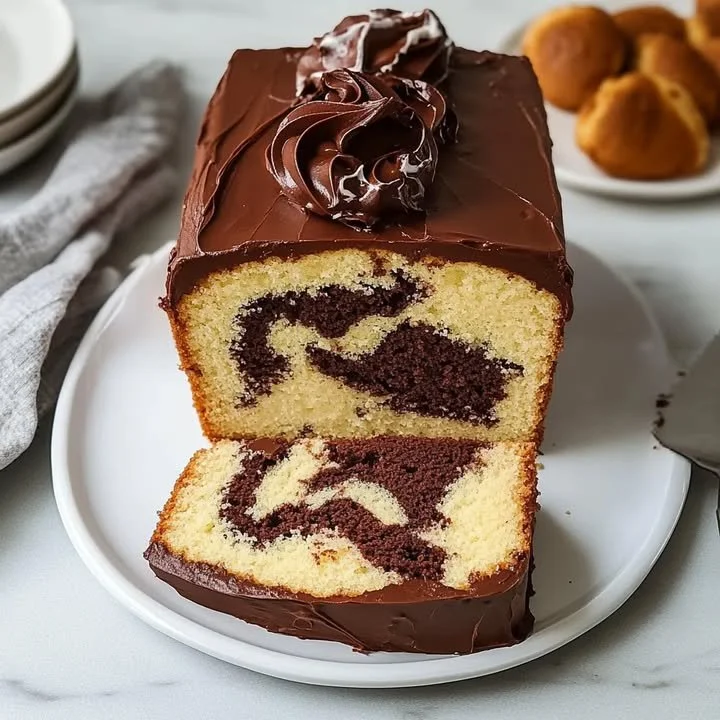
Next, in another bowl, I mix the wet ingredients: eggs, buttermilk, melted butter, and vanilla extract. This mixture adds moisture and flavor to the bread. Once everything is well combined, I fold the wet mixture into the dry ingredients until just combined. I try not to over-mix here; I want to keep the bread light and fluffy! Now comes the fun part. I scoop half of the vanilla batter into the greased pan, then pour in half of the chocolate batter, and I repeat with the remains, creating a lovely swirl pattern. I take a knife and gently swirl the batters together, which creates a beautiful marbled effect.
After that, I pop the loaf into the oven and bake it for about 50-60 minutes. While it’s baking, my kitchen fills with the most heavenly aroma. I can hardly wait! To check if the bread is done, I stick a toothpick into the center, and it should come out clean or with only a few moist crumbs attached. Let it cool for a bit in the pan before transferring it to a cooling rack. I always end up stealing a slice while it’s still warm; I just can’t resist!
Pro Tips for Best Results
I tested this recipe three ways and found that using room-temperature ingredients makes a significant difference in the final texture. It helps achieve that soft, tender crumb we all love! Also, I recommend using high-quality cocoa powder for the best chocolatey flavor. I tried a few brands, and the richness really shines through in the finished bread.
Another tip I picked up is not to over-swirl the batters. If you overdo it, you’ll end up with a muddy mixture instead of beautiful swirls. I usually give it about three to four gentle swirls with my knife, and that’s usually enough to create that gorgeous marbling effect. Lastly, let the bread cool completely before slicing it. I know the smell is tempting, but this will prevent it from crumbling apart when you cut into it!
Common Mistakes to Avoid
One common mistake I made during my early baking days was not paying attention to my measurements. Make sure to spoon the flour into your measuring cup instead of scooping it directly. Scooping packs the flour down, resulting in too much flour and a heavy loaf. Trust me; I learned that the hard way!
Another pitfall is skipping the greasing of the loaf pan. I definitely left a batch of chocolate marble bread stuck to the bottom of the pan once, and it was such a pain to clean up. A good spray of cooking oil or a touch of butter will ensure your bread releases without a hitch.
Overbaking is another mistake that many people, including myself, occasionally fall into. Every oven is different, and I always recommend checking the bread a few minutes before the suggested baking time. You want that perfect golden-brown crust!
Lastly, don’t forget to let it cool completely on the cooling rack! Cutting into a warm loaf is tempting, I know. But allowing it to cool helps with the texture, so you get those lovely, clean slices. (See the next page below to continue…)