
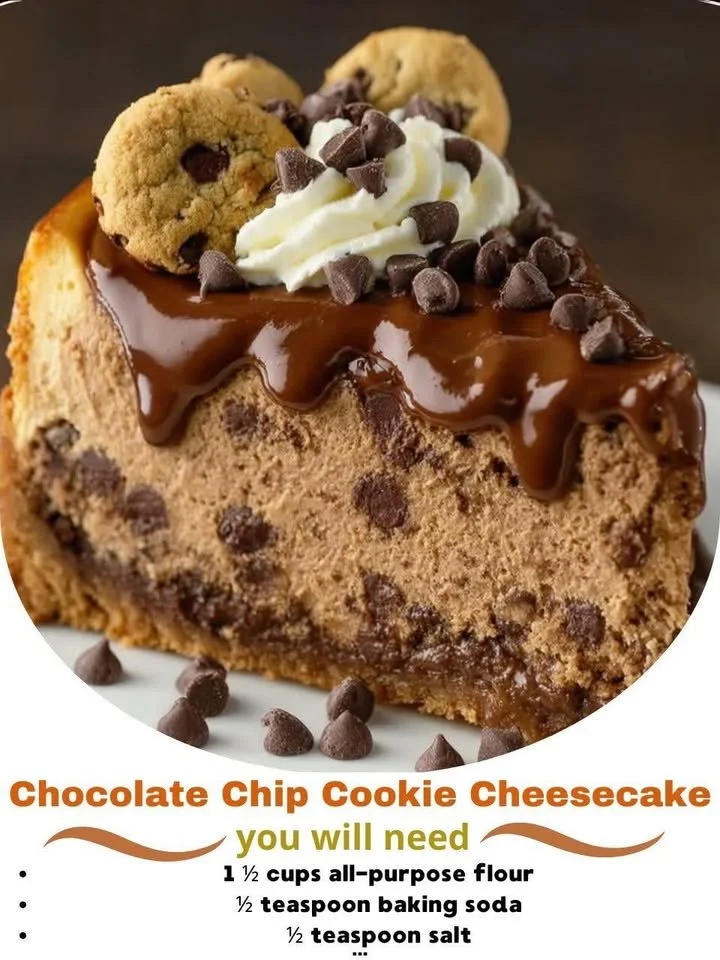
Welcome to my kitchen! Today, I’m excited to share with you one of my absolute favorites: Chocolate Chip Cookie Cheesecake. This delightful dessert combines the creamy richness of cheesecake with the nostalgic, comforting flavors of chocolate chip cookies. It’s a sweet loaf of happiness that’s sure to please anyone who takes a bite, and I can’t wait for you to try making it yourself!
Why You’ll Love This Recipe
This Chocolate Chip Cookie Cheesecake is a showstopper that combines two classic desserts into one delightful treat. The smooth and creamy cheesecake filling perfectly complements the buttery, chocolate chip cookie crust. Every slice is an explosion of flavors, and you’ll find the textures to be irresistible! Whether you’re celebrating a special occasion or just indulging yourself on a weekday, this cheesecake is sure to become a favorite in your home. (See the ingredients in the next page below…)
Ingredients
– 1 ½ cups all-purpose flour
– ½ teaspoon baking soda
– ¼ teaspoon salt
– ½ cup unsalted butter, softened
– ½ cup granulated sugar
– ½ cup brown sugar, packed
– 1 large egg
– 1 teaspoon vanilla extract
– 1 cup semi-sweet chocolate chips
– 16 ounces cream cheese, softened
– ¾ cup granulated sugar
– 2 large eggs
– 1 teaspoon vanilla extract
– 1 tablespoon all-purpose flour
Equipment Needed
– Mixing bowls
– Electric mixer or whisk
– 9-inch springform pan
– Measuring cups and spoons
– Rubber spatula
– Baking sheet
– Parchment paper
– Cooling rack
Step-by-Step Instructions
Let’s get started! First, preheat your oven to 350°F (175°C). I love the anticipation of those warm baking aromas wafting through my kitchen. To make the cookie crust, whisk together the flour, baking soda, and salt in a bowl. In another mixing bowl, cream the softened butter with both sugars until it becomes light and fluffy. Then, add the egg and vanilla extract, mixing until combined. Gradually incorporate the dry ingredients until fully mixed, and then fold in those glorious chocolate chips. *This is where the smell starts to kick in, and it’s heavenly!* Just a quick note: I like to keep my dough slightly chilled before spreading it in the pan. This helps to create a firmer layer for baking. (See the next page below to continue steps…)
Spread the cookie dough evenly in the bottom of your springform pan, making sure to press it down firmly. I usually like to take the time to even out the edges for a more polished look. Bake for about 10-12 minutes or until it’s just lightly golden. Don’t worry if it seems a little undercooked; it will firm up while cooling! While that’s in the oven, you can whip up the cheesecake filling. In a large mixing bowl, beat the softened cream cheese and sugar until it becomes smooth and fluffy, which takes about 2-3 minutes. Add the eggs one at a time, then mix in the vanilla extract and flour until the ingredients are just blended together. You want that smooth texture, so don’t overmix—trust me, I learned that the hard way!
Once your crust has cooled a bit, pour the cheesecake filling over it, spreading evenly. Drizzle any remaining chocolate chips over the top for that extra indulgence! Place everything back into the oven and bake for about 40-50 minutes. You’ll know it’s done when the edges look set, but the center still has a slight jiggle. While it bakes, your house will fill with the most delightful scent that’s hard to resist! I usually take this time to tidy up and daydream about my upcoming slice of cheesecake.
Pro Tips for Best Results
When I first tested this recipe, I tried using different types of chocolate, including milk chocolate and dark chocolate. While they all taste amazing, semi-sweet really stands out for the balance of flavor without being overly rich. I also found that letting the cheesecake cool slowly in the oven with the door cracked helps prevent cracks on the surface. Just turn off the oven but leave the cake inside for an additional 60 minutes to create that perfect texture!
Consistency is key to a smooth cheesecake filling. I’ve learned that softening the cream cheese ahead of time is essential; if it’s too cold, you’ll end up with lumps – yuck! While I’ve used a hand mixer successfully, I swear by my stand mixer for that silky smooth finish. If you have one, it’s totally worth it! Lastly, I recommend chilling the cheesecake in the fridge for at least four hours, if not overnight. This waiting period is torturous but oh-so-important for the flavors and texture to meld nicely!
Common Mistakes to Avoid
One common mistake I see often is not using room temperature ingredients. If your cream cheese is cold straight from the fridge, you’ll end up with a lumpy filling that doesn’t blend well. So make sure to plan ahead and let your ingredients come to room temperature before starting! Also, don’t skip the baking step for the cookie crust. Some may think it’s okay to just add the filling directly on raw dough, but this will lead to a soggy bottom—definitely not what we want! (See the next page below to continue…)
Overbaking can also ruin your cheesecake. If you see it start to crack, it’s an indicator that it’s been in the oven too long. That slight jiggle in the middle is what you’re looking for when it’s done! Lastly, I realize that patience is a virtue, especially when it comes to chilling. It can be tempting to cut in early, but if you give it time to set properly in the fridge, the cheesecake will slice much cleaner and be twice as delicious!
Serving Suggestions
When it comes to serving this Chocolate Chip Cookie Cheesecake, I love to add a dollop of whipped cream on top for a touch of elegance and that extra creaminess. Sometimes I even sprinkle a few mini chocolate chips over the whipped cream for a decorative touch! It also pairs beautifully with fresh berries or a drizzle of caramel sauce, adding a pop of color and flavor contrast that makes each plate look appealing. I also like serving it with a scoop of vanilla ice cream on the side for those who want a warm-and-cold dessert experience!
An unexpected but delightful serving option is to enjoy it with a cup of coffee or milk. I find that the rich flavors really shine when complemented by a warm beverage. It’s particularly cozy during the cooler months, making it an ideal dessert for gatherings or quiet nights in.
If I’m serving guests, I often cut small slices to offer a variety of desserts rather than letting anyone have a massive slice. Everyone loves a little sample of everything, and it keeps the options plentiful and fun!
Variations & Customizations
While this recipe is a classic, you can totally put your spin on it! One of my favorite variations is to fold in crushed Oreos or peanut butter chips into the cheesecake filling for an extra layer of sweetness and texture. If you’re feeling adventurous, try adding a swirl of raspberry or caramel sauce through the cheesecake mixture before baking. Not only does it look stunning, but it imparts a lovely contrast of flavors!
For a nutty twist, you can also add some chopped nuts—walnuts or pecans work wonderfully—for that added crunch. Just be sure to toast them lightly beforehand to enhance their flavor. If you want to make it more festive, consider adding a pinch of cinnamon or nutmeg to the crust and filling during those holiday seasons.
Lastly, if you’re trying to lighten things up, you can play around with lighter cream cheese alternatives and Greek yogurt in the filling instead of all cream cheese. I did this once, and while it changes the texture slightly, it still results in a delicious dessert!
How to Store, Freeze & Reheat
To store leftover cheesecake, be sure to keep it covered in the fridge for up to 5 days. I usually place it in an airtight container or cover it tightly with plastic wrap. It’s hard to resist sneaking a slice every time I open the fridge, though! If you want to stash it away for later, you can freeze slices for up to 2-3 months. Just make sure they are well-wrapped in plastic wrap and then placed in a freezer-safe container.
When it comes time to enjoy your frozen cheesecake, let it thaw in the refrigerator overnight or for a few hours on the counter. Reheating isn’t usually necessary, as I’ve found that it’s best served chilled. However, if you do prefer a warm slice, you can microwave it for about 10-15 seconds for a comforting, melty bite.
I recommend enjoying it within a couple of days after thawing, as I find that the flavors are most vibrant when freshly made. Between the rich chocolate and creamy cheesecake layers, it’s a treat worth savoring!
Conclusion
I hope you enjoy making this Chocolate Chip Cookie Cheesecake as much as I do! It’s a sweet treat that brings joy to my family and friends and is always a hit at gatherings. Trust me; once you try making it, you’ll love the process and the results. Happy baking, and enjoy every decadent bite!