
Next, in a separate bowl, I whisk together the flour, baking soda, and salt – a simple yet crucial step to ensure everything is evenly mixed. Gradually, I add this dry mixture into the wet ingredients, mixing until just combined. It’s important not to overmix here; I like to switch to a spatula for this part to make it easier. Then, I fold in those delightful crushed Butterfinger bars, the chocolate chips, and caramel bits, which adds layers of flavor. The dough will be thick and slightly sticky, but that’s just how I like it!
Once the dough is ready, I scoop generous tablespoons onto a lined baking sheet, leaving space between each mound to allow for spreading. I usually aim for 2-3 inches apart, as I like my cookies to have room to breathe! Bake them in the preheated oven for about 10-12 minutes until the edges are lightly golden but the centers still look a bit soft. After removing them from the oven, I let them rest on the baking sheet for a few minutes before transferring them to a cooling rack, letting all those delicious smells waft through my kitchen.
Pro Tips for Best Results
One of the best things I’ve learned while perfecting this recipe is that using room temperature ingredients (like butter and eggs) makes such a difference in the final texture of the cookies. They come out softer and chewier, which is exactly what I want in a cookie! I also recommend measuring your flour the right way – spoon it into your measuring cup and level it off, rather than scooping straight from the bag, to avoid dense cookies.
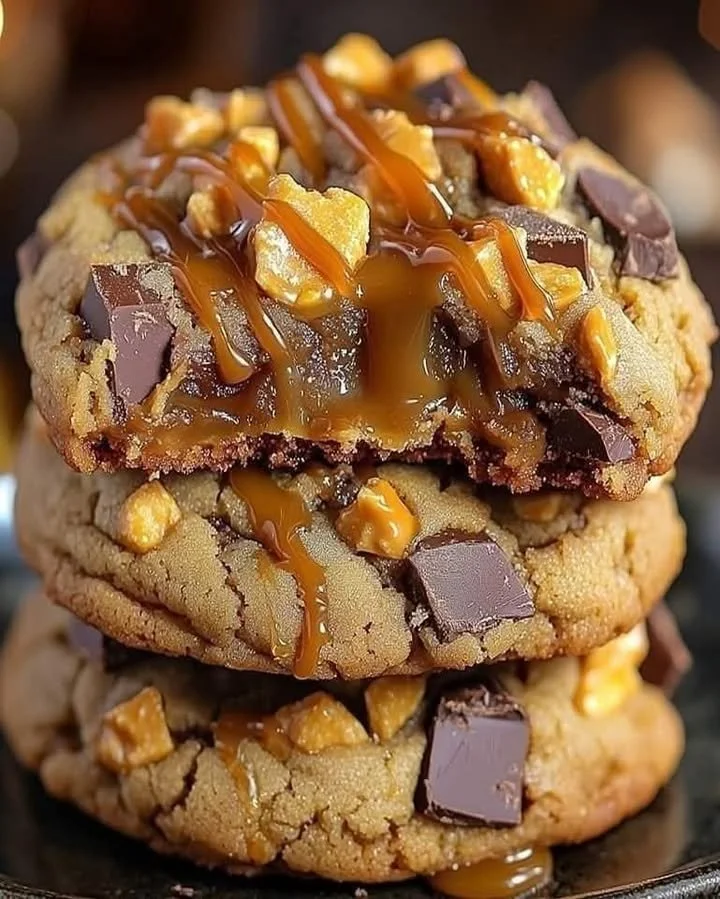
The type of Butterfinger candy bars you use can change the experience, too. I’ve tested this with both fun-sized and full-sized bars, and while both are delicious, the smaller pieces melt a bit more into the cookie, making for a wonderfully gooey experience. Finally, don’t skip the resting time on the cooling rack. It helps the cookies set up properly and enhances their texture, making them the perfect balance of chewy and crunchy.
One last thing: if your kitchen gets too warm while baking, I recommend chilling the dough for about 30 minutes before baking. I’ve found that this simple step makes for thicker cookies that hold their shape beautifully!
Common Mistakes to Avoid
One big mistake I initially made was overbaking the cookies. It’s tempting to leave them in for “just a bit longer,” but I’ve learned that they will continue to cook even after you’ve taken them out of the oven. Trust that the cookies will set as they cool on the baking sheet, and take them out while they still look a touch underbaked for the best results! (See the next page below to continue…)
Another common error is not letting the butter soften enough. Cold butter can’t cream properly, leading to a denser cookie. I always take my butter out well in advance, allowing it to come to room temperature so that it mixes effortlessly with the sugars.
I’ve also experienced the frustration of mixing too much. Once I add the flour mixture, I mix just until it’s combined. Overmixing can develop gluten, leading to tougher cookies than I desire. It’s all about that delightful, tender texture! Finally, if you don’t line your baking sheets with parchment paper or cooking spray, you risk sticky situations. I’m all about easy clean-up, and using parchment ensures the cookies glide right off without any crumbling.
Serving Suggestions
These Butterfinger Caramel Crunch Cookies are a hit all on their own, but there are a few ways to elevate the experience. I often serve them warm, with a scoop of vanilla ice cream on top for an extra decadent treat. The contrast of the warm cookie with the cool ice cream is simply divine, and it’s a favorite among my friends!
For an added touch of indulgence, I sometimes drizzle melted chocolate over the top of each cookie or sprinkle a pinch of sea salt right before serving. It enhances the sweet and salty flavors and makes the cookies look even more appealing. I’ve even made a quick dessert bar by placing the cookies on a platter alongside some fruity and nutty toppings, allowing everyone to create their own unique combinations.
If I’m feeling festive, I’ll package them up in a cute box with a ribbon for gifts. Who wouldn’t love receiving a homemade treat from my kitchen? It’s a perfect way to share the joy of baking with friends and family!
Variations & Customizations
If you want to switch things up, one of my favorite variations is to swap out the Butterfinger bars for Reese’s Pieces or chopped Snickers bars. The caramel and chocolate flavor remains, but it adds a different kind of rich sweetness that’s equally satisfying. I’ve also tried adding a touch of espresso powder to the dough for a mocha twist – it’s amazing how a little coffee flavor can elevate the entire cookie!
For those who enjoy a bit of spice, consider adding a teaspoon of cinnamon or a pinch of nutmeg to the dry ingredients. It gives the cookies a warm, cozy flavor that’s perfect for colder months or holiday gatherings. Additionally, I once experimented with adding chopped nuts like pecans or walnuts, which provided a wonderful crunch and depth to the texture.
And if you’re looking for a healthier twist, you can replace half of the all-purpose flour with whole wheat flour. It adds nuttiness and keeps the cookies soft while adding extra fiber. You can also experiment with using dark chocolate chips instead of semisweet for a richer chocolate experience!
How to Store, Freeze & Reheat
Storing these cookies is a breeze! I usually keep them in an airtight container at room temperature, where they can last for up to a week. However, it’s hard to resist them for that long in my house! If you want to keep them fresher for longer, you can always pop them in the fridge; just make sure to let them come back to room temperature before enjoying them again!
Freezing the cookies is an option I often recommend, especially if you want to save some for a future craving. I like to freeze them in a single layer on a baking sheet until firm, then transfer them to a freezer-safe bag or container. When I’m craving a cookie, all I have to do is pop one or two directly into the oven (no need to thaw!) at 350°F for about 12-15 minutes, and I’ll have warm, fresh cookies again.
When reheating, whether from the fridge or freezer, I suggest placing them in the microwave for about 10-15 seconds. This way, they become warm and soft again, and that gooey caramel inside just oozes with deliciousness. You can also use the oven, but I find the microwave is quicker for those late-night cravings!
Conclusion
Baking Butterfinger Caramel Crunch Cookies has turned into a beloved activity in my kitchen, and I’m so excited to share this recipe with you. The joy of combining simple ingredients to create magic is something I cherish. I know you’ll love these cookies just as much as I do, and I hope they bring happiness and warmth to your home, too. Happy baking!