
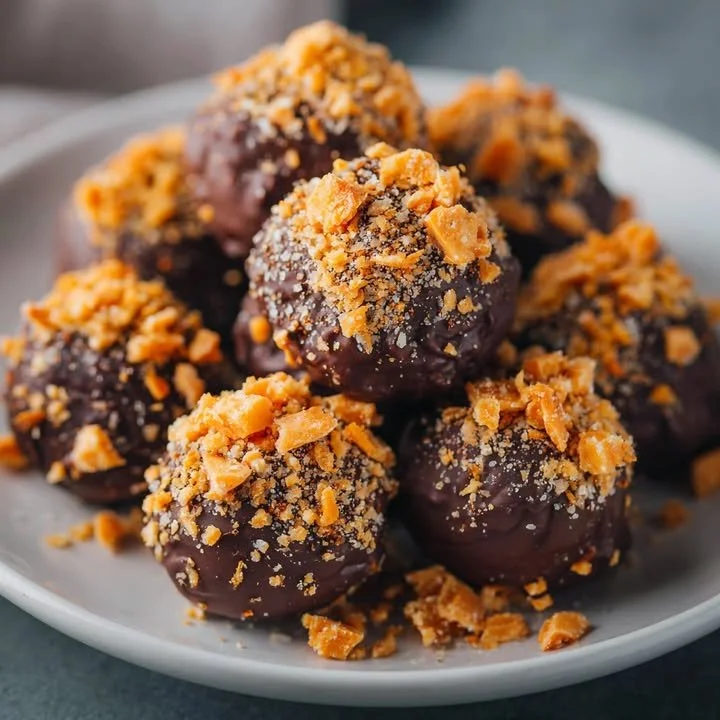
Oh, how I adore truffles! They’re rich, they melt in your mouth, and you can never have just one. One balmy afternoon in my kitchen, I found myself with the desire for something sweet but not too heavy. That’s when I decided to whip up a batch of No Bake Caramel Crunch Butterfinger Truffles. They are the perfect indulgence, combining creamy peanut butter, crispy Butterfinger candy, and luscious caramel — all without turning on the oven!
Why You’ll Love This Recipe
You’re going to love how easy and fun it is to make these truffles. They’re the ultimate treat to satisfy your sweet cravings without the fuss of baking. Each bite gives you that heavenly burst of chocolate, combined with a delightful crunch and the richness of peanut butter caramel. Trust me; these little bites of joy will quickly become your go-to dessert! (See the ingredients in the next page below…)
Ingredients
– 1 cup creamy peanut butter
– 1 cup crushed Butterfinger candy bars (about 4-5 bars)
– 1 cup powdered sugar
– 1 cup crushed graham crackers
– 1/2 cup caramel sauce
– 2 cups milk chocolate chips
– 1 tablespoon coconut oil (optional for melting chocolate)
– Sea salt for sprinkling (optional)
Equipment Needed
– Mixing bowl
– Rubber spatula or wooden spoon
– Baking sheet
– Parchment paper
– Microwave-safe bowl
– Refrigerator
Step-by-Step Instructions
To start, in a mixing bowl, combine the creamy peanut butter and powdered sugar. It should come together nicely into a thick, sweet mixture that looks like playdough — trust me, it’s almost impossible to resist licking the spoon! Once combined, fold in the crushed Butterfinger bars and graham cracker crumbs until everything is evenly distributed. This texture is going to be so delightful! (See the next page below to continue steps…)
Next, take a heaping spoonful of the mixture and roll it into small balls, about the size of a walnut. It’s okay to get a little messy here! I like to put them on a parchment-lined baking sheet to keep things tidy. Once you’ve rolled all the truffles, pop them into the refrigerator for about 30 minutes; this will help them firm up nicely. While they’re chilling, melt the chocolate chips in a microwave-safe bowl – be sure to stir every 30 seconds until they’re smooth and glossy. This step is where my kitchen starts to smell divine!
After chilling, remove the truffles from the fridge. Now comes the fun part: dip each ball into the melted chocolate, allowing any excess to drip off before placing them back on the parchment-lined sheet. You can sprinkle a touch of sea salt on top for an extra flavor kick. Once they’re all coated, let them set for about 10-15 minutes until the chocolate is firm. Finally, drizzle any leftover caramel sauce over the top for that extra touch of sweetness. They might look fancy, but I promise they’re incredibly simple to make!
Pro Tips for Best Results
When I first made these, I tried using crunchy peanut butter, thinking it would add extra texture, but I found the creaminess from the smooth peanut butter really helps bind everything together. I highly recommend sticking to the creamy option for that reason. For the chocolate coating, I’ve also tested using white chocolate instead of milk chocolate, and the results were equally delicious — just a different flavor profile!
Keep in mind that each brand of chocolate chips differs slightly in how smoothly they melt. I always like to add a teaspoon of coconut oil, which not only helps with the melting process but also creates a nice, shiny finish after they cool. If you’re dealing with a particularly hot kitchen, consider chilling your chocolate as well, so it sets faster!
Lastly, don’t skip the chilling step after rolling the truffles. Trust me, this makes a WORLD of difference in texture and flavor. When they’re nice and firm, they’ll hold their shape better during the chocolate dunking adventure!
Common Mistakes to Avoid
One common mistake I made my first time was not crushing the Butterfingers finely. It left large chunks in the truffles, which made it tricky to form them. I found using a zip-lock bag and a rolling pin to crush the candy bars is a great way to get that perfect fine crumb. If your truffles are falling apart, they may need more graham cracker or powdered sugar to bind thoroughly. (See the next page below to continue…)
Additionally, some people skip the chilling step, thinking they can just dive straight into the chocolate coating. But let me tell you, if you try to coat warm truffles, they’ll fall apart or not maintain their shape, resulting in a melty mess. It’s so worth waiting just a little longer for that perfect texture!
Finally, I highly recommend tasting the mixture before rolling it into balls. The sweet and savory balance is essential! If it’s too sweet for your liking, tweaking the ratios a little can make a huge difference. After all, your taste buds should lead the way!
Serving Suggestions
I love serving these truffles at gatherings; they’re always an instant hit! One suggestion is to arrange them on a decorative platter and drizzle some extra caramel on top for presentation. They also look stunning sprinkled with a little coarse sea salt to emphasize that sweet-and-salty flavor combination.
For a tidy serving option, I sometimes put them into mini cupcake liners, which gives them an extra touch of finesse while making them easy to grab and enjoy. They also make great gifts! Just package them up in a cute jar tied with a ribbon, and you’ve got a thoughtful and delicious present.
When it comes to pairing, a hot cup of coffee or a tall glass of cold milk is the perfect companion for these truffles. The rich flavors of each bite combined with your drink of choice create a delightful tasting experience.
Variations & Customizations
Feeling creative? You can easily customize these truffles based on your taste preferences or dietary needs! If you’re a coconut lover, try adding finely shredded coconut to the mixture; it complements the peanut butter wonderfully. You could even swap out the Butterfinger candy for crushed Oreos or Snickers for a different flavor twist.
If you want to make these a bit healthier, using dark chocolate instead of milk chocolate is a great option, and you can try a natural sweetener like agave syrup in place of powdered sugar. This allows you to indulge without feeling quite so guilty. Plus, adding a touch of vanilla extract elevates the flavors beautifully!
Lastly, consider adding a pinch of cayenne pepper or espresso powder for a sophisticated kick. It might sound unexpected, but I love how these flavors contrast with the caramel and chocolate, making each bite exciting!
How to Store, Freeze & Reheat
Storing these decadent truffles is easy — just place them in an airtight container lined with parchment paper to avoid sticking. They’ll keep well in the refrigerator for up to two weeks. Trust me, if you can resist them that long, you’re doing better than I ever could!
If you want to make a larger batch ahead of time, I’ve found that freezing them works wonderfully too. Lay them out on a baking sheet to freeze them individually, then transfer the balls to a freezer-safe container or zip-lock bag. They’ll last for about 2-3 months in the freezer. Just remember to thaw them in the fridge before indulging!
Reheating these truffles isn’t necessary, but if they’ve been in the fridge and you prefer them softer, leave them out at room temperature for about 15-20 minutes before serving. This way, they regain their delightful melt-in-your-mouth texture that makes them so irresistible!
Conclusion
There you have it; my cherished recipe for No Bake Caramel Crunch Butterfinger Truffles! They’re easy to whip together and make for a delightful treat you and your friends will love. Indulging in these sweet bites while enjoying a beautiful day is one of life’s simple pleasures. I hope you find joy in making them just as much as I do! Happy snacking!