
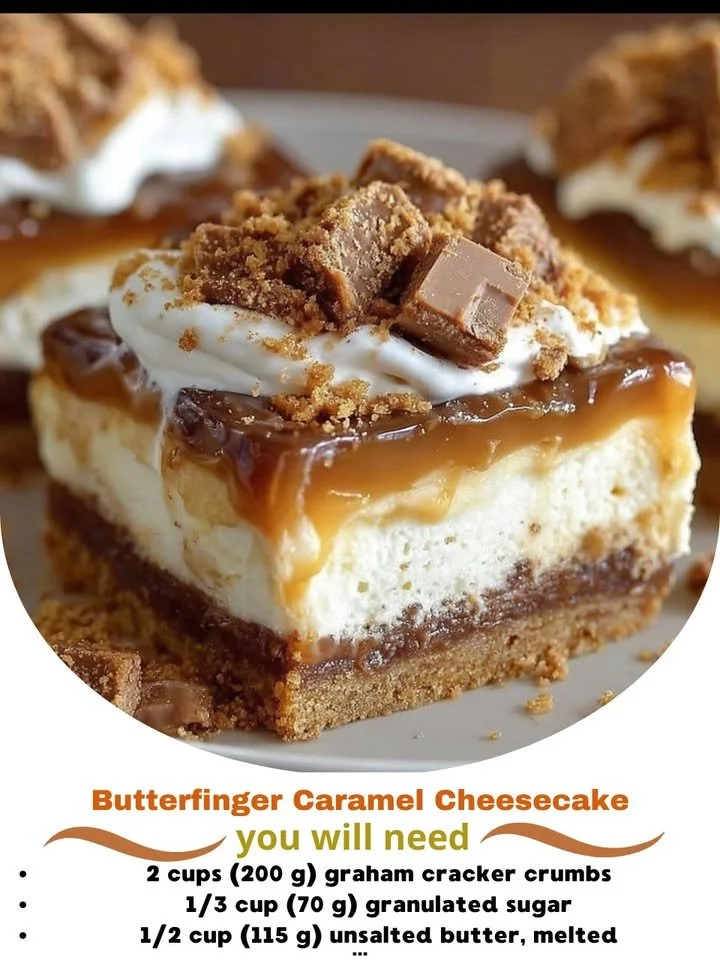
Hey there, fellow dessert lovers! Today, I’m excited to share a recipe that’s as rich and indulgent as it sounds—Butterfinger Caramel Cheesecake. There’s something magical about the combination of creamy cheesecake and crunchy Butterfinger candy that sends my taste buds into a whirl. Every bite of this dessert is a mix of sweetness, saltiness, and that irresistible buttery crunch. So, put on your apron, and let’s turn my kitchen into a haven for this delicious cheesecake!
Why You’ll Love This Recipe
Let me tell you why this Butterfinger Caramel Cheesecake is one of my go-to desserts. First off, it’s an absolute showstopper, making it a perfect centerpiece for any gathering. The blend of flavors—the smooth, creamy cheesecake with decadent caramel and crunchy Butterfinger pieces—creates a texture adventure that’s simply delightful. The best part? It’s surprisingly easy to make! Once you master this recipe, you’ll find yourself making it for birthdays, holidays, or just because you deserve a treat. Trust me, everyone will be asking for seconds! (See the ingredients in the next page below…)
Ingredients
– For the crust:
– 1 ½ cups crushed graham crackers
– ½ cup unsalted butter, melted
– ¼ cup granulated sugar
-
For the cheesecake filling:
- 2 (8 oz) packages cream cheese, softened
- ½ cup granulated sugar
- 1 teaspoon vanilla extract
- 2 large eggs
- 1 cup heavy cream
-
For the topping:
- 1 cup caramel sauce
- 1 cup crushed Butterfinger candy bars
Equipment Needed
– 9-inch springform pan
– Mixing bowls
– Electric mixer
– Rubber spatula
– Measuring cups and spoons
– Food processor (for crushing the graham crackers)
Step-by-Step Instructions
First, let’s start with the crust. Preheat your oven to 350°F (175°C). In a mixing bowl, combine the crushed graham crackers, melted butter, and sugar. Mix it all together until it resembles wet sand. Press this mixture firmly into the bottom of your springform pan—don’t skip this step; it’s crucial for a solid crust! Bake it in the preheated oven for about 10 minutes until it’s just golden. The smell? Absolutely heavenly! (See the next page below to continue steps…)
Next, while the crust is cooling, let’s whip up the cheesecake filling. In a mixing bowl, beat the softened cream cheese with granulated sugar until it’s light and fluffy. This step is all about incorporating air, so take your time! Then, add in the vanilla extract and one egg at a time, mixing well after each addition. Once everything is well combined, fold in the heavy cream gently with a spatula. The batter should now be luxuriously creamy and a little bit thick.
Now, pour this creamy mixture over the cooled crust in your springform pan, smoothing the top with your spatula. This cheesecake will rise a little while baking, and it will give you a lovely, creamy texture. Bake it at 325°F (160°C) for about an hour. Keep a close eye on it—it’s done when the edges are set but the center still has a slight jiggle. Let it cool to room temperature while you prepare the caramel and Butterfinger topping.
Once the cheesecake has cooled, drizzle the caramel sauce over the top generously; I like to go a little wild here! Next, sprinkle the crushed Butterfinger bars over the caramel. You’ll get that delightful crunch that adds such a fun contrast to the creamy cheesecake. Refrigerate for at least 4 hours, or preferably overnight, to let all the flavors meld together beautifully; the wait is hard, but oh-so worth it when you finally slice in!
Pro Tips for Best Results
I’ve tested this recipe a few different ways, and one of my biggest takeaways is to make sure your cream cheese is at room temperature before you start mixing. Trust me, cold cream cheese will lead to lumps in your filling, and nobody wants that! I also recommend using a springform pan; it makes for easy removal and a gorgeous presentation.
Another tip? Don’t skimp on the chilling time! I know it’s hard to wait, but letting the cheesecake chill overnight allows the flavors to deepen and leads to a denser, creamier texture. I’ve found that the cheesecake tastes even better the next day.
Lastly, if you want to add a touch of elegance, you can whip some extra heavy cream and pipe it around the edges before adding your toppings. It not only looks beautiful but makes each slice just that much creamier. It’s those little touches that elevate a dessert to a whole new level!
Common Mistakes to Avoid
One common mistake I made the first time I tried this recipe was not allowing my cheesecake to cool gradually in the oven. I went straight to room temperature, and that caused cracks on top. To avoid this, turn off the oven when the cheesecake is done, crack the oven door open, and let it sit in there for about an hour before taking it out. This gradual cooling helps prevent those pesky cracks. (See the next page below to continue…)
Another pitfall is overbaking the cheesecake. Aim for that slight jiggle in the center when you pull it out of the oven. If it looks completely set, it’s likely overcooked. Trust me; you want that soft, creamy texture!
Lastly, I learned the hard way that the caramel sauce needs to be warm when you drizzle it over the cheesecake. If it’s cold, it can harden quickly and won’t stick as well to the cheesecake. So, heat it slightly before application for the perfect drizzle.
Serving Suggestions
When it’s time to serve this showstopper, I like to take it out of the fridge about 30 minutes beforehand. Letting it come to room temperature just makes the flavors pop! I enjoy slicing into it with a warm knife to get those beautiful, clean edges.
For an added flair, I often serve it with a dollop of whipped cream on the side or on top. You can even sprinkle a few additional crushed Butterfinger pieces for that extra crunch. Everyone in my household loves to pair it with a scoop of vanilla ice cream; the cold creaminess is a delightful contrast to the rich cheesecake.
If it’s a special occasion, why not top it with chocolate shavings or sprinkle some sea salt on top of the caramel? It adds a lovely balance to the sweetness and elevates it even more. It’s a dessert that everyone will remember!
Variations & Customizations
This Butterfinger Caramel Cheesecake is super versatile. If you want to change things up, you can swap the Butterfinger bars for another favorite candy bar—Snickers or Reese’s could be amazing options! Just chop them up and follow the same steps; you’re bound to enjoy the outcome.
You can also play with the flavor of the cheesecake itself. Adding a tablespoon of cocoa powder could give you a delicious chocolate twist, perfect for chocolate lovers! Or, if you’re feeling adventurous, try mixing in some peanut butter to the filling for a rich and nutty flavor that pairs beautifully with the chocolate and caramel.
For those who might be gluten-free, simply substitute the graham crackers with gluten-free options, and you’ll have a dessert everyone can enjoy. I’ve done this for friends, and I promise you, they won’t even know the difference!
How to Store, Freeze & Reheat
If you’re lucky enough to have leftovers, store your Butterfinger Caramel Cheesecake in an airtight container in the fridge. It will keep for about 4 to 5 days, but trust me, it’s likely to disappear much faster than that! The flavors will deepen as it sits, making those next slices even more delicious.
If you want to prepare it ahead of time, you can freeze the cheesecake! Just make sure it’s completely cooled before wrapping it tightly with plastic wrap and then aluminum foil. It will stay fresh in the freezer for up to 2 months. When you’re ready to enjoy it, let it thaw in the refrigerator overnight before serving.
I recommend not freezing the toppings. Instead, add the caramel and Butterfinger toppings just before serving to maintain their delicious crunch. This way, your cheesecake will be as fresh and delightful as the day you made it!
Conclusion
I hope you enjoy making this Butterfinger Caramel Cheesecake as much as I do! Each bite is like a little piece of heaven, and I can’t wait for you to impress your family and friends with it. Remember, cooking is all about experimenting, so feel free to put your spin on it and have fun in the kitchen. Happy baking!