
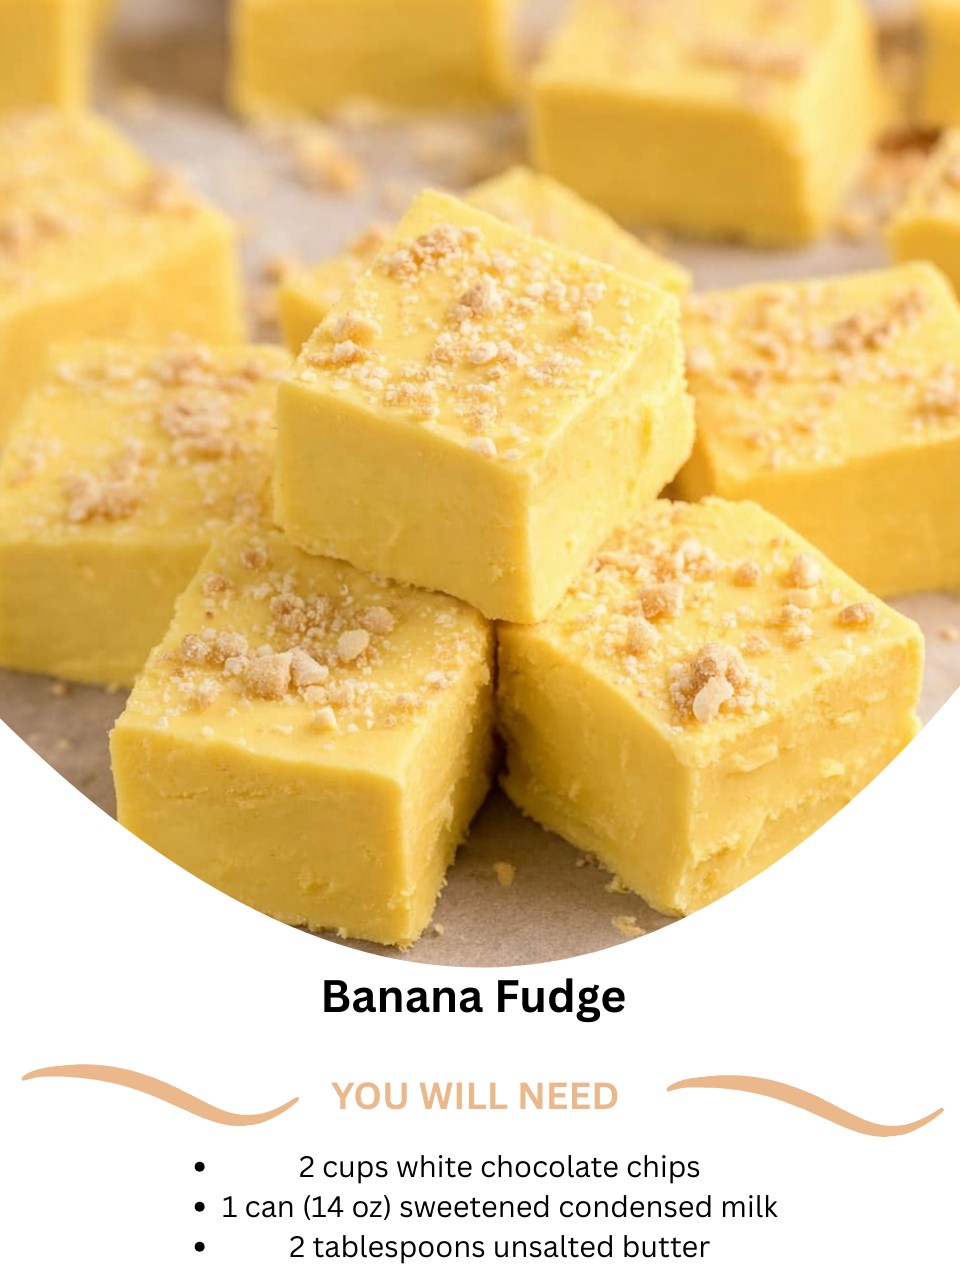
I created this Banana Fudge by accident, staring at three overly ripe bananas on my counter that were too perfect for banana bread but begging to be used. I wondered if I could capture that warm, nostalgic flavor in a creamy fudge. As I mashed the bananas into the melting white chocolate and sweetened condensed milk, my kitchen filled with the most incredible, comforting aroma—like fresh banana bread and vanilla pudding had a sweet, luxurious baby. The resulting fudge was unbelievably creamy and packed with true banana flavor. It instantly became my favorite way to rescue spotty bananas and create a uniquely delicious treat that surprises and delights everyone who tries it.
Why You’ll Love This Recipe
You are going to fall in love with this recipe because it’s the most delicious and inventive way to use up ripe bananas you’ll ever find. It transforms them into a rich, smooth, and decadent confection that tastes like the essence of a perfect banana cream pie. It’s incredibly easy to make, requires no baking, and is a fantastic alternative to the usual loaf of banana bread. From my experience, this is the treat that makes people pause and say, “Wait, this is banana?!” in the best way possible. It’s comfort food in its most elegant, bite-sized form.
Ingredients
- 2 cups high-quality white chocolate chips
- 1 (14 oz) can full-fat sweetened condensed milk
- 2 tablespoons unsalted butter
- ¾ cup very ripe banana mash (about 2 medium bananas)
- 1 teaspoon pure vanilla extract
- ½ teaspoon banana extract (trust me, do not skip this!)
- A generous pinch of fine sea salt
- Optional: ¼ cup chopped walnuts or pecans for topping
(See the next page below to continue…)
Equipment Needed
- An 8×8 inch baking pan
- Parchment paper
- Medium-sized, heavy-bottomed saucepan
- Rubber spatula
- Small mixing bowl and fork for mashing
- Cutting board and knife (if using nuts)
Step-by-Step Instructions
First, let’s talk about the most important ingredient: the bananas. Don’t use raw, yellow bananas—wait until they’re speckled with brown spots and very soft. This is when they’re at their sweetest and most flavorful. I mash mine thoroughly with a fork in a small bowl until they’re almost a smooth puree, with just a few tiny lumps for texture. This ensures the flavor distributes evenly throughout the fudge. Now, I line my 8×8 inch pan with parchment paper, leaving overhangs on two sides to create a sling. This is a step I never skip for easy, clean removal later.
Now, for the fudge base. In my heavy-bottomed saucepan, I combine the white chocolate chips, the entire can of sweetened condensed milk, and the butter. I place this over the lowest heat setting my stove offers. Patience is absolutely key here. I stand by the stove with my spatula, stirring almost constantly and scraping the bottom and corners thoroughly. White chocolate is delicate and will seize into a grainy mess if it gets too hot. You’re waiting for it to melt into a completely smooth, glossy pool.
When the mixture is velvety and lump-free, I immediately remove the pan from the heat. Now, here’s where we add the magic. I vigorously stir in the mashed banana, the pure vanilla extract, the essential banana extract, and that pinch of fine sea salt. The banana extract might seem optional, but it’s what intensifies and secures that true, forward banana flavor—without it, the taste can be subtle. The salt is crucial for balancing all the sweetness. I stir until everything is perfectly combined into a fragrant, pale yellow mixture.(See the next page below to continue…)
Working quickly, I pour the thick fudge mixture into your prepared pan and smooth the top with the spatula. If I’m using nuts, I sprinkle the chopped walnuts or pecans evenly over the top now and gently press them in so they adhere. I then let the pan cool completely on the counter before covering it and transferring it to the refrigerator. This fudge needs to chill and firm up completely for at least 4 hours, but I’ve found that letting it set overnight is ideal for achieving the perfect, sliceable texture.
Pro Tips for Best Results
I tested the banana component three different ways: with banana puree from raw bananas, with ripe mashed bananas, and with the addition of banana extract. Here’s the winning formula: use very ripe, spotty mashed bananas and the banana extract. The ripe bananas provide the natural sweetness and base flavor, while the extract locks in and amplifies that unmistakable banana taste. I’ve tried this step both ways, and trust me, using both works better for a flavor that really sings.
Here’s what I learned the hard way about texture: you must mash the bananas very well. I once left too many chunks, and while tasty, it created little wet pockets in the fudge that affected the smooth, creamy consistency. A nearly smooth mash integrates seamlessly. Also, make sure your mashed bananas are at room temperature, not cold from the fridge, when you add them. A cold shock can sometimes cause the warm chocolate mixture to thicken too abruptly.
For the absolute smoothest texture and to prevent graininess, the quality of your white chocolate and your melting technique are everything. A higher-quality chip with real cocoa butter melts more smoothly. Always use the lowest heat and stir constantly. If you see even a hint of graininess, remove it from the heat immediately and stir vigorously—you can sometimes bring it back. Adding the room-temperature banana mash off the heat also helps cool the mixture slightly, which is perfect for setting.
Common Mistakes to Avoid
The biggest mistake is using high heat to melt the base. Impatience leads to scorched milk and seized, grainy chocolate. I did this on my first attempt, and the fudge had a burnt, gritty texture that was beyond saving. Don’t do what I did! The lowest possible heat is your only option. If you’re nervous, use a double boiler. It’s a foolproof method for that perfect, silky-smooth base every single time.(See the next page below to continue…)
Don’t skip the banana extract. This was my second test, and while the fudge was creamy and sweet, the banana flavor was mild and faded into the background. The extract is what gives it that powerful, authentic banana punch that makes people say “wow.” It makes a huge difference in delivering the promised flavor.
Another error is using under-ripe bananas. They lack the necessary sweetness and intense banana flavor, and they don’t mash as smoothly. Your fudge will taste bland and slightly starchy. Wait for those bananas to get spotty and soft—the riper, the better. This is one instance where blackening bananas are a blessing, not something to avoid.
Finally, don’t skimp on the chilling time. I’ve been tempted to cut it early, but the center remains too soft, especially with the added moisture from the bananas. A full four-hour chill is the bare minimum, but overnight is truly non-negotiable for the perfect firm-yet-creamy texture that allows you to get clean, beautiful slices.
Serving Suggestions
I love serving this fudge slightly chilled. I take it out of the fridge about 10-15 minutes before serving. This brief warming softens it just enough for that ultimate creamy, melt-in-your-mouth texture. Arranged on a simple platter, it’s a beautiful pale yellow color. For a pretty finish, I sometimes dust the top very lightly with a sprinkle of cinnamon or cocoa powder just before serving.
For a perfect dessert pairing, I like to serve it with a cup of strong coffee. The bitterness complements the sweet, fruity fudge beautifully. It’s also fantastic with a glass of cold milk or, for a grown-up twist, a drizzle of caramel sauce over the top. It makes an incredible topping for a scoop of vanilla ice cream, creating an instant banana foster sundae.
When gifting, I stack the squares in a small box lined with parchment paper. I always add a tag that says “Banana Fudge” because the flavor is such a fun and unexpected surprise. It’s a wonderful gift for teachers, neighbors, or anyone who appreciates a homemade treat that’s a little different from the ordinary.
Variations & Customizations
For a “Banana Nut” delight, fold ½ cup of chopped toasted walnuts or pecans into the fudge itself along with the mashed banana. The nuts add a wonderful crunch and classic flavor pairing. You could also press a few whole pecan halves onto the top for a decorative look before it sets.
You can create a “Chocolate Banana” swirl fudge by dividing the base after melting. To one half, add the banana mash and extract. To the other half, add 2 tablespoons of cocoa powder. Layer and swirl them in the pan for a beautiful marbled effect that combines two beloved flavors.
For a “Tropical Banana” version, stir in ½ cup of toasted sweetened coconut along with the mashed banana. The combination of coconut and banana is pure tropical bliss. A tiny drop of rum extract (⅛ teaspoon) added with the vanilla can enhance that island vibe even further.
How to Store, Freeze & Reheat
For storing, I keep the fudge in an airtight container in the refrigerator. Due to the fresh fruit content, it’s essential to keep it chilled. It stays fresh and maintains its perfect texture for about 1 week. Always use parchment between layers if stacking. It can sit out for an hour or two during a party, but should be returned to the fridge promptly.
This fudge freezes quite well. Wrap the whole block or individual squares tightly in plastic wrap, then seal in a heavy-duty freezer bag. It will keep for up to 2 months. The texture may be slightly softer upon thawing due to the bananas, but the flavor will remain excellent.
To thaw, transfer the wrapped fudge from the freezer directly to the refrigerator and let it thaw slowly overnight. This prevents condensation and maintains the best texture. Do not thaw at room temperature. There is no need to reheat it. Once thawed, serve chilled for the best consistency.
Conclusion
This Banana Fudge is more than just a recipe to me; it’s a happy little kitchen miracle that turns something ordinary into something extraordinary. It never fails to bring a sense of playful delight and comforting nostalgia. I hope this recipe encourages you to look at those overripe bananas on your counter not as a chore, but as an opportunity to create a uniquely sweet and creamy joy. Now, go mash those bananas—your own batch of smooth, fruity bliss is waiting.