
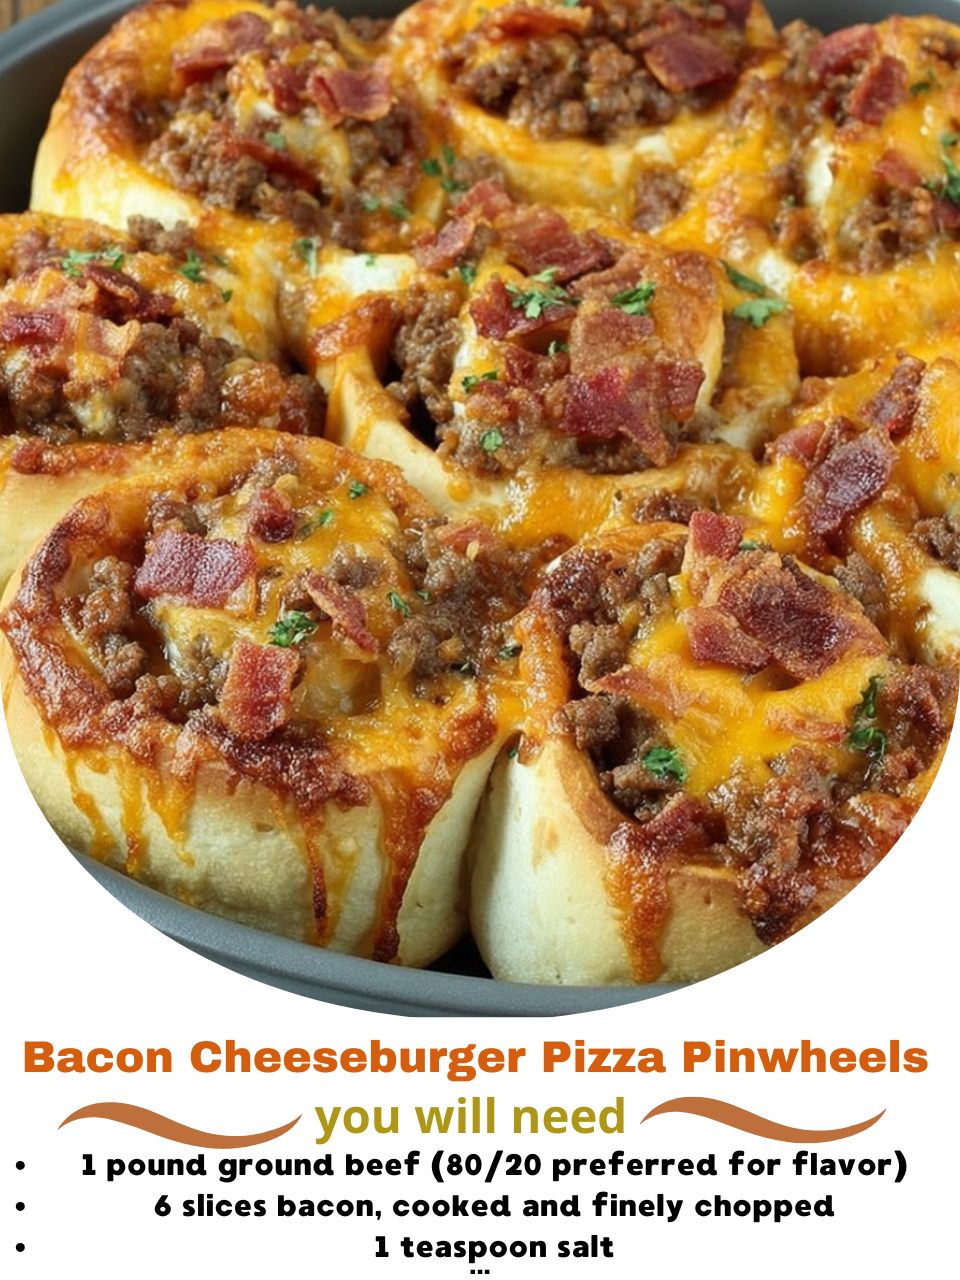
The scent of bacon and browning beef mingling with garlic and onion is my kitchen’s ultimate welcome home. I dreamed up these Bacon Cheeseburger Pizza Pinwheels during a big game day, desperate for a snack that was handheld, hearty, and packed with everyone’s favorite flavors. As I rolled the savory filling into the pizza dough and sliced it into spirals, I crossed my fingers. When they came out of the oven, golden and bubbling, the first bite was a total touchdown: all the joy of a juicy bacon cheeseburger, wrapped in a soft, warm, dippable crust. They disappeared in minutes, and I knew I’d created a new party legend.
Why You’ll Love This Recipe
You’ll love this recipe because it combines three crowd-pleasing classics—bacon cheeseburgers, pizza, and fun finger food—into one irresistible, shareable bite. They’re surprisingly simple to make, perfect for feeding a hungry group, and the “wow” factor is off the charts when you bring that tray to the table. Whether it’s for game day, a kid’s party, or a fun family dinner, these pinwheels guarantee empty plates and happy faces. From my oven to yours, I promise these will be the first thing to vanish at your next gathering.
Ingredients
- 1 lb ground beef (80/20 preferred)
- 6 slices bacon, cooked crisp and finely chopped
- 1 teaspoon salt
- 1/2 teaspoon black pepper
- 1 teaspoon garlic powder
- 1 teaspoon onion powder
- 1 (13.8 oz) can refrigerated classic pizza dough
- 1 cup shredded cheddar cheese
- 1 cup shredded mozzarella cheese
- 1/4 cup dill pickle slices, finely chopped
- 2 tablespoons yellow mustard
- 2 tablespoons ketchup or burger sauce
- 1 egg, beaten (for egg wash)
- Sesame seeds (optional, for topping)
Let’s talk ingredients. The 80/20 ground beef is key here—the fat equals flavor and moisture, preventing the filling from drying out. Don’t use extra-lean. For the bacon, cook it until very crisp so it stays crunchy in the bake. The pickles are the magic ingredient that makes it taste authentically like a burger; trust me, don’t skip them. Using a blend of cheddar for sharpness and mozzarella for meltiness creates the perfect cheesy pull. As for the dough, the classic canned pizza dough works perfectly—it’s pliable and bakes up soft. Don’t use a thin-crust style.(See the next page below to continue…)
Equipment Needed
- Large skillet
- Rolling pin
- Parchment paper
- Baking sheet
- Sharp knife or pizza cutter
- Pastry brush (for egg wash)
- Mixing bowl
Step-by-Step Instructions
I always start by cooking the bacon in my large skillet until it’s super crispy. I remove it to drain on paper towels, but I leave about a tablespoon of the glorious bacon fat in the pan. To that hot, smoky fat, I add the ground beef, breaking it up as it browns. I season it with the salt, pepper, garlic powder, and onion powder. I cook it until no pink remains, then I drain off any excess grease—you want the meat flavorful but not swimming in fat. I let this mixture cool in the pan for at least 15 minutes. This is crucial: if the meat is too hot, it will melt the cheese and make the dough soggy and impossible to roll.
While the meat cools, I prep my other components. I shred my cheeses, chop the pickles, and crisp the bacon into fine bits. In a small bowl, I mix the ketchup and mustard together to make my “burger sauce.” Then, I preheat my oven to 400°F (200°C) and line a baking sheet with parchment paper. Now, for the dough. I unroll the canned pizza dough onto a lightly floured piece of parchment paper. Using my rolling pin, I gently roll it out just a bit more to form a neat, even rectangle, about 10×14 inches. This gives me a good canvas to spread everything on.
Assembly time! I spread the cooled beef mixture evenly over the dough, leaving a half-inch border clear on all edges. Next, I drizzle the mustard-ketchup sauce over the meat. Then, I sprinkle on the chopped pickles, both cheeses, and finally the crispy bacon bits. Now, here’s the fun part: starting from one of the long sides, I use the parchment paper to help me lift and tightly roll the dough into a log, like a giant sushi roll. I pinch the seam and the ends to seal everything in. I place the log seam-side down on my prepared baking sheet.(See the next page below to continue…)
Using a sharp serrated knife, I slice the log into 1-inch thick pinwheels. A gentle sawing motion works best to keep the shape. I arrange them on the baking sheet about an inch apart. I brush the tops lightly with the beaten egg wash—this gives them that beautiful, golden-brown shine. For an extra touch, I sprinkle a few sesame seeds on top. Then, into the hot oven they go! I bake them for 15-18 minutes, until the dough is cooked through, golden, and the cheese is bubbly.
Pro Tips for Best Results
I tested the meat temperature three different ways: adding it hot, warm, and completely cool. Warm, but not hot, is the absolute sweet spot. Hot meat melts the cheese instantly, creating a greasy, leaky mess. Cold meat can make the dough too stiff. Letting the browned beef cool for 15-20 minutes in the pan is the perfect compromise. It’s still warm enough to be pliable but won’t ruin your dough or cheese.
Here’s what I learned the hard way about rolling: you must roll it tightly. My first batch was a bit loose because I was worried about filling squeezing out. The result? Pinwheels that unravelled slightly while baking. Now, I roll with confidence, tucking and squeezing as I go. A tight roll ensures every slice holds its perfect spiral shape and all the delicious filling stays locked inside.
Don’t skip the egg wash. It might seem like a tiny step, but it’s what gives the pinwheels their professional, glossy, golden-brown finish. It also helps any sesame seeds stick. Without it, the dough can look pale and dry. That simple brush of beaten egg elevates them from homemade to bakery-beautiful.
Common Mistakes to Avoid
My biggest first-time mistake was not letting the meat cool. I was in a rush and spread the sizzling hot beef right onto the dough. The cheese turned into an oily pool, and the dough became a greasy, un-rollable nightmare. I had to scrap the whole batch. Patience here is not just a virtue; it’s the difference between success and a frustrating mess.(See the next page below to continue…)
Another pitfall is overfilling. It’s tempting to pack in more cheese and bacon, but if you overstuff the log, it will burst open at the seams while baking, and the filling will ooze out all over your pan. A moderate, even layer is better than a heaping mound. You can always serve extra burger sauce on the side for dipping.
Don’t use a dull knife to slice. A dull blade will press down on the log and squish the pinwheels flat, ruining the layers. A sharp serrated knife or a piece of unflavored dental floss (pulled underneath and crossed over the top to cut) gives you the cleanest slices without deforming your beautiful spiral.
Finally, avoid under-baking. The top may look golden quickly, but the dough in the center of each pinwheel needs time to cook through. If you pull them out too early, you’ll have a raw, doughy center. Bake until the dough is deeply golden and firm to the touch. The cheese will be gloriously bubbly.
Serving Suggestions
I like serving these pinwheels piping hot, arranged on a big wooden board or platter. I always put out small bowls of extra burger sauce, ketchup, and even a creamy ranch or comeback sauce for dipping. The double-dip factor is a big part of the fun.
For a complete game-day spread, I’ll pair them with a big, crunchy veggie platter and some crispy potato skins. They’re rich, so the fresh vegetables are the perfect palate cleanser. A cold beer or a pitcher of iced tea is the ideal beverage alongside.
When I make these for a kid-friendly dinner, I’ll serve them with a simple side of sweet potato fries or apple slices. Calling them “pizza swirls” or “burger rolls” gets even the pickiest eaters excited to try them. They’re a surefire way to make an ordinary weeknight feel like a party.
Variations & Customizations
This recipe is a fantastic canvas. My favorite variation is a “Western Burger” style. I add 1/4 cup of finely diced green bell pepper and onion to the beef as it cooks, and after baking, I drizzle the pinwheels with a little BBQ sauce instead of serving ketchup.
For a spicy kick, I use Pepper Jack cheese and add a teaspoon of diced jalapeños (from a jar) to the filling. A few dashes of hot sauce in the burger sauce mix really turns up the heat. You could even use a spicy Italian sausage mix instead of half the beef.
If you want to lighten it up, you can use a 90/10 lean ground beef and add a tablespoon of water to keep it moist. You can also use a whole-wheat pizza dough and low-fat cheese, though the melt won’t be as dramatic. For a “Pizza” twist, swap the burger seasonings for Italian seasoning and use pizza sauce, pepperoni, and mozzarella.
How to Store, Freeze & Reheat
These pinwheels store well. Let them cool completely, then store in an airtight container in the refrigerator for up to 3 days. They are fantastic cold, straight from the fridge, but reheating is best.
They freeze beautifully for make-ahead appetizers. Arrange the baked and cooled pinwheels on a parchment-lined sheet to freeze solid, then transfer to a freezer bag. They’ll keep for up to 2 months. You can also freeze the unbaked, sliced pinwheels on a sheet, then bag them. Bake from frozen, adding 5-7 minutes to the baking time.
To reheat, the oven or air fryer is best to recrisp the exterior. Warm at 350°F for about 10 minutes. The microwave will work in a pinch for a single serving, but it will make the dough a bit soft and chewy. For the best texture, always opt for the oven.
Conclusion
These Bacon Cheeseburger Pizza Pinwheels are the ultimate fusion food—fun, flavorful, and guaranteed to bring people together. They’re proof that the best party snacks are often the ones that combine familiar favorites in a new, exciting way. I hope this recipe brings as much laughter and empty plates to your table as it has to mine. Give them a try at your next gathering and get ready to share the recipe! Happy baking, friends.