
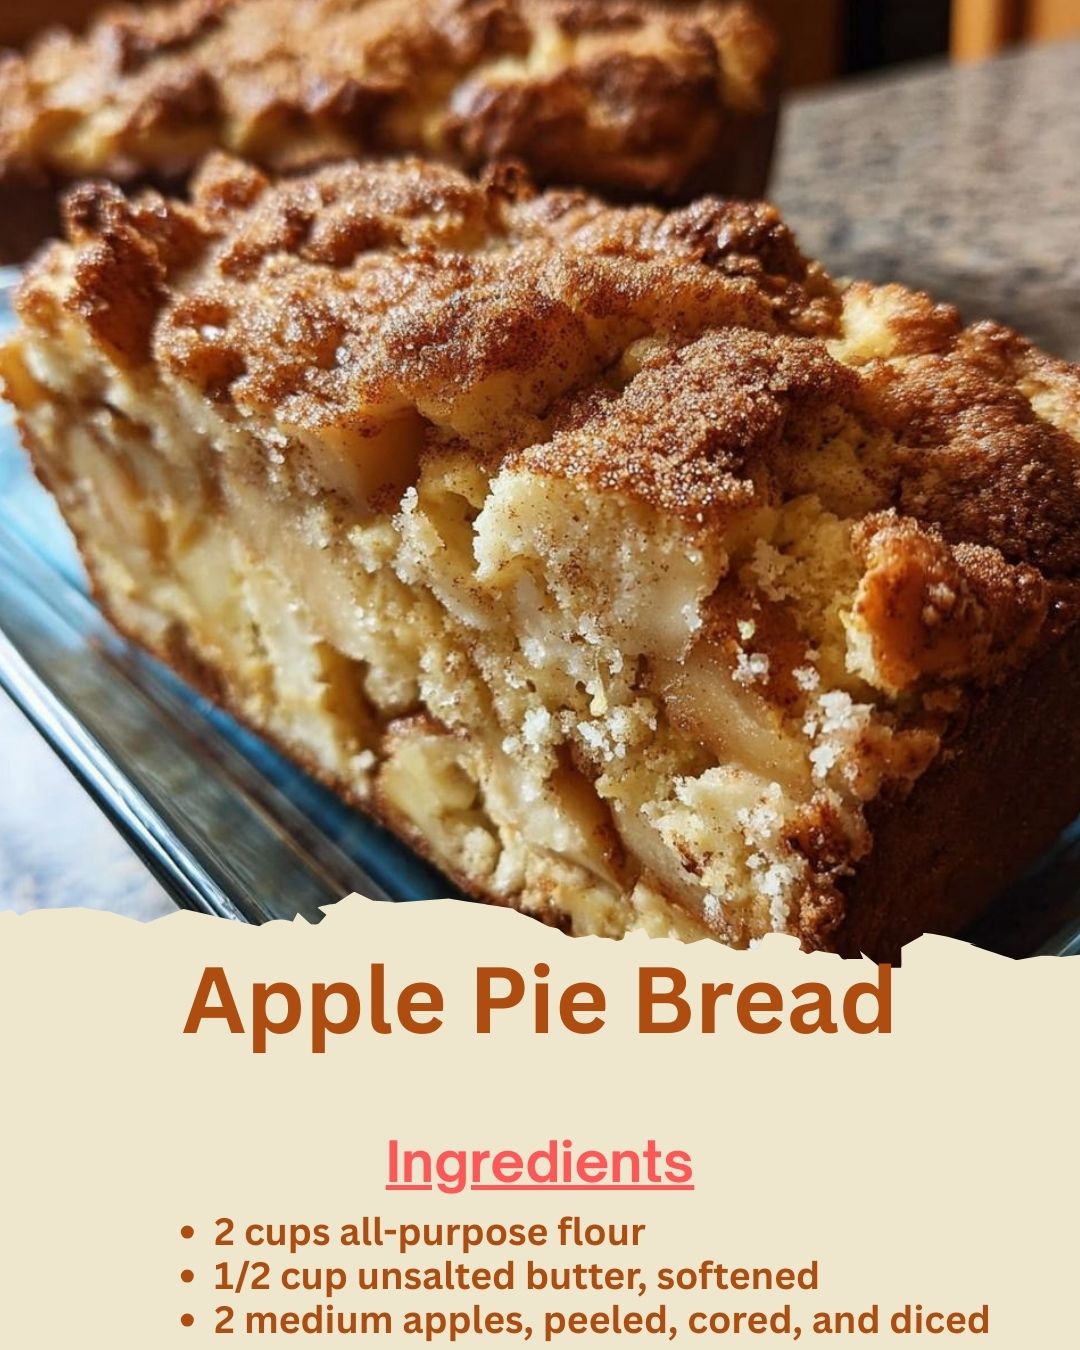
I first baked this Apple Pie Bread on a crisp fall morning when I had a bushel of apples and a craving for something cozy. As I folded the cinnamon-spiced diced apples into the thick, buttery batter, my kitchen filled with the most comforting aroma—like a fresh apple pie and a vanilla-scented candle had a beautiful baby. When I pulled the golden loaf from the oven and the sweet, spiced steam wafted up, I knew I’d created something special. That first warm slice, tender and studded with soft apple pieces, was pure autumnal bliss. It’s the taste of a pie, in the comforting form of a sliceable loaf, and it’s been my favorite way to welcome sweater weather ever since.
Why You’ll Love This Recipe
You are going to adore this recipe because it captures all the heartwarming flavor of homemade apple pie in an incredibly simple, no-fuss loaf. It’s the perfect project for when you want that pie feeling without the work of making a crust. The bread is wonderfully moist, packed with soft cinnamon apples in every bite, and your home will smell absolutely divine while it bakes. It’s fantastic for breakfast, with afternoon tea, or as a humble yet impressive dessert. It’s the kind of bake that makes everyone feel at home.
Ingredients
- 2 cups all-purpose flour
- 1/2 cup (1 stick) unsalted butter, softened
- 3/4 cup granulated sugar
- 2 large eggs, at room temperature
- 2 medium apples, peeled, cored, and finely diced (I prefer Granny Smith or Honeycrisp)
- 1/2 cup milk (whole or 2%)
- 2 teaspoons baking powder
- 1 1/2 teaspoons ground cinnamon
- 1 teaspoon pure vanilla extract
- 1/2 teaspoon salt
- Optional Topping: 2 tablespoons coarse sugar mixed with 1/4 teaspoon cinnamon (See the next page below to continue…)
Equipment Needed
- 9×5 inch loaf pan
- Parchment paper
- Large mixing bowl
- Medium mixing bowl
- Handheld or stand mixer
- Whisk
- Rubber spatula
- Cooling rack
Step-by-Step Instructions
Let’s start with the foundation: the batter. First, I always line my loaf pan with parchment paper, leaving an overhang on the two long sides. This is my non-negotiable trick for a perfect, easy release every single time. I learned the hard way when a beautiful loaf tore in half because it stuck. Now, in a large bowl, I cream together the softened butter and sugar. This step is crucial—I beat them on medium speed for a good three minutes, until the mixture is pale, fluffy, and almost like a thick frosting. This incorporates air, which gives the bread its lovely, tender crumb.
While that’s mixing, I whisk together my dry ingredients in a separate bowl. I combine the flour, baking powder, cinnamon, and salt. That cinnamon scent as I whisk is one of my favorite parts. I also prep my star ingredient: the apples. I peel, core, and dice them into small, uniform pieces—about the size of a pea. I’ve tried grating the apples, but they release too much moisture and make the bread soggy. Small dice gives you perfect little pockets of soft apple throughout. I toss the apple pieces with a tablespoon of the dry flour mixture; this little trick helps prevent them from sinking to the bottom of the loaf.
Now, back to the creamed butter. I beat in the eggs, one at a time, making sure each is fully incorporated before adding the next. Then I stir in the vanilla. The mixture might look a bit curdled at this point, but don’t worry—it will come together. With the mixer on low, I alternately add the dry ingredients and the milk, starting and ending with the dry ingredients. I add the flour in three parts and the milk in two. I mix only until the last streak of flour disappears; overmixing is the enemy of a tender loaf. (See the next page below to continue…)
Finally, I fold in the flour-coated apple pieces with a rubber spatula. The batter will be very thick, which is exactly what you want to support those apples. I scrape the batter into my prepared loaf pan and smooth the top. For a beautiful, sparkling crunch, I sprinkle the cinnamon-sugar topping over the batter. Then, it goes into a preheated 350°F oven. I bake it for 55-65 minutes. The true test is a toothpick inserted into the center of the bread (not just an apple pocket) coming out clean. The smell while it bakes is absolutely intoxicating.
Pro Tips for Best Results
My top tip is about the apples. I’ve tested this with different varieties, and a firm, tart apple like Granny Smith is the absolute best. It holds its shape during baking and provides a bright flavor contrast to the sweet, spiced bread. Softer apples, like Red Delicious, turn to mush. Don’t skip peeling them, either—the peels can separate and create tough, chewy bits in the finished loaf. Trust me, take the extra few minutes to peel.
Properly softening your butter is non-negotiable. I’ve tried this with melted butter and with butter that was too cold. Melted butter made the bread dense and greasy, while cold butter wouldn’t cream properly. The ideal softened butter should be cool to the touch but leave a deep indent when you press it. I usually set mine out on the counter for about 45 minutes before I start baking. This one detail makes a huge difference in texture.
The flour-coating trick for the apples is a game-changer I learned after my first loaf had all the fruit at the bottom. Simply tossing the diced apples with a spoonful of the measured flour from your dry ingredients creates a light barrier that helps suspend them throughout the batter. It’s a tiny, 10-second step that ensures you get apple in every single bite, from the top of the loaf to the bottom.
Common Mistakes to Avoid
The first mistake I made was underbaking the loaf. Because it’s so moist from the apples, the top can look beautifully golden and set while the very center is still raw batter. I was so excited to eat it that I pulled it out at 50 minutes, only to find a gummy stripe in the middle. Now, I always use a toothpick or a thin knife and test in a few spots, making sure I’m hitting cake, not just apple. It often needs the full 65 minutes. (See the next page below to continue…)
Another common error is overmixing the batter once the flour is added. As soon as you see the last streak of flour disappear into the wet ingredients, stop mixing! I used to keep going to make it “smooth,” and it resulted in a tough, tunneled texture because I overdeveloped the gluten. A few small lumps in the batter are perfectly fine; they’ll bake out. Gentle folding at the end is the key to a soft, delicate crumb.
Using the wrong size loaf pan will throw off your bake time and texture. A 9×5 inch pan is standard. I once used an 8×4 pan because it was all I had, and the batter was so deep it took forever to bake through, and the outside was overdone by the time the center set. If you only have a different size, you can adjust: for a smaller pan, fill it only 2/3 full and bake the excess as muffins. For a larger pan, the loaf will be flatter and bake faster.
Neglecting to let the bread cool completely before slicing is a heartbreaking mistake. I know it’s tempting to cut into that warm, fragrant loaf, but if you do, it will squish and crumble. The structure needs time to set as it cools. I let mine cool in the pan on a rack for 15 minutes, then use the parchment paper to lift it out and let it cool completely on the rack. Slicing into it then reveals a perfect, moist texture.
Serving Suggestions
I love serving this bread slightly warm, thickly sliced, with a generous smear of salted butter. The way the butter melts into the warm, spiced crumb is absolute perfection with a cup of black coffee in the morning. For a more decadent breakfast or brunch, I’ll toast a slice and top it with a dollop of vanilla yogurt or a drizzle of maple syrup.
For a simple yet elegant dessert, I serve a slice at room temperature with a scoop of vanilla bean ice cream and a quick caramel sauce. The warm bread (I’ll pop a slice in the toaster oven for a minute) with the cold ice cream is a classic combo that feels special. A dusting of powdered sugar on top also looks beautiful and adds a touch of sweetness.
This loaf also makes a wonderful, heartfelt gift. Once completely cool, I wrap it tightly in parchment paper and then in festive plastic wrap or a reusable tea towel. I tie it with baker’s twine and sometimes attach a small bag of coffee or tea. It’s a gift that says “I made this for you with care,” and it’s always warmly received.
Variations & Customizations
For a nutty crunch and deeper flavor, try adding a half cup of chopped walnuts or pecans to the batter when you fold in the apples. I love the textural contrast it provides. You could also sprinkle some on top with the cinnamon sugar for a beautiful, toasted finish.
If you love streusel, skip the simple cinnamon-sugar topping and make a quick crumble instead. Mix 1/4 cup flour, 1/4 cup brown sugar, 2 tablespoons cold cubed butter, and 1/2 teaspoon cinnamon with a fork until crumbly. Sprinkle this over the batter before baking. It creates a delicious, bakery-style crunchy topping that takes it to the next level.
For a different spice profile, you can play with the warm flavors. I’ve added a quarter teaspoon of nutmeg and a pinch of cardamom along with the cinnamon for a more complex, chai-like spice blend. You could also add a tablespoon of bourbon or dark rum to the batter along with the vanilla for a sophisticated, grown-up twist.
How to Store, Freeze & Reheat
To keep it fresh, I store the completely cooled loaf, well-wrapped in plastic wrap or aluminum foil, at room temperature. It will stay deliciously moist for up to 3 days. You can also store it in an airtight container. I do not recommend refrigerating it, as the cold air will dry it out and change the texture, making it stale faster.
This bread freezes beautifully for longer storage. I let the loaf cool completely, then wrap it tightly in two layers of plastic wrap and a final layer of foil. It will keep in the freezer for up to 3 months. You can also slice it before freezing and separate the slices with parchment paper, so you can pull out just one slice at a time for a quick treat.
To reheat, my favorite method is to toast individual slices. For a whole loaf, I unwrap it, wrap it loosely in foil, and warm it in a 300°F oven for 15-20 minutes until heated through. If you try to microwave a whole slice for more than 10-15 seconds, it can become gummy. Gentle, dry heat in the oven or toaster revives that just-baked warmth and texture perfectly.
Conclusion
This Apple Pie Bread is more than just a recipe; it’s a cozy hug in loaf form. It fills your home with the most welcoming scent and delivers a slice of pure comfort with every bite. I hope it becomes a cherished part of your fall and winter baking traditions, bringing as much warmth and happiness to your kitchen as it has to mine. Now, go grab those apples and preheat your oven—your new favorite loaf is waiting to be made. Happy baking!