
Next, prepare the filling. In another bowl, combine the diced apples with lemon juice, granulated sugar, and cornstarch. This part is really fun; I love the bright aroma of lemon combined with the sweetness of the apples. Spread the apple mixture over the crust evenly, then sprinkle the reserved crumb topping over the apples.
Now it’s time to bake! Place your pan in the preheated oven and let it bake for about 35-40 minutes, or until the topping is golden brown and the apples are soft. When you open the oven, the heavenly smell of baked apples and cinnamon will wrap around you like a warm blanket.
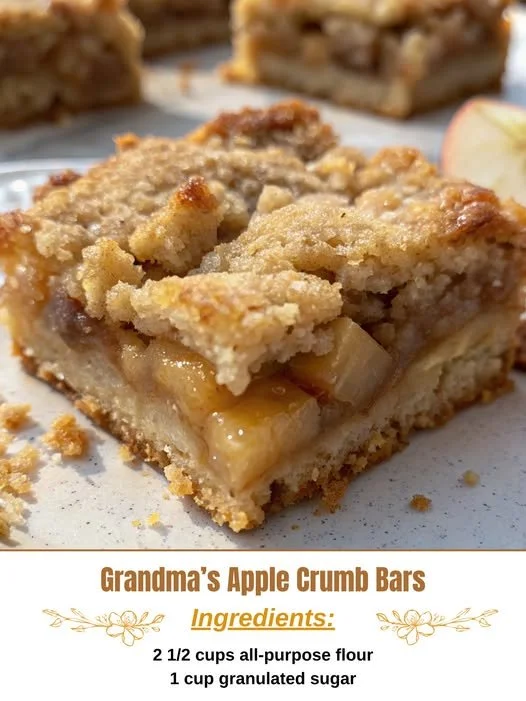
Once the bars are done, let them cool in the pan for about 30 minutes before slicing. I often find that the hardest part is waiting to dig in, but cooling helps them set perfectly. Once they’ve cooled, cut them into squares and serve them warm or at room temperature.
Pro Tips for Best Results
I’ve been experimenting with this recipe for a while, and one thing I learned is to use a mix of apple types for a more complex flavor. I usually combine tart Granny Smith apples with sweet Honeycrisp apples. The two together create a lovely balance.
For the crumb topping, I tested using both cold and softened butter, and I found that softened butter gives a better texture. The bars become almost cookie-like, which I really enjoy! Also, make sure to not press the crumbly mixture too hard into the pan when forming the base. You want it compact but still a bit airy so it bakes beautifully.
Finally, don’t skip out on the lemon juice in the apple mixture! It not only brightens the flavor but also helps prevent the apples from browning too quickly. A little zest does wonders in enhancing the taste of the apples and gives a lovely aromatic note.
Common Mistakes to Avoid
One common mistake I made the first time I made these bars was using overly ripe apples. While they might smell sweet, they can get mushy during baking. Trust me, you want your apples to maintain some structure to create that nice bite in each bar. I now make sure to pick apples that are firm and a little tart for the best results.
Another error is not letting the bars cool long enough before cutting them. I get it; the aroma is tempting, but cutting into them too soon results in a messy, apple-y disaster. I’ve learned to resist the urge and practice some patience; your efforts will be rewarded with neat slices that hold their shape.
It’s also essential to measure the ingredients precisely, especially the flour. In my early attempts, I used just a scoop and ended up with too dense a crust. Now, I always spoon the flour into the measuring cup and level it off for accuracy. It may seem tedious, but it makes a world of difference in texture! (See the next page below to continue…)