
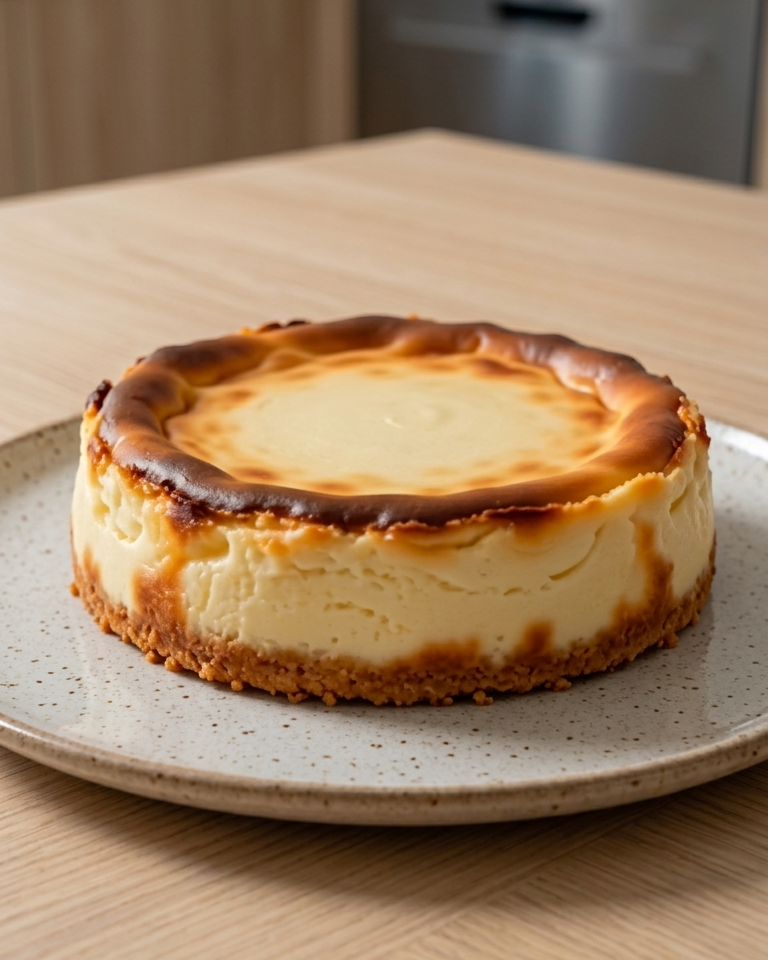
The first time I made this 2-Ingredient High-Protein Cheesecake, I honestly didn’t expect much from such a short ingredient list. I was standing in my kitchen late at night craving something creamy and sweet, but I didn’t want a heavy dessert loaded with sugar or complicated steps. As soon as this cheesecake started baking, my kitchen filled with that warm yogurt-and-vanilla aroma that reminded me of classic cheesecake shops. When I took the first bite after letting it cool, I was genuinely surprised by how smooth, light, and satisfying it tasted. Ever since then, this recipe has become one of my favorite quick healthy desserts to make when I want something simple, protein-packed, and comforting.
Why You’ll Love This Recipe
What I personally love most about this cheesecake is how ridiculously easy it is while still tasting like a real dessert. You only need Greek yogurt and eggs to create a creamy baked cheesecake with a soft texture that feels indulgent without being heavy. I’ve made this recipe after workouts, during busy weekdays, and even late at night when I wanted a healthier treat, and it never disappoints. If you enjoy quick high-protein desserts that don’t require fancy ingredients or complicated techniques, this recipe will absolutely become one of your go-to favorites. (See the ingredients in the next page below…)
Ingredients
- 1 cup (180 g) plain Greek yogurt
- 2 large eggs
- Optional: 1 drop vanilla extract
- Optional: Pinch of cinnamon
Equipment Needed
- Small mixing bowl
- Whisk or fork
- Oven-safe ramekin or small baking dish
- Spoon or spatula
- Oven
- Cooling rack
Step-by-Step Instructions
The first thing I always do is preheat my oven to 180°C before touching the ingredients. I learned the hard way that pouring the batter into an oven that isn’t fully heated can affect the texture and make the cheesecake cook unevenly. While the oven heats, I lightly grease my ramekin with a tiny bit of oil or butter. Trust me, don’t skip greasing the dish because this cheesecake likes to stick around the edges once baked. (See the next page below to continue steps…)
In a small bowl, I whisk together the Greek yogurt and eggs until the mixture becomes completely smooth. The first time I made this recipe, I rushed this step and ended up with tiny egg streaks inside the cheesecake. Now I take an extra minute to mix everything properly, and the final texture becomes much creamier. If I’m adding vanilla extract or cinnamon, this is the moment I mix them in because they blend beautifully into the batter.
Once the mixture looks silky and lump-free, I pour it into the prepared dish and smooth the top with the back of a spoon. I like tapping the ramekin gently on the counter because it removes trapped air bubbles that can sometimes create cracks while baking. The batter looks very thin at this stage, but don’t worry—that’s completely normal. I remember thinking I had done something wrong the first time, but the eggs work their magic in the oven.
I bake the cheesecake for around 20 minutes until the edges turn lightly golden and the center looks set but slightly soft. One mistake I made early on was overbaking it because I wanted the middle completely firm. That only made the texture rubbery instead of creamy. After baking, I let it cool at room temperature for at least 15 minutes. This waiting step is honestly difficult because the smell is amazing, but cooling helps the cheesecake firm up perfectly.
Pro Tips for Best Results
I tested this recipe with different types of yogurt, and full-fat Greek yogurt gave me the creamiest texture by far. Low-fat versions still work, but they tend to create a slightly more watery cheesecake. If you want that rich cheesecake consistency, trust me and use thick Greek yogurt with minimal liquid.
Another thing I learned through trial and error is that room-temperature ingredients mix much more smoothly. Cold eggs straight from the fridge can create lumps in the batter that are harder to whisk away. Now I let the eggs sit on the counter for about 10 minutes before mixing, and the batter becomes silky much faster.
Don’t rush the cooling step. I know it’s tempting to dig in immediately because the cheesecake smells incredible, but giving it time to cool changes the texture completely. I’ve eaten it warm and chilled, and personally, I think it tastes even better after spending an hour in the fridge because it becomes denser and creamier.
Common Mistakes to Avoid
The biggest mistake I made the first time was using regular yogurt instead of Greek yogurt. The mixture turned out too watery and never properly set in the oven. Greek yogurt is essential because it’s thicker and contains less moisture, which gives the cheesecake structure and that creamy texture everyone loves. (See the next page below to continue…)
Another common mistake is overmixing the batter aggressively. I once whisked the mixture so much that it became full of air bubbles, and the cheesecake puffed up strangely before collapsing. Now I mix just until smooth, and the texture comes out much more even and attractive.
Overbaking is another problem that can ruin this recipe quickly. I used to leave it in the oven until the center looked fully solid, thinking that meant it was done correctly. Instead, the cheesecake became dry and eggy. A slight jiggle in the middle is actually what you want because it continues setting while cooling.
I also recommend avoiding very large baking dishes because the cheesecake layer becomes too thin. I tried spreading the batter into a wide dish once, and it baked too quickly and lost its creamy center. A small ramekin or compact baking dish works much better for achieving that soft cheesecake texture.
Serving Suggestions
I personally love eating this cheesecake chilled straight from the fridge with a sprinkle of cinnamon on top. The cold texture reminds me of classic New York cheesecake, but it feels much lighter and fresher. Sometimes I drizzle a little honey over the top when I want extra sweetness without adding refined sugar.
Fresh fruit works beautifully with this recipe too. I often serve mine with strawberries, blueberries, or sliced bananas because the creamy cheesecake pairs perfectly with juicy fruit. One of my favorite combinations is adding raspberries because their slight tartness balances the richness of the yogurt.
When I want to make this dessert feel more special, I add a spoonful of nut butter or crushed nuts on top. Almond butter and chopped walnuts create a delicious high-protein snack that feels surprisingly filling. I’ve even served it to friends with dark chocolate shavings, and nobody believed it only had two main ingredients.
Variations & Customizations
I’ve experimented with adding cocoa powder to the batter, and it creates a delicious chocolate version that tastes almost like a healthy chocolate mousse cheesecake. Just a small spoonful transforms the flavor completely without needing extra sugar.
Another version I enjoy is adding lemon zest and a tiny squeeze of lemon juice. The citrus flavor makes the cheesecake taste brighter and fresher, especially during warm weather. It reminds me of those light summer cheesecakes you find in cafés.
Sometimes I also mix in cinnamon and a drop of vanilla extract for a warm bakery-style flavor. I tried this combination during winter, and my kitchen smelled incredible while it baked. It gave the cheesecake a comforting dessert vibe even though the recipe stayed healthy and protein-packed.
How to Store, Freeze & Reheat
From my experience, this cheesecake stores really well in the fridge for about three days. I usually cover the ramekin with plastic wrap or place the cheesecake in an airtight container to keep it fresh. The texture actually becomes creamier after chilling overnight, which is why I often make it ahead of time.
I’ve also tested freezing it, and surprisingly, it works better than I expected. I let the cheesecake cool completely before wrapping individual slices tightly. When I want one later, I thaw it overnight in the fridge, and the texture stays smooth and pleasant.
As for reheating, I personally prefer eating this cheesecake cold, but you can warm it slightly in the microwave for a few seconds if you like a softer texture. Just don’t overheat it because the eggs can become rubbery very quickly. I learned that lesson after accidentally microwaving one slice too long.
Conclusion
This 2-Ingredient High-Protein Cheesecake is proof that simple recipes can still feel incredibly satisfying and delicious. I genuinely love how quick, affordable, and easy it is to make, especially on busy days when I want a healthier dessert without spending hours in the kitchen. The creamy texture, light flavor, and endless customization options make it one of those recipes I come back to again and again. If you try it in your own kitchen, trust me—you’ll be amazed by how something so simple can taste this good.