
After the dough cools a bit, I start adding the lightly beaten eggs gradually. This part can feel tricky the first time because the dough looks like it’s separating, but trust me—keep mixing and it will always come back together. I look for a consistency that drops from the spoon slowly, forming a V-shape. Once it’s ready, I pipe long strips of dough onto a parchment-lined baking sheet, spacing them well. They bake until golden and firm, and every time I peek through the oven window, I feel that same thrill watching them puff into perfect éclairs.
While the éclairs cool, I move on to the pastry cream. I whisk the eggs, sugar, and cornstarch together until smooth. In a saucepan, I heat the milk with the vanilla bean, letting it infuse for maximum flavor. When the milk is hot but not boiling, I pour it slowly into the egg mixture, whisking constantly. Then I pour everything back into the saucepan and cook until thickened, whisking nonstop. When the cream finally bubbles and thickens into the smooth, silky custard I love, I remove it from the heat and let it cool completely.
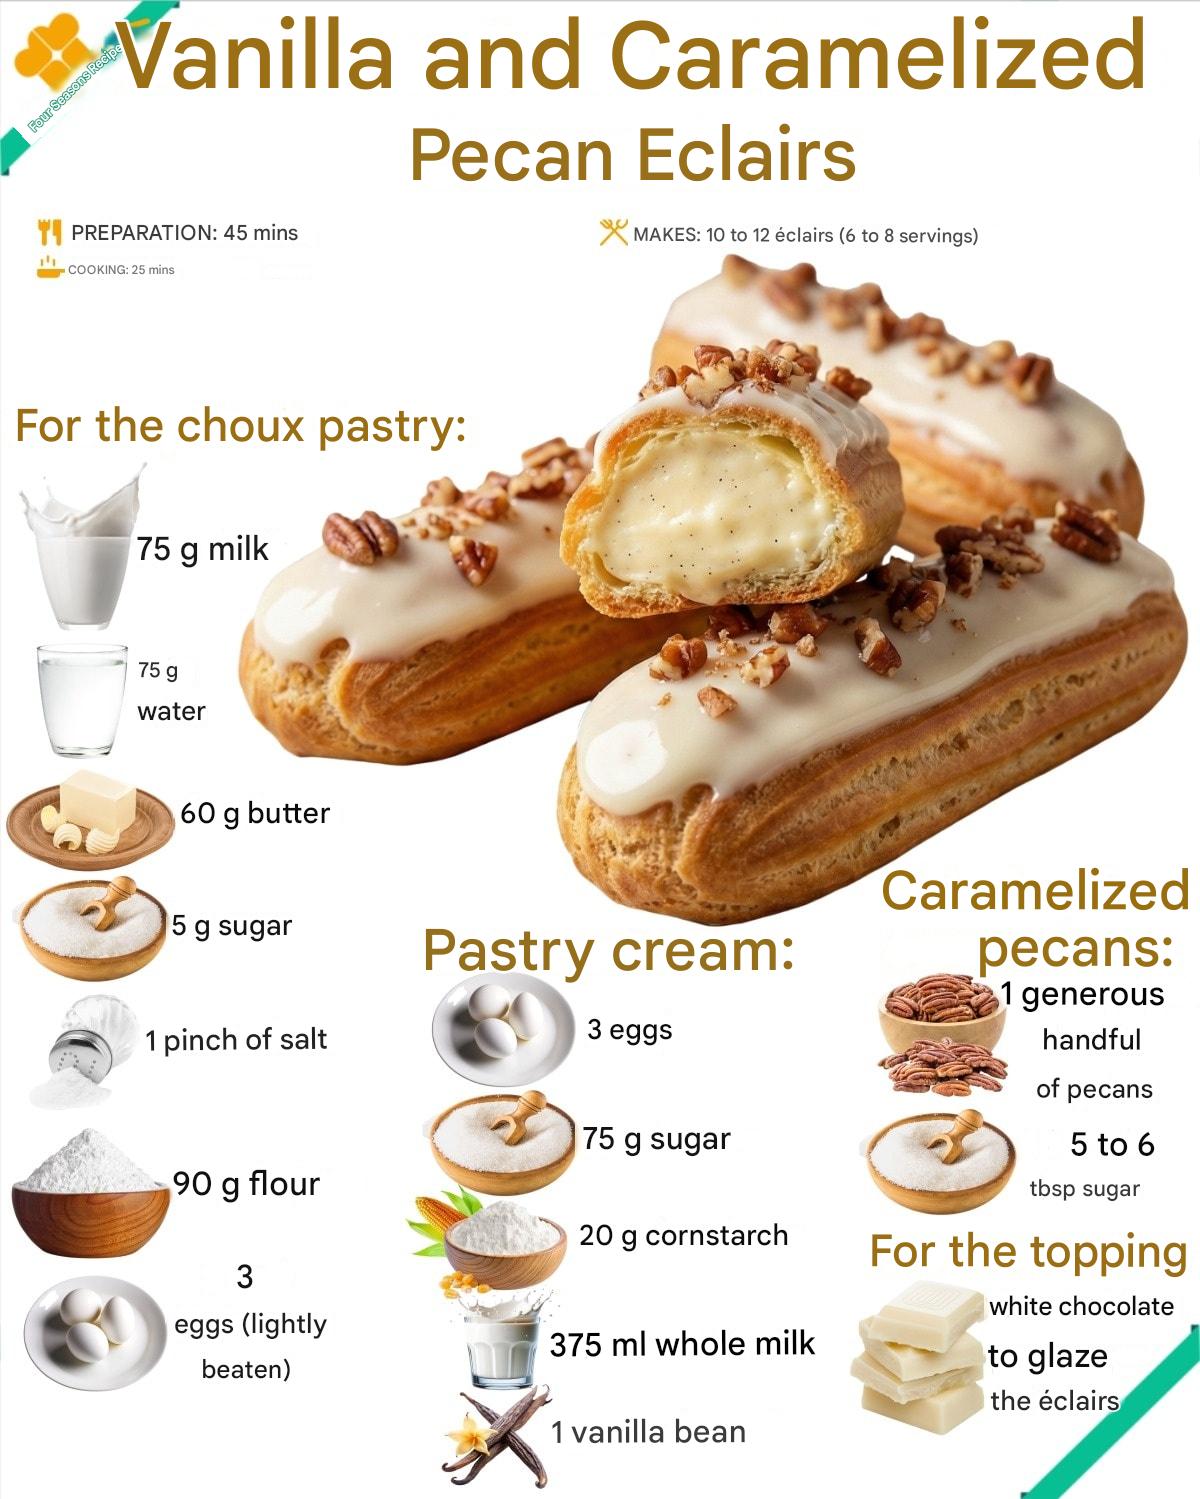
Next, I caramelize the pecans. This part fills the kitchen with a sweet, nutty aroma that makes everyone wander in asking what I’m making. I heat sugar in a pan until it melts into amber caramel, then toss in the pecans. The moment they’re coated, I spread them on parchment to cool. Once hardened, I chop them coarsely—they add the most delightful crunch to the final éclairs. To assemble, I fill each éclair shell with vanilla pastry cream, dip the tops into melted white chocolate, and sprinkle the caramelized pecans generously on top. The combination is pure heaven.
Pro Tips for Best Results
I tested this recipe three different ways—baking at a lower temperature, at a higher temperature, and using steam—and what I found is that éclairs bake best with a high initial temperature that encourages puffing, followed by a slightly lower temperature to dry the shells. Starting at around 200°C (400°F) and then lowering to 180°C (350°F) works wonders. This helps create that hollow interior perfect for filling.
Another tip I learned the hard way: never open the oven door during the first 15 minutes of baking. I did this once because I was overly excited, and the éclairs deflated in seconds like sad little balloons. Patience is truly your friend here. Let the steam inside the pastry do its job so the shells rise and dry properly.
For the pastry cream, tempering the eggs slowly is everything. The first time I hurried, I poured in the hot milk too fast and ended up with tiny cooked egg bits—definitely not what you want. Adding the milk gradually while whisking eliminates the risk and results in an irresistibly smooth custard. Always strain the pastry cream if you’re unsure; straining guarantees a perfect texture every time.
Finally, when glazing the éclairs, let the chocolate cool slightly so it thickens enough to coat without dripping everywhere. If the chocolate is too hot, it melts the top layer of pastry cream beneath it, creating a messy finish. Letting it sit for just a minute or two makes all the difference.
Common Mistakes to Avoid
I made this mistake the first time—adding too many eggs to the choux dough because I assumed more eggs meant more puff. But choux pastry is incredibly sensitive; too much egg results in flat éclairs that spread instead of rising. Always add eggs a little at a time and check consistency rather than relying solely on the measurement.
Another common mistake is removing the éclairs from the oven too early. Even if they look beautifully browned, they need time to fully dry inside. If they don’t, they collapse as they cool. Leaving them in the turned-off oven for five more minutes helps them retain their shape and crispness. I learned this trick after one batch cooled into soggy, misshapen pastries.(See the next page below to continue…)