
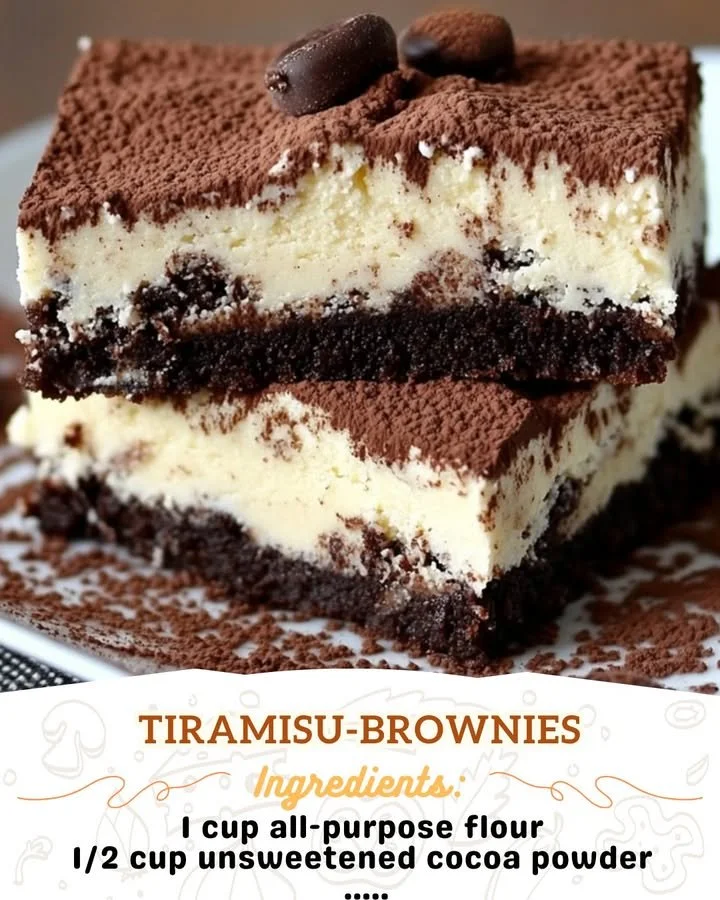
There’s something irresistibly delightful about combining two of my absolute favorite desserts: tiramisu and brownies. The rich, fudgy texture of brownies paired with the creamy coffee mascarpone flavor of tiramisu creates a truly decadent treat that’s perfect for any occasion. Today, I’m excited to take you through my recipe for Tiramisu Brownies, which have become a staple in my kitchen whenever I want to impress family and friends with something uniquely delicious.
Why You’ll Love This Recipe
These Tiramisu Brownies are so such a crowd-pleaser, blending the best of both worlds into a single dessert that’s as lovely to look at as it is to eat. The crust is rich and gooey, and the topping is lusciously creamy, hinting at all those wonderful flavors of coffee and cocoa. They are perfect for a cozy night in or a festive gathering. I promise you won’t be able to have just one! (See the ingredients in the next page below…)
Ingredients
– 1 cup unsalted butter
– 2 cups granulated sugar
– 4 large eggs
– 1 cup all-purpose flour
– 1 cup cocoa powder
– 1/2 teaspoon baking powder
– 1/4 teaspoon salt
– 1 cup semi-sweet chocolate chips
– 1 cup mascarpone cheese
– 1 cup heavy cream
– 1/2 cup powdered sugar
– 1/4 cup espresso or strong coffee
– Cocoa powder for dusting
Equipment Needed
– Mixing bowls
– Measuring cups and spoons
– Whisk or electric mixer
– 9×13 inch baking dish
– Parchment paper
– Spatula
– Sifter
Step-by-Step Instructions
First, let’s preheat your oven to 350°F (175°C). I always line my baking dish with parchment paper for easier removal later—it’s a little trick I’ve learned over the years. In a large bowl, melt the butter. Once melted, stir in the granulated sugar until combined. Then, add the eggs, one at a time, whisking well after each addition. This step creates a lovely, light batter that will become wonderfully fudgy in the oven! (See the next page below to continue steps…)
Next, sift together the flour, cocoa powder, baking powder, and salt in another bowl. Gradually fold the dry ingredients into the wet mixture, careful not to overmix. This dough should look thick and rich. Finally, fold in the chocolate chips; they are the magic touch that makes these brownies so indulgent. Pour the batter into your lined baking dish and smooth the top with a spatula. Bake for about 25-30 minutes, or until a toothpick inserted in the center comes out with a few moist crumbs.
While the brownies are cooling, let’s make the tiramisu topping! In a separate bowl, whip the mascarpone cheese, heavy cream, and powdered sugar until it forms soft peaks. Drizzle in the espresso to give your topping that authentic coffee flavor. Once the brownies have cooled completely, spread this luscious mascarpone layer generously on top. For the final touch, sift cocoa powder over the top for that classic tiramisu finish. Let it chill in the fridge for at least an hour before slicing—this helps everything meld together beautifully.
Pro Tips for Best Results
One of my favorite tips for making these brownies is to use high-quality cocoa powder. I tested this three ways, and trust me, the brand you choose does make a difference in flavor! I also recommend letting the brownies cool completely before adding the mascarpone layer; otherwise, you risk it melting into a puddle instead of sitting pretty on top.
For a more intense coffee flavor, try incorporating a splash of coffee liqueur into the mascarpone mixture—just be sure to adjust the sugar to balance the sweetness. Finally, cutting the brownies with a warm knife makes for cleaner slices. Run your knife under hot water, dry it off, and then slice through the brownies; it’s a little hack that makes serving a breeze!
I also find that these brownies taste even better the next day. Allowing them to sit overnight gives all those flavors time to develop and deepen, so if you can resist eating them all in one sitting, I highly encourage you to wait just a bit longer!
Common Mistakes to Avoid
When I first started making brownies, I often used a too-small baking dish, which led to uneven cooking. Make sure to use the specified 9×13 inch dish for perfect results! Don’t forget to watch your baking time; if you overbake, they can become dry—nobody wants that!
Another pitfall is skimping on chilling time. The mascarpone layer really benefits from spending a little time in the fridge, allowing it to set nicely. I remember once trying to cut into them right after adding the topping—what a mess! It’s so worth the wait for neatly cut brownies.
Lastly, be mindful of the espresso temperature. If it’s too hot, it could cause your mascarpone to soften too much. Wait a few minutes after brewing your coffee before adding it into the mix. It may seem simple, but those little details can make a world of difference. (See the next page below to continue…)
Serving Suggestions
These Tiramisu Brownies are perfect on their own, but if you’re feeling fancy, why not serve them with a drizzle of chocolate sauce or a dollop of whipped cream on the side? It adds an extra touch of indulgence that your guests will absolutely love.
I also enjoy presenting them with a small cup of espresso or coffee; it echoes the tiramisu theme and provides that perfect pairing. You could even sprinkle some shaved dark chocolate on top for added elegance—it looks gorgeous and tastes divine.
For gatherings, consider making mini versions in a muffin tin; they’re incredibly cute and easy to grab at parties. Plus, who doesn’t love mini desserts? I think they add a fun twist to any dessert table!
Variations & Customizations
If you’re looking to mix things up, you can try swapping out the mascarpone for cream cheese for a tangy twist. It gives the brownies a slightly different flavor that I’ve found many people enjoy! You could also experiment with adding a layer of caramel sauce between the brownie and mascarpone layers for that extra sweetness; it’s heavenly!
For a nutty texture, consider folding in some chopped nuts like walnuts or hazelnuts for a delightful crunch. Not only do they add flavor, but they also bring a lovely texture that complements the softness of the brownies and the creaminess of the topping.
Lastly, if you’d like to make this dish gluten-free, you can easily substitute the all-purpose flour with a gluten-free blend. It has worked beautifully in my experiments, so don’t hesitate to make these Tiramisu Brownies accessible to everyone!
How to Store, Freeze & Reheat
You can store these Tiramisu Brownies in an airtight container in the refrigerator for up to five days. Just make sure to separate layers with parchment paper to prevent sticking, especially with the creamy topping. I usually find they taste best chilled, due to the way the flavors develop overnight!
If you’re considering freezing them, slice the brownies and wrap each piece in plastic wrap, then place them in a freezer-safe container. They can be frozen for up to three months—perfect for when a dessert craving strikes! To enjoy, simply thaw them in the fridge overnight, and they’ll be ready to indulge.
Reheating isn’t necessary, but if you prefer a warm brownie experience, heat them gently in the microwave for 10-15 seconds. Just be cautious, as you don’t want to melt the mascarpone topping too much! I usually prefer them cold, but it’s nice to have options.
Conclusion
I hope you’re as excited to create these Tiramisu Brownies as I am every time I make them! They truly do bring a little bit of magic into my kitchen, blending two irresistible desserts into one delightful package. Whether for special occasions, gatherings, or just a cozy night in, this recipe stands out. I can’t wait for you to give them a try; I promise they’ll become your new favorite dessert too! Happy baking!