
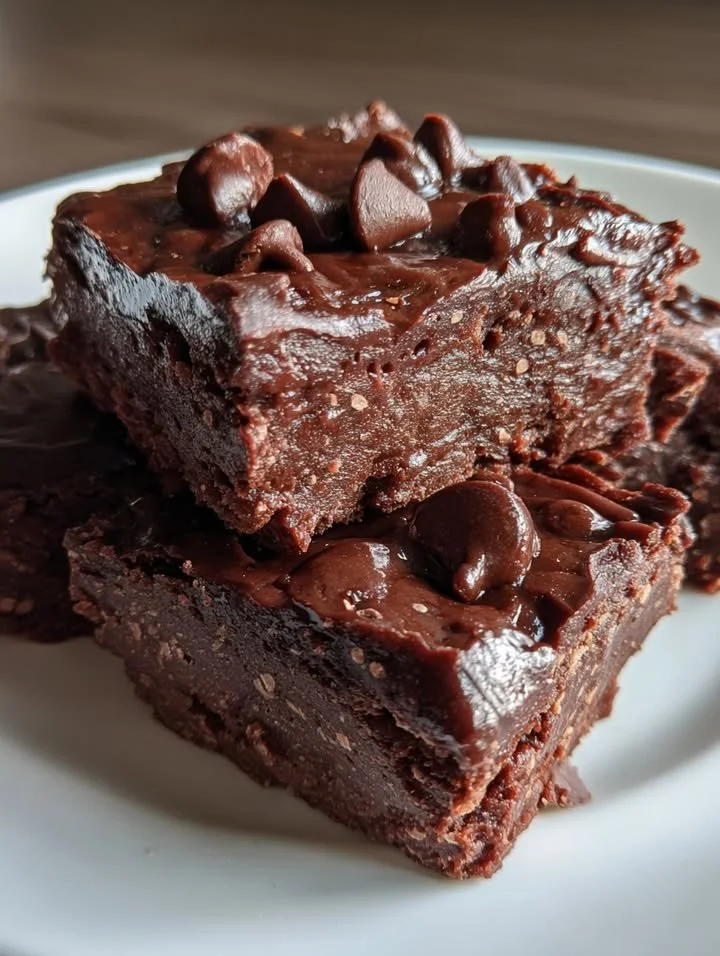
Sugar-Free Cottage Cheese Chocolate Bars. These bars are not just a healthier option; they’re also ridiculously easy to make and perfect for satisfying that chocolate craving without any guilt. Let’s dive in!
Why You’ll Love This Recipe
If you’re looking for a sweet indulgence that won’t derail your healthy eating plans, these sugar-free bars will become your new best friend. Made primarily with cottage cheese, cocoa powder, and a dash of vanilla, they are rich in protein and flavor, offering a tasty balance between creamy and chocolatey. I promise you won’t even miss the sugar! It’s the perfect snack for any time of the day, and what’s better than a treat that you can feel good about eating? (See the ingredients in the next page below…)
Ingredients
– 1 cup cottage cheese
– 1/2 cup unsweetened cocoa powder
– 1/4 cup sugar substitute (like stevia or monk fruit)
– 1 tsp vanilla extract
– 1/4 cup almond milk (or any milk of your choice)
– A pinch of salt
– Optional: 1/4 cup chopped nuts or chocolate chips (sugar-free)
Equipment Needed
– Mixing bowl
– Whisk or blender
– Baking dish (8×8 inches or similar)
– Parchment paper (for easy removal)
– Knife for cutting into bars
Step-by-Step Instructions
Making these bars is a breeze, and I can’t wait to walk you through the process! First, start by preheating your oven to 350°F (175°C). As that heats up, combine the cottage cheese, cocoa powder, sugar substitute, vanilla extract, and almond milk in a mixing bowl. I either whisk it by hand or use my blender for an ultra-smooth texture—it really depends on how much of a workout I want! Just blend until everything is well combined and you have a rich, chocolatey batter. It’s surprisingly luscious! (See the next page below to continue steps…)
Next, line your baking dish with parchment paper for easy removal later. Pour the mixture into the dish, smoothing it out with a spatula to make sure the surface is even. If you want to add some crunch, now’s the time to sprinkle in those chopped nuts or sugar-free chocolate chips. Then, pop the dish into the preheated oven and bake for about 25-30 minutes. You’ll know they’re ready when a toothpick comes out clean from the center.
Once they’ve finished baking, let them cool in the pan for about 10 minutes before transferring them to a wire rack. I like to slice them into bars while they’re still slightly warm—it makes the cutting process smoother. After cooling completely, these bars firm up beautifully and can be stored for a perfect sweet treat throughout the week.
Pro Tips for Best Results
I tested this recipe three different ways using various sugar substitutes, and I found that monk fruit offers the best flavor without an aftertaste, allowing the chocolate to shine through. If you’re sensitive to sweetness, remember that not all sugar substitutes have the same level of sweetness, so adjust to your taste—which may mean starting on the lower side!
Don’t skip the almond milk; it adds a creaminess that complements the cottage cheese beautifully. I once used regular milk, and while it was still good, the almond milk really took the flavor profile to new heights. Plus, it keeps the bars nice and moist without being too dense.
Lastly, if you want a little more richness, consider adding a swirl of nut butter on top before baking. I usually go for almond butter, which pairs perfectly with the chocolate and makes for a delectable marbled effect. It’s a simple tweak that sets these bars apart and caters to my universe of nut-loving friends!
Common Mistakes to Avoid
One common mistake is overbaking the bars. It’s easy to get distracted and accidentally leave them in the oven a few minutes too long. I learned this the hard way; my first batch was dry and crumbly. Aim for that perfect middle ground where the bars are firm but still slightly moist. (See the next page below to continue…)
Another thing to keep an eye on is the mixing process. I once neglected to blend the cottage cheese well enough, and my bars ended up with random chunks. While I didn’t mind, I could tell that my guests were a little unsure. Make sure to blend until the mixture is smooth; a blender is my go-to for ensuring consistency.
Also, remember to let your bars cool completely before slicing. I couldn’t wait once, and tried to cut them a bit too early, leading to a melty mess. The bars firm up as they cool, allowing for clean, beautiful cuts that are visually appealing and definitely Instagram-worthy. Trust me, patience pays off!
Serving Suggestions
These Sugar-Free Cottage Cheese Chocolate Bars are fantastic on their own, but if you want to elevate the experience further, consider serving them with fresh berries on the side. The natural sweetness and tartness of berries create a delightful contrast with the rich chocolate flavor of the bars.
For a cozy evening treat, I love pairing these bars with a cup of herbal tea. It’s an enjoyable ritual; I settle down with my tea and a bar, savoring each bite while unwinding at the end of the day. The combination is simple yet comforting—perfect after a long day.
If you’re hosting a gathering, these bars are an excellent addition to your dessert table. Their healthier profile will appeal to guests who are conscious about sugar while providing something delicious for everyone to enjoy. You can even cut them into bite-sized squares for a fun, interactive treat!
Variations & Customizations
The beauty of this recipe is the flexibility it offers. If you want to try different flavors, consider adding a teaspoon of espresso powder to enhance the chocolate flavor. It’s a little secret I stumbled upon that elevates the richness, and you’d be amazed at the nice depth it brings to the bars.
For a fruity twist, feel free to fold in some mashed bananas or pureed applesauce into the batter. These not only add a lovely flavor but also some natural sweetness and additional moisture. I’ve made variations with both, and they each brought a lovely new vibe that kept things exciting in my kitchen!
Lastly, play around with the toppings. Sometimes I sprinkle the bars with shredded coconut or a drizzle of melted dark chocolate (sugar-free, of course) on top. It’s an easy way to make them feel more festive, especially when sharing with friends and family.
How to Store, Freeze & Reheat
I usually store these bars in an airtight container at room temperature for up to a week, and they actually hold up quite well! If I make a big batch, though, I love freezing some for later. Just slice them into bars, wrap each one in plastic wrap, and place them in a freezer-safe bag. They’ll keep for about three months, making them perfect for when unexpected chocolate cravings strike!
When you’re ready to enjoy them, simply take a bar out of the freezer and let it thaw on the counter for a little while. If you prefer the bars a bit warm, you can pop them in the microwave for about 10-15 seconds. Just be sure to keep an eye on it so they don’t get too hot.
One thing I adore about these bars is that they maintain their deliciousness even after freezing. Soft and creamy, with chocolatey goodness—they taste just as great as when I first made them.
Conclusion
So there you have it, my friends—Sugar-Free Cottage Cheese Chocolate Bars that are easy to make and absolutely scrumptious! I’ve got to tell you, the joy of satisfying a sweet tooth while being mindful of my health is unmatched. I truly hope you love these bars as much as I do and that they become a staple in your kitchen. Happy baking, and enjoy every single bite!