
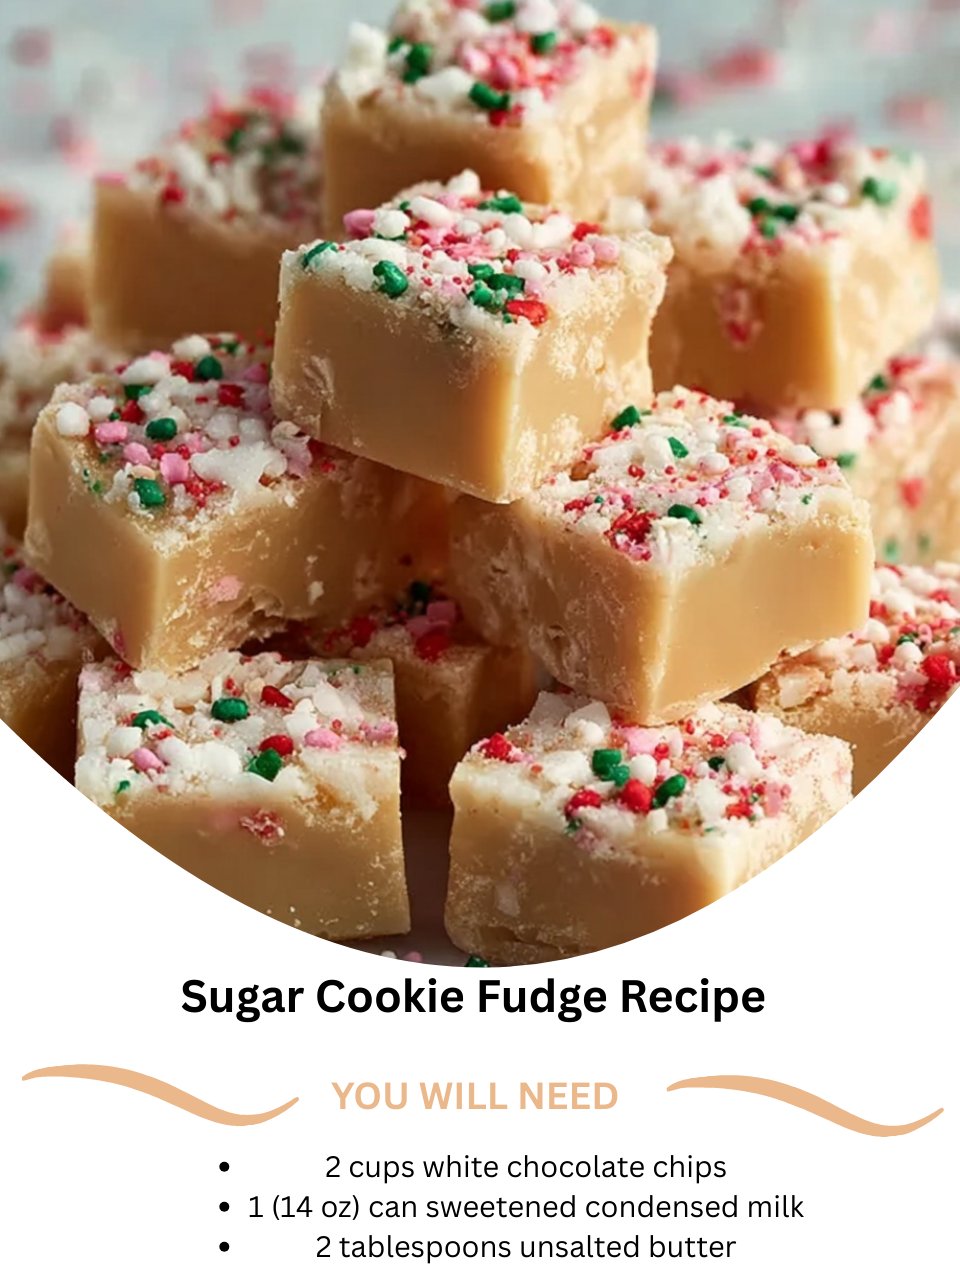
I first dreamed up this Sugar Cookie Fudge during a holiday baking marathon, when I longed for that classic sugar cookie flavor but didn’t have the energy for rolling, cutting, and decorating. I wondered if I could capture that same buttery, vanilla essence in a simple, creamy fudge. As the white chocolate and sweetened condensed milk melted together, I added a splash of almond extract—the secret heart of sugar cookie flavor—and my entire kitchen was suddenly wrapped in the warm, nostalgic aroma of a childhood bakery. The moment I tasted the finished, sprinkle-topped squares, I knew I’d created something magical: all the joy of a sugar cookie with none of the fuss.
Why You’ll Love This Recipe
You are going to fall head over heels for this recipe because it delivers the iconic, beloved flavor of a soft-baked sugar cookie in the most delightfully creamy and indulgent form. It is the ultimate shortcut to a festive, crowd-pleasing treat that looks like you spent hours decorating, but comes together in mere minutes on the stovetop. From my experience, this fudge has a magical way of making everyone feel nostalgic and happy. It’s buttery, sweet, and utterly charming—a guaranteed hit for any occasion that deserves a little extra sweetness.
Ingredients
- 2 cups high-quality white chocolate chips
- 1 (14 oz) can full-fat sweetened condensed milk
- 2 tablespoons unsalted butter
- 1 ½ teaspoons pure vanilla extract
- ½ teaspoon pure almond extract (this is the key!)
- A generous pinch of fine sea salt
- For topping: Rainbow sprinkles, nonpareils, or coarse sugar
(See the next page below to continue…)
Equipment Needed
- An 8×8 inch baking pan
- Parchment paper
- Medium-sized, heavy-bottomed saucepan
- Rubber spatula
- Small bowl for mixing extracts
Step-by-Step Instructions
First, let’s prepare for a clean getaway. I always line my 8×8 inch pan with parchment paper, leaving generous overhangs on two opposite sides to create a sling. This little trick is what ensures you’ll get perfect, intact squares later—trust me, trying to dig fudge out of a bare pan is a lesson in frustration I’ve already learned for you. Now, in your heavy-bottomed saucepan, combine the white chocolate chips, the entire can of sweetened condensed milk, and the butter. Place this over the lowest heat setting your stove offers. Patience is your best friend here.
This is the gentle melting phase where you need to stay close. I stand by the stove with my trusty rubber spatula, stirring almost constantly and making sure to scrape the bottom and corners thoroughly. White chocolate is delicate and can seize into a grainy mess if it gets too hot. You’re waiting for it to transform into a completely smooth, glossy, and thick river of cream. When there isn’t a single chip left and the mixture is velvety, I immediately remove the pan from the heat. The smell is wonderfully sweet and buttery.
Now, for the flavor that makes this fudge sing. Off the heat, I stir in the pure vanilla extract, the absolutely essential almond extract, and that pinch of fine sea salt. Don’t even think about skipping the almond extract—it’s what gives this fudge that unmistakable “sugar cookie” soul. I was skeptical at first too, but I’ve tried it both ways, and trust me, this one works better. The salt is crucial for balancing the sweetness and making the vanilla and almond pop. Stir until everything is perfectly combined into a lush, fragrant base.(See the next page below to continue…)
Working quickly while the fudge is still warm and soft, I pour the mixture into your prepared pan and smooth the top with the spatula. This is the moment for decoration! I immediately shower the top with a generous handful of rainbow sprinkles or nonpareils and gently press them in so they adhere. If you wait too long, the surface will set and the sprinkles won’t stick. I then let the pan cool completely on the counter before covering it loosely and transferring it to the refrigerator to chill and firm up completely for at least 4 hours, or ideally overnight.
Pro Tips for Best Results
I tested the extract combination three different ways, and the ½ teaspoon of almond extract with the vanilla is the magic ratio. Using only vanilla tastes flat, like plain sweet fudge. Using too much almond can overpower. This specific blend perfectly mimics that nostalgic sugar cookie flavor from the grocery store bakery or your grandma’s kitchen. It’s the heart of the recipe, so measure it carefully.
Here’s what I learned the hard way about the sprinkles: timing and type are everything. You must add them the second you smooth the fudge into the pan. I once let it sit for five minutes while I answered the door, and the sprinkles just bounced right off the set surface. Also, avoid using dark-colored sprinkles (like deep blues or blacks) if you can, as they tend to bleed their dye into the white fudge after a day or two. Classic rainbow jimmies or pastel nonpareils work and look best.
For the creamiest, smoothest texture, the quality of your white chocolate is paramount. A higher-quality chip or chopped bar with real cocoa butter will melt more smoothly and taste less waxy than bargain brands. It’s the difference between a good treat and an incredible one. Also, resist the urge to increase the heat to speed up melting. Low and gentle heat prevents scorching the milk and ensures that luxurious, melt-in-your-mouth finish we’re after.
Common Mistakes to Avoid
The biggest mistake is turning up the heat. Impatience leads to scorched sweetened condensed milk and seized, grainy chocolate. I did this on my first attempt, and there was no saving it—the fudge had a burnt taste and a gritty texture. You must keep the flame on the absolute lowest setting. If you’re nervous, use a double boiler. It takes a few minutes longer, but it’s a foolproof method for that perfect, silky base.(See the next page below to continue…)
Don’t skip the almond extract or try to substitute it with more vanilla. This was my second test batch, and while it was still sweet and tasty, it completely lost its signature “sugar cookie” identity. It just tasted like vanilla fudge. That ½ teaspoon of almond extract is the non-negotiable key that triggers the flavor memory and sets this recipe apart. It makes a huge difference.
Another error is not lining the pan. I thought a thorough buttering would suffice. The fudge stuck terribly around the edges, and I had to serve it as a “rustic crumble” instead of neat, pretty squares. The parchment paper sling isn’t just for easy removal; it allows you to lift the entire block onto a cutting board, which is essential for getting clean, professional-looking slices with your hot knife.
Finally, don’t skimp on the chilling time. I’ve poked it after two hours, and while the top is firm, the center is still too soft to slice neatly. A full four-hour chill is the minimum, but overnight is truly ideal. This slow, cold setting allows the fats to crystallize properly, giving you that firm yet creamy bite that defines perfect fudge. Rushing this step leads to squares that squish and lose their shape when you try to pick them up.
Serving Suggestions
I love serving this fudge at room temperature. About 10-15 minutes before serving, I’ll arrange the colorful squares on a simple white or pastel platter. This brief warming softens it just enough for that ultimate creamy, melt-in-your-mouth texture. It looks so cheerful and festive all on its own, thanks to those bright sprinkles.
For a delightful dessert pairing, I like to serve it with a cold glass of milk—it’s the classic cookie experience!—or a hot cup of coffee or chai tea. The warm spices in chai complement the buttery vanilla notes beautifully. During the holidays, I’ll add a few pieces to a cookie exchange box; its unique texture and flavor always make it a standout among traditional baked cookies.
When I’m gifting this fudge, which is often for birthdays, holidays, or teacher appreciations, I stack the squares in a clear cellophane bag tied with a curling ribbon that matches the sprinkles. I always include a small tag that says “Sugar Cookie Fudge” because the flavor is such a fun and delicious surprise. It’s a gift that feels incredibly personal, playful, and made with love.
Variations & Customizations
For a fun seasonal twist, simply change the sprinkles! For Christmas, I use red and green jimmies. For Valentine’s Day, I use all red and pink heart-shaped sprinkles. For the Fourth of July, I use red, white, and blue stars. The base recipe stays exactly the same, but the topping transforms it for any holiday. It’s my go-easy way to make a themed treat without any extra effort.
You can create a “Stuffed” Sugar Cookie Fudge by adding mix-ins. After removing the base from the heat, gently fold in ½ cup of crushed shortbread cookies or vanilla wafer crumbs. This adds a wonderful, subtle texture that really emphasizes the cookie experience. I’ve also folded in mini white chocolate chips for extra creaminess, or even a handful of freeze-dried strawberry pieces for a pop of color and tartness.
If you’re not a fan of almond, or need a nut-free version, you can achieve a similar flavor profile. Replace the almond extract with ¼ teaspoon of butter extract and increase the vanilla extract to 2 teaspoons. It gives a rich, buttery note that is still reminiscent of cookie dough. For a funfetti cake batter version, add ¼ teaspoon of butter extract and use round rainbow nonpareils mixed right into the fudge before pouring.
How to Store, Freeze & Reheat
For storing, I keep the fudge in an airtight container in the refrigerator, with sheets of parchment between layers to protect the sprinkles. It stays fresh and maintains its perfect texture for up to two weeks. The fridge is essential for keeping it firm and the sprinkles bright. It can sit out during a party for a few hours, but for any longer storage, back into the fridge it goes.
This fudge freezes beautifully. I wrap the whole block (or individual squares) tightly in plastic wrap, then seal them in a heavy-duty freezer bag, pressing out all the air. It will keep well for up to 3 months. The sprinkles may lose a tiny bit of their crunch after thawing, but the flavor and creamy texture remain perfectly intact. It’s fantastic for getting a head start on holiday gifting.
To thaw, I transfer the wrapped fudge from the freezer directly to the refrigerator and let it thaw slowly overnight. This prevents any condensation from forming on the surface, which can make the sprinkles bleed and the fudge sticky. There’s no need to reheat it. Once thawed, it’s ready to slice (if frozen as a block) or serve immediately.
Conclusion
This Sugar Cookie Fudge is more than just a candy to me; it’s a little bite of pure, uncomplicated joy. It never fails to bring a smile to my face and to the faces of everyone who tries it. I hope this recipe finds its way into your kitchen and becomes your own secret weapon for creating sweet, nostalgic moments with minimal effort. Now, go find your favorite sprinkles—your own batch of creamy, cookie-inspired happiness is waiting to be made.