
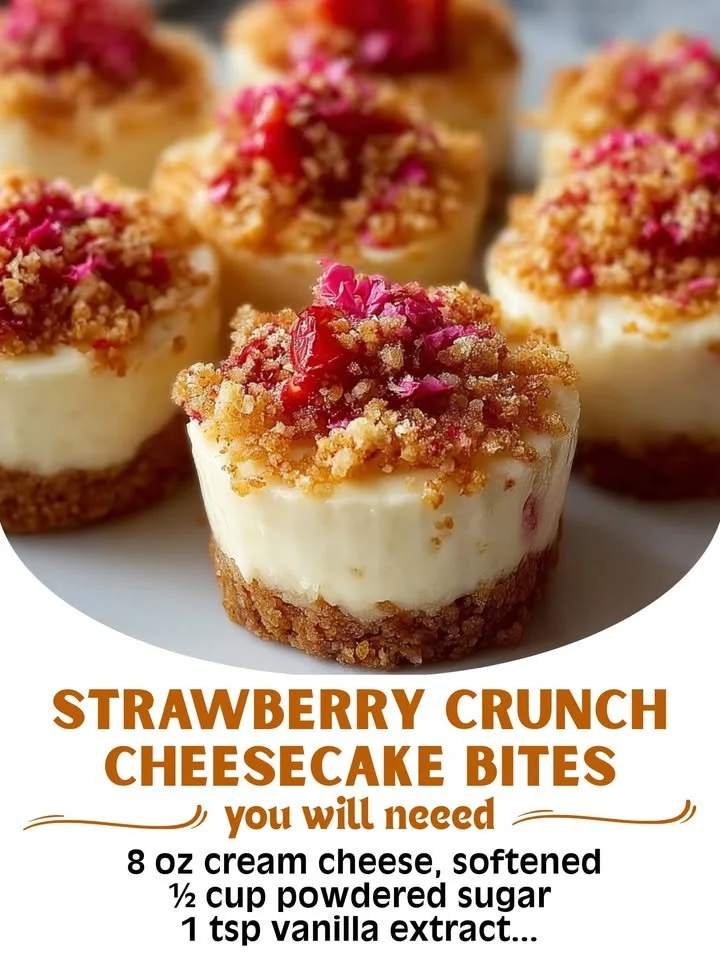
I still remember the first time I tried making Strawberry Crunch Cheesecake Bites in my kitchen. The moment I opened the container of strawberries, a sweet, fruity aroma filled the air, making my mouth water instantaneously. I was instantly transported back to warm summer days when strawberries were at their peak ripeness. As I mixed the ingredients, the combination of cream cheese and whipped topping created a delightful creaminess that I could hardly resist tasting before it even made it into the dessert. The end result? These delightful bites are not only easy to make, but they also vanish quickly among family and friends. I absolutely love these bites, and I can’t wait to share my journey in making them with you!
Why You’ll Love This Recipe
You’ll absolutely adore these Strawberry Crunch Cheesecake Bites because they bring a burst of flavor and color to any occasion. Whether it’s a sunny picnic, a dinner party, or just a cozy night in, these bites are the perfect sweet treat that never fails to impress. Imagine sinking your teeth into the creamy cheesecake center, followed by a satisfying crunch and the sweetness of fresh strawberries. Each bite feels like a mini celebration, and they’re effortless to whip up. Trust me, once you serve these, everyone will be clamoring for more!
Ingredients
- 1 cup fresh strawberries, diced
- 8 oz cream cheese, softened
- 1/2 cup powdered sugar
- 1 teaspoon vanilla extract
- 1 cup whipped topping (like Cool Whip)
- 1 cup crushed vanilla wafers (about 15 cookies)
- 1/2 cup strawberries, for topping (optional)
- 1 tablespoon sugar (if desired for macerating strawberries) (See the next page below to continue…)
Equipment Needed
- Mixing bowl
- Electric mixer or whisk
- Rubber spatula
- Measuring cups and spoons
- Plastic wrap or storage container
- Baking sheet
- Parchment paper (optional)
Step-by-Step Instructions
When I first started making these bites, my kitchen felt like the ultimate sweet-scents factory! I began by prepping the strawberries; I diced up one cup of those luscious red jewels. At first, I tried to skip macerating them with a little sugar, but trust me, waiting a bit was worth it. Sprinkling a tablespoon of sugar helped enhance their sweetness and made the topping so much yummier. After letting that rest for about ten minutes, I didn’t realize how juicy and flavorful my strawberries would become.
Next, I turned my attention to the creamy cheesecake filling. In a mixing bowl, I combined the softened cream cheese with powdered sugar and vanilla extract. I used my electric mixer here, and let me tell you, I’m so glad I did! The mixture became beautifully smooth and rich within seconds—no lumps! I gently folded in the whipped topping with a rubber spatula. This is a step I recommend taking your time with because you want it to be airy and fluffy rather than dense. Trust me, the texture makes all the difference.
Now came the fun part—assembling the bites! I used a small baking sheet lined with parchment paper, but you can also just cover it with plastic wrap if you prefer. I took spoonfuls of the cheesecake filling and formed them into little balls. When I rolled them, I kept them on the smaller side, about the size of a walnut. After placing them on the sheet, I froze them for about 30 minutes. This step is crucial; it helps the cheesecake bites hold their shape when I coat them in the crushed vanilla wafers.(See the next page below to continue…)
While they were chilling, my kitchen was filled with anticipation. Once they were firm enough, I rolled them in the crushed vanilla wafers, ensuring every bite was perfectly coated. I couldn’t help but taste one after they were ready, and let me tell you, I was instantly hooked! The combination of creamy filling and crunchy coating is simply divine. I topped each one with a little piece of sugared strawberry for that extra flourish.
Pro Tips for Best Results
Through trial and error, I discovered some great tips that make this recipe shine. First off, I tested the ratio of whipped topping to cream cheese three different ways. I found that using equal parts whipped topping and cream cheese creates a balanced flavor and delightful texture. If you want even more of a cheesecake flavor, increase the cream cheese by an ounce or two—just don’t skimp out on the whipped topping!
Another crucial point is chilling time. I learned the hard way that if I rushed this step, my bites would lose their shape and be more gooey than bite-sized. Make sure to freeze them until they’re firm, usually at least 30 minutes is ideal. Also, while the coated bites can stay out for a bit, I recommend only serving them right after making. They’ll taste best chilled!
Lastly, don’t skip using fresh strawberries for the topping. Frozen strawberries don’t have the same vibrant flavor or texture—trust me, I tried it, and it just didn’t hit the same. Fresh strawberries bring that crisp, juicy element that balances out all the creaminess.
Common Mistakes to Avoid
I made the mistake of skimping on the whipping process on my first attempt. It’s a small detail, but I can’t stress enough how vital it is to ensure your cream cheese is incredibly smooth before mixing it with the other ingredients. If it’s not blended well, the filling will have an unappealing texture, and nobody wants that!(See the next page below to continue…)
Another pitfall I encountered was not preparing the berries properly. The first time I didn’t macerate them, and the result was just okay—not what I expected! The added sugar really elevates the flavor, making every bite sing with sweetness. Always give your strawberries that extra ten minutes of rest.
I also learned the hard way about portion size. The first time I made these bites, I made them too big and ended up with a gooey mess. Stick with a walnut-sized target, and you’ll be rewarded with that perfect proportion of crust to filling!
Lastly, keeping the bites at room temperature for too long is a definite no-no. I let them sit out for a while during a get-together, and they became too soft. Keeping them chilled until serving time ensures they maintain their structure and delightful creaminess.
Serving Suggestions
I love serving these Strawberry Crunch Cheesecake Bites at gatherings because they’re visually stunning and just the right size for a sweet treat. When I plate them up, I like to arrange them on a colorful platter and add a few whole strawberries around for an extra touch of brightness. This makes for a beautiful presentation.
Additionally, I enjoy pairing these bites with a light dessert wine or sparkling rosé. The sweetness of the wine enhances the flavors of the cheesecake and complements the strawberries beautifully. It feels like a tiny indulgence, perfect for those more special occasions.
For casual get-togethers, I often set out a platter of these bites alongside some fresh whipped cream. It gives guests the option to dip or top their bites with even more creaminess, amplifying the experience!
Variations & Customizations
One of the wonderful aspects of this recipe is how easy it is to customize! I’ve tried adding crumbled cookies to the mixture for a different flavor base, like Oreos or chocolate wafers, which added a delicious twist. The chocolate flavor pairs surprisingly well with strawberry!
Another variation I tried included a hint of lemon zest in the cheesecake filling. This added a refreshing tang that beautifully complements the sweetness of the strawberries. If you’re a lemon lover, give it a shot! You won’t be disappointed.
For a more seasonal spin, I’ve substituted the strawberries for raspberries or blueberries when they are in season. The process is the same, and the result remains just as delicious. It’s amazing how different fruits can bring unique flavors to this simple recipe.
How to Store, Freeze & Reheat
Storing these bites is pretty straightforward. I usually place any leftovers in an airtight container in the fridge. They keep for about three days, though I highly recommend enjoying them fresh for optimal flavor and texture!
If you find yourself with a surplus, you can freeze them, which I did after my first batch. I placed them in a freezer-safe container with parchment paper between layers, and they stayed quite well preserved. Just remember to let them thaw in the fridge before serving to regain that lovely cheesecake texture.
You might be tempted to reheat them, but I’d advise against it. Heating would ruin that beautiful creamy texture, turning them gloopy. They are best enjoyed chilled, straight from the fridge, just as I intended them to be!
Conclusion
In closing, making Strawberry Crunch Cheesecake Bites has become one of my favorite kitchen adventures. The mix of flavors, textures, and the sheer joy of creating something so visually appealing and delicious is unbeatable! I’m thrilled to have shared this experience with you and can’t wait for you to try making these bites yourself. Dive into your kitchen, and enjoy the delightful process as much as I do. Happy baking!