
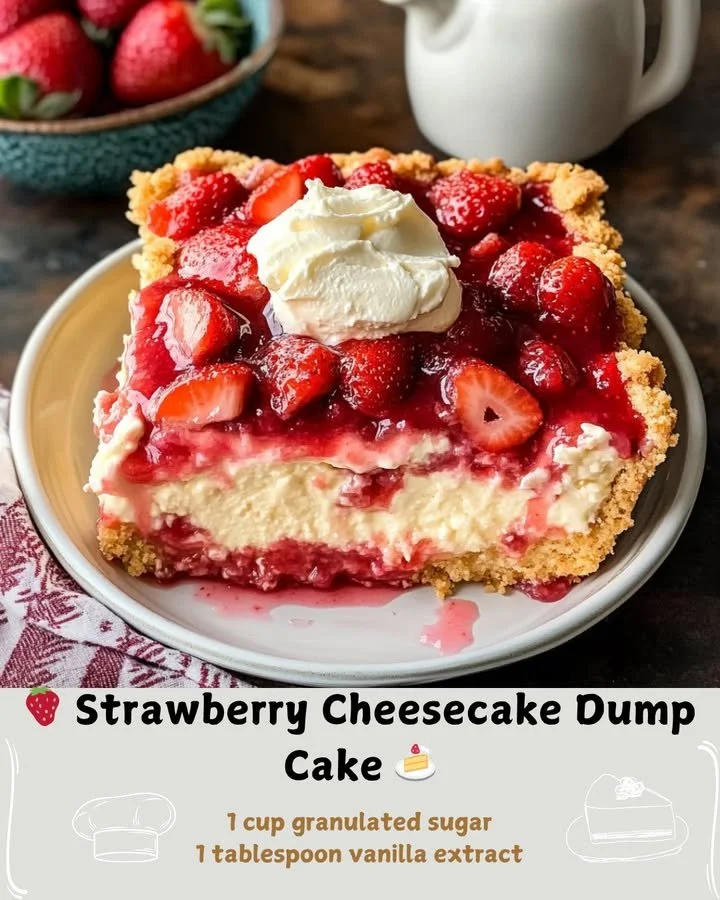
Let me tell you about one of my absolute favorite desserts to whip up when I want something that’s both delightful and ridiculously easy. The Strawberry Cheesecake Dump Cake has become a staple in my kitchen! It’s almost magical how just a few simple ingredients can come together to create a luscious dessert that feels indulgent without all the fuss of traditional cheesecake recipes.
Why You’ll Love This Recipe
This recipe brings the best of both worlds—creaminess from the cheesecake and a sweet burst of strawberry flavor—all in one! It’s the ultimate dessert for gatherings, family dinners, or just a cozy night in. Plus, the ease of making it means I can have more time to relax and enjoy with loved ones rather than slaving away in the kitchen. Imagine serving a dessert that feels fancy, yet took hardly any effort! You’ll love how the cake crunches on top and gives way to a velvety strawberry cheesecake layer beneath. Do yourself a favor and give it a try! (See the ingredients in the next page below…)
Ingredients
– 2 cups fresh strawberries, hulled and sliced
– 1 (15-ounce) box of yellow cake mix
– 1 (8-ounce) package of cream cheese, softened
– 1/2 cup sugar
– 1/2 cup butter, melted
– 1 teaspoon vanilla extract
– 1/4 teaspoon salt
– 1 cup water
Equipment Needed
– 9×13-inch baking dish
– Mixing bowls
– Whisk or electric mixer
– Rubber spatula
– Measuring cups and spoons
Step-by-Step Instructions
First, I start by preheating my oven to 350°F (175°C). While that’s warming up, I gently mix the sliced strawberries with a tablespoon of sugar in a bowl and let them sit for a moment. This draws out their juices, creating a sweet sauce that pairs beautifully with the cheesecake layer. Next, in another bowl, I beat the softened cream cheese with sugar until it’s smooth and fluffy. This part always reminds me of fluffy clouds as I watch the mixture transform! (See the next page below to continue steps…)
Next, I stir in the melted butter, vanilla, and salt into the cream cheese mixture until everything is well combined. It’s at this point that my kitchen starts to smell heavenly! In my baking dish, I layer the strawberry mixture first, followed by dollops of the cream cheese mixture. Then, I take the dry cake mix and cover it all with an even layer. Don’t worry about making it perfect; rustic is part of its charm! Finally, I pour the water evenly over the cake mix, making sure it’s soaked through, which helps to create that lovely texture I love.
After that, it’s time to pop the baking dish into the oven! I let it bake for about 40-50 minutes, and I love how my kitchen fills with the warm, sweet scent of strawberries and cake as it bakes. When it’s done, the top should be golden brown and a bit crunchy, while the cheese and strawberry layers bubble underneath. Let it cool for a few minutes before serving; I’ve found that patience here is key to getting those perfect portions!
Pro Tips for Best Results
I tested this three ways to find the perfect flavor and texture balance. One time, I used frozen strawberries instead of fresh, and while it worked, I found that fresh strawberries gave a juicier, fresher taste that’s simply unmatched. Also, make sure not to skip the step of letting the strawberries sit with sugar first; this little trick elevates the flavor to another level!
Another thing I discovered is to keep an eye on the baking time. Every oven is a bit different, and no one wants a dry cake! I recommend checking it a little earlier than the suggested time. A good visual cue is when the top turns golden and the edges start to pull away from the sides of the pan.
Lastly, unveiling the cake after it cools is always a surprise! It’s tempting to dig in right away, but letting it sit helps firm up those layers. I find that waiting enhances the overall experience and gives the flavors time to meld together beautifully.
Common Mistakes to Avoid
One common mistake I made at first was not properly mixing the cream cheese. If there are lumps, they won’t dissolve in the baking process, and that can result in an uneven texture. Make sure to mix it thoroughly—you want it smooth and fluffy! (See the next page below to continue…)
Also, be careful not to overdo it with the water! Pouring too much can lead to a soggy texture, which we definitely want to avoid. Ensuring an even pour helps keep the layers distinct and delicious.
Another thing to watch for is over-baking—this can dry out the cake, and trust me, nobody wants to bite into a dry dump cake! The center should still have a slight jiggle when you take it out of the oven.
Lastly, I’ve learned that cooling it too quickly in the fridge can affect the texture. A gentle, room-temperature cool-down helps preserve that gooey cheesecake flavor you’re looking for.
Serving Suggestions
When it comes to serving this Strawberry Cheesecake Dump Cake, I love to present it warm with a scoop of vanilla ice cream on the side. The creaminess of the ice cream balances perfectly with the warm cake! I also enjoy garnishing it with whipped cream and a sprinkle of fresh strawberries for that extra touch of color and flair.
Another idea is to serve it with a drizzle of homemade strawberry sauce, made from the strawberries I didn’t use in the cake. Just simmer them on the stove with some sugar until they break down into a lovely glaze that’s perfect for drizzling.
And let’s not forget about coffee! This dessert pairs wonderfully with a hot cup. It’s like a slice of summer on a plate that brings people together, making it perfect for brunch or any friendly gathering.
Variations & Customizations
The beauty of this dump cake is that it’s so versatile! While the strawberry version is my favorite, you can absolutely switch up the berries based on what’s in season or what you have on hand. Raspberries, blueberries, or even peaches work beautifully too.
What’s more, if you’re feeling adventurous, play around with the cake mix! A chocolate cake mix can give this dessert an entirely new twist, especially if you layer in some chocolate ganache on top. The options are endless with this sweet treat!
For a nutty texture, consider adding crushed walnuts or pecans on top before baking. They add a lovely crunch that contrasts beautifully with the creamy filling and soft cake base. Each bite becomes a delightful mix of textures!
How to Store, Freeze & Reheat
If I have any leftover (which is rare!), I store it in an airtight container in the fridge, where it stays fresh for about 3-4 days. I usually pop it in the microwave for a few seconds to warm it back up before enjoying—it’s just as good the second time around!
Should you decide to make it ahead of time for an event, this dump cake freezes perfectly! Just wrap it tightly in plastic wrap and then foil before freezing. It can last up to three months in the freezer, which is a lifesaver for busy days.
When you’re ready to enjoy it again, let it thaw overnight in the fridge and reheat it in the oven at a low temperature until warmed through. The textures and flavors hold up beautifully, making it feel like freshly baked goodness!
Conclusion
I hope you get the chance to try making this Strawberry Cheesecake Dump Cake! It’s one of those recipes that never fails to impress, and I love how it brings people together. The aromas wafting through the kitchen, the easy assembly, and the satisfied faces around the table are all the reasons why this dessert has found a permanent spot in my heart (and my recipe box!). Enjoy every delicious bite!