
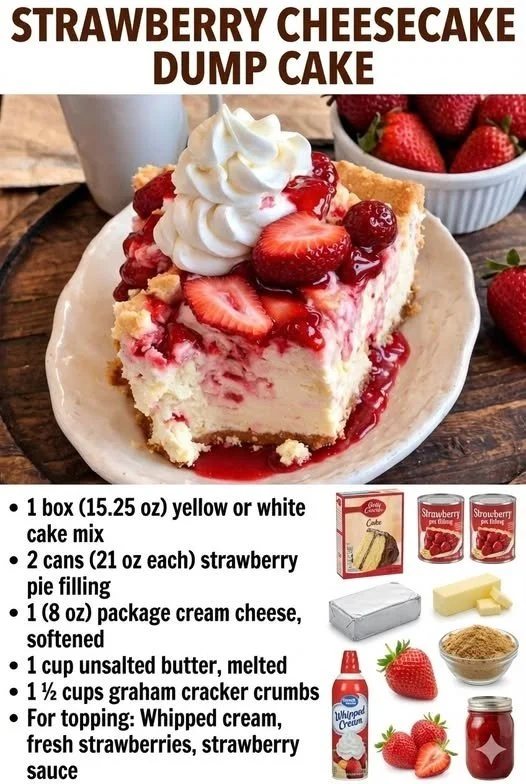
Welcome to my kitchen! Today, I’m excited to share one of my ultimate dessert secrets – the Strawberry Cheesecake Dump Cake. This delightful treat is a blend of rich cheesecake and juicy strawberries, all seamlessly combined with cake mix for ease and deliciousness. Trust me, if you have a sweet tooth like I do, this dessert will become a staple in your home in no time!
Why You’ll Love This Recipe
What I love about this Strawberry Cheesecake Dump Cake is how easy it is to prepare without skimping on flavor. It’s a hands-off approach that doesn’t require any fancy baking skills, yet impresses everyone who takes a bite. The combination of creamy cheesecake filling and sweet strawberries is simply irresistible. Perfect for picnics, potlucks, or simply enjoying on a cozy evening, this is a recipe you’ll cherish. (See the ingredients in the next page below…)
Ingredients
– 1 can (21 oz) strawberry pie filling
– 1 box (15.25 oz) vanilla cake mix
– 1/2 cup unsalted butter, melted
– 8 oz cream cheese, softened
– 1 cup powdered sugar
– 1 teaspoon vanilla extract
– 1/2 cup sour cream
– Fresh strawberries (optional, for topping)
Equipment Needed
– 9×13 inch baking dish
– Mixing bowls
– Hand mixer or whisk
– Rubber spatula
– Measuring cups and spoons
Step-by-Step Instructions
To start, preheat your oven to 350°F (175°C). I find it’s best to get the oven going while I prepare the batter so everything bakes evenly. In a mixing bowl, combine the softened cream cheese, powdered sugar, and vanilla extract. You can use a hand mixer or a whisk, but if you whip it by hand, you’ll get a little workout, which I don’t mind! Whip until it’s creamy and smooth. Then, gently fold in the sour cream until just combined. It smells heavenly! (See the next page below to continue steps…)
Next, pour the strawberry pie filling into the bottom of your greased baking dish. Spread it out evenly across the base. The vibrant color alone makes me excited! Then, pour the cheesecake mixture over the strawberry filling, carefully spreading it out so it covers beautifully. Now, here’s the fun part – sprinkle the dry cake mix evenly over the top of the cheesecake layer. You don’t need to mix it; just let the magic happen in the oven! Finally, drizzle the melted butter over the cake mix, ensuring it’s well covered.
Bake this masterpiece in your preheated oven for about 45-50 minutes. You’ll know it’s ready when the edges are bubbly and the top is golden brown. I like to let it cool for a few minutes before diving in, but the aroma filling my kitchen is almost unbearable! Once slightly cooled, I slice it into squares and serve it warm, but it’s equally delicious at room temperature.
Pro Tips for Best Results
As someone who loves flavor, I often test my recipes in a few different ways. For example, I tried this dump cake with both regular and gluten-free cake mixes, and both were fantastic – so don’t hesitate to customize based on your dietary needs! Also, if you want a more intense strawberry flavor, consider adding fresh strawberries on top before serving; it really elevates the dessert!
Another tip I learned is to let the cream cheese soften at room temperature – this truly helps to achieve a light and fluffy filling. I often forget to plan ahead and it makes a difference, trust me! Finally, a scoop of vanilla ice cream goes perfectly on top, and I’m usually ‘that person’ who can’t resist.
Common Mistakes to Avoid
One mistake I’ve made in the past is not greasing the baking dish, thinking the cake mix would release easily. Spoiler alert: it didn’t! I ended up scraping the last bits off, which was a bit of a disaster. Don’t skip that step! Another thing is to avoid overmixing your cheesecake layer; that’s how it can become dense rather than creamy. Keep it gentle! (See the next page below to continue…)
Also, make sure to keep an eye on the baking time. Ovens can vary, and the last thing you want is a dry dump cake; check it a few minutes early, and remember it will continue to cook a bit after you take it out. Lastly, be kind to yourself; if something goes wrong, know it’s okay! Even a slightly mishap dessert can end up being delicious!
Serving Suggestions
When it comes to serving this cake, I love to get creative. It pairs beautifully with whipped cream and a sprinkle of fresh strawberries on top. This not only makes it visually appealing but adds a refreshing pop to the dish. I often serve it for brunch alongside fresh fruit and coffee for an irresistible combo.
For special occasions, I like to drizzle a bit of chocolate sauce over the top to elevate it to a whole new level. It makes every bite a fantastic experience! And if you’re celebrating something special, don’t shy away from a scoop of ice cream melting right on top – pure bliss!
Finally, if you want to turn this into a dinner party showstopper, you could even layer it in individual dessert cups. It looks classy and gives each guest their own unique serving. Trust me, people will be asking for seconds!
Variations & Customizations
One of the best parts about this recipe is its versatility! You can easily switch up the fruit based on your personal taste or what’s in season. Peaches and blueberries work wonderfully, too. I’ve even made this with cherry pie filling, and it was a huge hit with friends.
If strawberries aren’t your thing, consider adding a twist by mixing in a bit of lemon zest to enhance the cheesecake flavor. It adds a delightful tang that balances the sweetness perfectly.
For a richer flavor profile, try incorporating a chocolate cake mix instead of vanilla! Combine that with cherries for a chocolate-covered cherry dump cake. The choices are endless, and it’s always fun to experiment!
How to Store, Freeze & Reheat
If you have leftovers, which is rare in my house, I recommend covering the cake tightly with plastic wrap or tinfoil. It stores well in the refrigerator for up to 3-4 days – though I can’t promise it’ll last that long! Simply reheat individual portions in the microwave for about 30 seconds before serving. It tastes just like fresh out of the oven!
If you want to make it ahead of time, this dessert freezes beautifully. I usually save a slice or two by wrapping it tightly and freezing it for up to three months. When you’re ready for a treat, just let it thaw in the fridge overnight and reheat before indulging.
Always remember to keep it in an air-tight container to prevent freezer burn. Discovering a slice in the depths of your freezer is like finding hidden treasure!
Conclusion
So there you have it—my tried-and-true recipe for Strawberry Cheesecake Dump Cake! I love how easy and delicious it is, proving that you don’t have to spend hours in the kitchen to make something special. I hope you enjoy making this delightful treat as much as I do. Happy baking!