
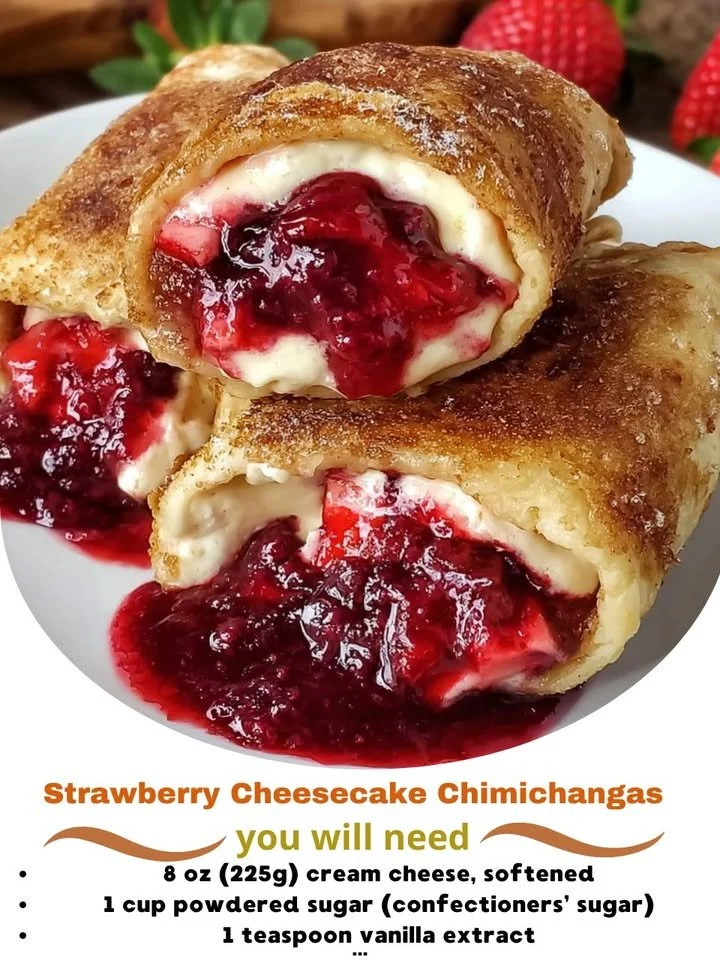
Oh, how I love experimenting in my kitchen, especially when it comes to creating desserts! One of my absolute favorites to whip up is Strawberry Cheesecake Chimichangas. If you’re a fan of creamy cheesecake paired with the freshness of strawberries, then this delightful fusion dessert will become your new go-to. Picture crispy, golden-brown tortillas stuffed with a smooth and tangy cheesecake filling, all rolled up and drizzled with sweet strawberry sauce. Trust me; it’s a game-changer for your dessert rotation!
Why You’ll Love This Recipe
This recipe is a delightful twist on both classic cheesecake and traditional chimichangas, making it a fun treat that won’t disappoint. It’s simple enough for a weeknight indulgence yet impressive enough to serve at dinner parties. Plus, the joy of biting into that warm, crispy exterior only to find a luscious creamy filling inside is truly something special. Your friends and family will be asking for seconds, and you’ll be more than happy to oblige! (See the ingredients in the next page below…)
Ingredients
– 4 large flour tortillas
– 8 oz cream cheese, softened
– 1/2 cup powdered sugar
– 1 tsp vanilla extract
– 1 cup fresh strawberries, chopped
– 1 tsp cornstarch
– 1 cup vegetable oil (for frying)
– Optional: whipped cream and extra strawberries for garnish
Equipment Needed
– Mixing bowl
– Electric mixer or whisk
– Frying pan or deep fryer
– Spatula
– Paper towels
– Serving plate
Step-by-Step Instructions
To start, I take my softened cream cheese and mix it in a bowl with powdered sugar and vanilla extract. Sometimes, I prefer using a hand mixer just to make sure everything is combined thoroughly and the mixture is nice and smooth. Once that’s all blended together, I fold in the chopped strawberries and cornstarch. This helps to thicken the filling and prevents it from getting too runny while we’re frying. The smell of the strawberries blending with the cream cheese is simply divine, making me excited to dig in! (See the next page below to continue steps…)
Now that the filling is ready, I set everything up for assembly. I lay out one of the flour tortillas on a clean counter. I add a few generous spoonfuls of the cheesecake filling right in the center and then carefully fold in the sides, rolling it tightly as if I were making a burrito. The first time I made these, I struggled with the rolling part, but with a little practice, I’ve got it down to an art! Next, I heat the oil in a frying pan over medium heat, making sure it’s hot enough to fry but not so hot that it smokes.
Once the oil is ready, I gently place each rolled chimichanga seam-side down into the pan. I fry them until they’re golden brown and crispy, which usually takes about 2-3 minutes per side. The sizzling sound as they fry is music to my ears! I then carefully remove them with a spatula and place them on paper towels to drain any excess oil. Let me tell you, the crunchy texture on the outside is just so satisfying!
Once the chimichangas have cooled for a minute, I plate them and generously drizzle with more strawberry sauce and perhaps a dollop of whipped cream on top! Each bite is an explosion of textures and flavors – creamy, sweet, and crunchy all at once. It’s hard to stop at just one; trust me, I’ve tried!
Pro Tips for Best Results
I tested this recipe three ways: using fresh strawberries, frozen strawberries, and even a berry mix. Fresh strawberries definitely provide the best flavor and texture, but if it’s off-season, frozen will work in a pinch—just be careful about the excess moisture. You don’t want things too soupy!
Another tip I have is to keep an eye on the oil temperature. If it’s too hot, your chimichangas will brown too quickly without cooking through, and if too cool, they’ll end up greasy and soggy. A good rule of thumb is to drop a small piece of tortilla into the oil; if it bubbles right away, the oil is ready!
Lastly, experiment with the filling! I’ve added a touch of lemon zest for a citrusy kick, and it paired wonderfully with the strawberries. Don’t be afraid to make it your own—the possibilities are endless!
Common Mistakes to Avoid
Mistake number one that I made early on was overstuffing my chimichangas. Sounds tempting, right? But trust me, if you add too much filling, they can burst open while frying, leading to a gorgeous mess but not the dessert you envisioned. Always aim for a modest amount of filling to keep things tidy!
Another common pitfall is not sealing your chimichangas properly. If there’s a loose edge, the filling can ooze out during frying. I’ve learned that giving them an extra pinch to seal really helps keep everything enclosed. Double-check those seams!
One thing I almost always forget is to allow the chimichangas to cool slightly after frying. It’s incredibly tempting to dive right in, but that moment of patience is worth it! They can be scorching hot, which could take away from the enjoyment of that first bite.
Lastly, don’t skip the garnishes! I’m a firm believer that a little drizzle of extra strawberry sauce or a dollop of whipped cream really elevates the whole experience. It’s the little things that bring out the big flavors!
Serving Suggestions
Strawberry Cheesecake Chimichangas are absolutely delightful on their own, but a scoop of vanilla ice cream on the side truly takes it to another level. The combination of the warm chimichangas with cold ice cream is just heavenly!
I sometimes like to serve them with a side of fresh strawberries for a pop of color and added fruity goodness. It makes the presentation beautiful and adds a refreshing contrast. Plus, it makes my guests feel a bit fancy!
If you’re having a get-together, why not set up a dessert bar? Lay out the chimichangas alongside a variety of toppings like chocolate sauce, whipped cream, and crushed nuts. This way, everyone can customize their dessert to their liking, making it a fun way to end the meal!
Variations & Customizations
Feeling like a flavor adventurer? Try swapping the strawberries for blueberries or raspberries for a different berry twist. Each berry adds its unique flavor profile; the blueberries bring a slight tartness while raspberries add a lovely bright note.
Another idea I recently fell in love with is adding a hint of chocolate. By mixing some mini chocolate chips into the cream cheese filling, you get rich, melty moments throughout each bite. It makes for a delectable chocolate-strawberry experience—absolutely irresistible!
For those who want a more decadent cheesecake experience, consider creating a cookie crust instead of using plain tortillas. Simply crush graham crackers, mix with melted butter, and use that as a filling base before rolling up. Wow, right? The crunch from the cookie addition adds another layer of fun!
How to Store, Freeze & Reheat
If you happen to have any leftovers (though most times, this dish disappears quickly!), you can store them in an airtight container in the fridge for up to three days. Just reheat them in the oven for a few minutes to bring back that crispiness.
For freezing, these chimichangas do very well! Allow them to cool completely before wrapping tightly in aluminum foil or freezer bags. They can last in the freezer for up to two months. When you’re ready to enjoy, simply fry or bake them from frozen, adding a few extra minutes to the cooking time until heated through and crispy again.
If you’re reheating in a microwave, be aware that the crispiness won’t hold up as well. I recommend using the oven or an air fryer for the best texture recovery. Trust me; you want that crunch!
Conclusion
Making Strawberry Cheesecake Chimichangas is a fun and rewarding experience that brings a little piece of joy into my kitchen. Whether you’re indulging solo or sharing with loved ones, this dessert is bound to please! So, grab those ingredients and get ready to create something extraordinary that will have everyone asking for the recipe. Happy cooking!