
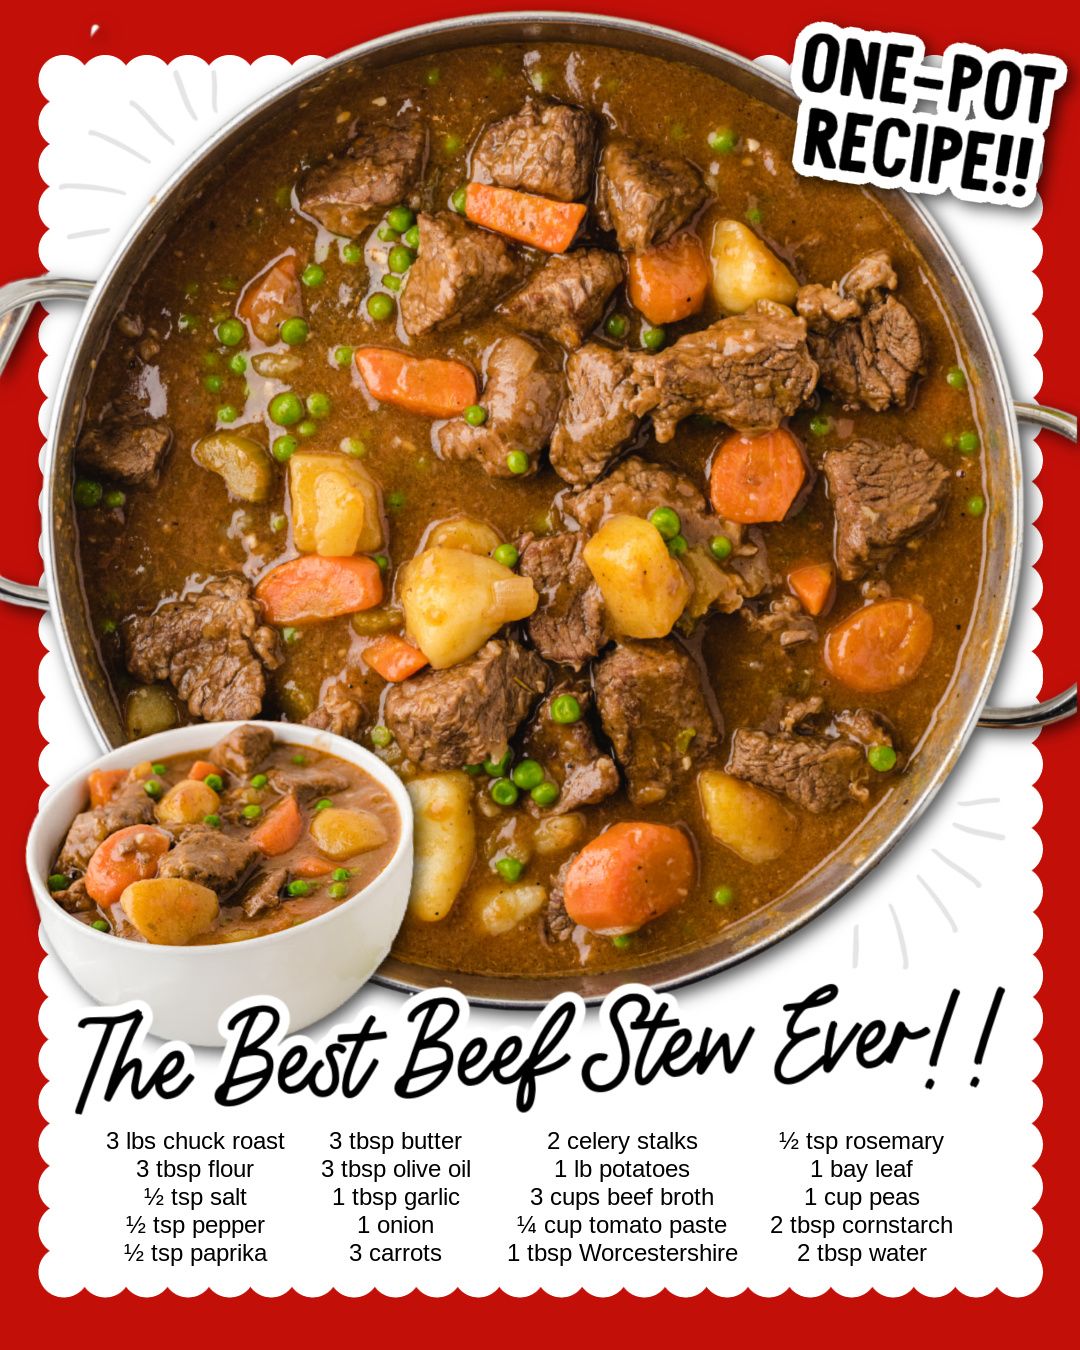
There’s something almost medicinal about the scent of beef stew simmering on the stovetop. It’s the ultimate kitchen comfort, a promise of warmth that fills every corner of the house. I discovered this one-pot version on a blustery Sunday, craving that deep, soul-satisfying flavor but wanting to avoid heating the whole oven for hours. As the chuck roast browned and the garlic and onions began to soften, my kitchen transformed into the coziest place on earth. This stew, with its tender meat and rich, glossy gravy, became my go-to hug in a bowl. It’s pure, uncomplicated nourishment, and making it feels like a loving act of self-care.
Why You’ll Love This Recipe
You’ll love this recipe because it delivers that slow-cooked, all-day flavor in a fraction of the time, using just one pot for easy cleanup. It’s a forgiving, flexible formula that rewards you with incredibly tender beef and a deeply flavorful gravy that clings to every vegetable. Whether you’re feeding a family or meal-prepping for the week, this stew is a reliable, crowd-pleasing masterpiece that feels both rustic and elegant. From my stovetop to yours, I promise it will become a cherished part of your comfort food rotation.
Ingredients
- 3 lbs chuck roast, cut into 1.5-inch cubes
- 3 tbsp all-purpose flour
- 1/2 tsp salt
- 1/2 tsp black pepper
- 1/2 tsp paprika
- 3 tbsp unsalted butter
- 3 tbsp olive oil
- 1 tbsp minced garlic
- 1 large yellow onion, chopped
- 3 large carrots, peeled and cut into 1-inch chunks
- 2 celery stalks, cut into 1-inch pieces
- 1 lb Yukon Gold potatoes, cut into 1.5-inch chunks
- 3 cups beef broth (low-sodium preferred)
- 1/4 cup tomato paste
- 1 tbsp Worcestershire sauce
- 1/2 tsp dried rosemary (or 1 fresh sprig)
- 1 bay leaf
- 1 cup frozen peas
- 2 tbsp cornstarch
- 2 tbsp cold water
Let’s talk ingredients. The chuck roast is non-negotiable for me—it has the perfect marbling of fat that breaks down into melt-in-your-mouth tenderness during simmering. I’ve tried leaner cuts like sirloin, and they always end up tough. Don’t skip the flour coating; it’s the first step to building that gorgeous, thick gravy later. For the broth, I strongly recommend using a low-sodium variety. I learned the hard way that regular broth, combined with the Worcestershire and salted meat, can make the entire stew too salty. This way, you’re in full control of the seasoning.(See the next page below to continue…)
Equipment Needed
- Large, heavy-bottomed Dutch oven or stock pot (at least 6 quarts)
- Tongs
- Wooden spoon
- Small bowl (for cornstarch slurry)
- Measuring cups and spoons
Step-by-Step Instructions
My process always starts with the beef. I pat the chuck roast cubes completely dry with paper towels—this is the single biggest tip for getting a proper sear, not a steam. I toss them in a bowl with the flour, salt, pepper, and paprika until each piece is lightly coated. In my Dutch oven, I heat the butter and olive oil over medium-high heat. The oil helps prevent the butter from burning. I work in batches, never crowding the pot, to brown the meat on all sides. That sizzle and the rich, brown fond (those tasty bits) sticking to the bottom of the pot are the foundation of our flavor. This takes patience, but trust me, it’s worth every minute.
Once the meat is beautifully browned and set aside, I add the onions, carrots, and celery to the same pot. There’s still glorious fat and flavor in there. I let them cook for about 5-7 minutes, scraping up that fond with my wooden spoon, until the onions are soft and translucent. Then, I stir in the garlic for just 30 seconds until fragrant—any longer and it risks burning and turning bitter. This is when I add the tomato paste. I let it cook for a full minute, stirring constantly. This “toasts” the paste, deepening its flavor from tinny to rich and complex.
Now, for the magic. I return the browned beef and any accumulated juices to the pot. I pour in the beef broth and Worcestershire sauce, and add the rosemary and bay leaf. I bring everything to a lively simmer, then immediately reduce the heat to low, cover the pot, and let it gently bubble away. This is the slow transformation. I let it cook for about 1 hour and 15 minutes before I even touch the lid. The first time I made it, I kept peeking, which let out precious heat and steam. Resist the urge! The wait fills your home with the most incredible aroma.(See the next page below to continue…)
After that initial simmer, I add the potato chunks, nestling them into the rich broth. I cover it again and let it cook for another 30-45 minutes, until both the potatoes and beef are fork-tender. In the last 5 minutes, I stir in the frozen peas just to heat through. Finally, I make a slurry by mixing the cornstarch with cold water in a small bowl until smooth. I stir this into the bubbling stew, and within minutes, it transforms the broth into a luxurious, glossy gravy that coats the back of a spoon perfectly.
Pro Tips for Best Results
I tested browning the meat three different ways: all at once, in two batches, and in three batches. Crowding the pot was the biggest mistake. The meat releases steam and boils instead of searing, leaving you with gray beef and no fond. For 3 pounds of chuck, I’ve found two solid batches is the sweet spot. It feels like an extra step, but it’s the difference between a good stew and the best stew. Give each piece space to breathe in the hot oil.
Here’s what I learned the hard way about the simmer: a gentle bubble is key. The first time, I had the heat too high, causing a rapid boil that made the beef tough and shrunken. You want the liquid to be moving, but not violently rolling. Once you put the lid on, adjust the heat to the lowest setting that maintains that gentle movement. This slow, even heat is what coaxes the collagen in the chuck roast into gelatin, creating that fall-apart texture and silky sauce.
Don’t add the peas or the cornstarch slurry too early. Peas will turn to mush if simmered for more than a few minutes, losing their bright color and sweet pop. Add them at the very end. As for the slurry, always mix cornstarch with cold water before adding. Adding cornstarch directly to the hot stew will instantly create unappealing lumps. The cold slurry integrates smoothly and thickens the entire pot beautifully and evenly.
Common Mistakes to Avoid
My biggest first-time mistake was not patting the beef dry. I was in a hurry and tossed the damp cubes right into the flour. The flour became a pasty glue, and when it hit the hot oil, it just steamed and peeled off instead of creating a crisp, brown crust. This meant less flavor in the meat and less fond in the pot for our gravy base. Take the extra 60 seconds to dry the beef thoroughly—it makes a monumental difference.(See the next page below to continue…)
Another pitfall is under-seasoning the flour. That initial coating of salt, pepper, and paprika is your chance to season the meat from the inside out. I used to be timid here, thinking I could adjust later. But seasoning in layers is crucial for deep flavor. Don’t be afraid of that half teaspoon each of salt and pepper; it’s seasoning three pounds of meat and a whole pot of vegetables. Trust the process.
Don’t rush the vegetable sauté. If you add the broth before the onions, carrots, and celery have really softened and the tomato paste has darkened, you’re missing a layer of sweetness and depth. That few minutes of sautéing builds a flavor foundation that can’t be replicated. Let the vegetables sweat and soften, and watch the tomato paste change from bright red to a rusty, brick red color.
Finally, avoid adding the potatoes at the beginning. I did this once, thinking it would save time. They completely disintegrated after two hours of cooking, thickening the stew in a starchy, muddy way rather than with the clean thickness of the cornstarch slurry. Adding them in the last 30-45 minutes ensures they hold their shape and provide a perfect, creamy texture against the tender beef.
Serving Suggestions
I like serving this stew in wide, shallow bowls to showcase all the beautiful chunks of meat and vegetables. A final flourish of freshly chopped parsley or a crack of black pepper on top makes it look restaurant-worthy. For me, a stew this rich demands a simple, crusty bread on the side—a sourdough boule or a baguette—for dunking and sopping up every last drop of that incredible gravy. It’s non-negotiable in my house.
For a heartier meal, I’ll sometimes serve it over a bed of buttery egg noodles or a scoop of creamy mashed potatoes. The potatoes create a wonderful “double starch” situation that might seem decadent, but the way the stew gravy blankets the mash is absolute comfort food heaven. It turns the stew into more of a “beef Bourguignon” style dish that feels extra special for a dinner party.
On a really cozy night, I keep it simple with just the stew and bread, but I’ll add a bright, acidic side to cut through the richness. A simple arugula salad with a lemon vinaigrette or even just some quick-pickled red onions on the table provide a refreshing contrast that makes each bite of the stew feel new again. It balances the plate perfectly.
Variations & Customizations
This recipe is a wonderful canvas. My favorite variation is a “Guinness Beef Stew.” I substitute one cup of the beef broth for a cup of Guinness or another dark beer, adding it when I pour in the broth. It introduces a malty, slightly bitter depth that’s incredible for a St. Patrick’s Day twist. I’ll often throw in some sliced mushrooms with the onions for an even earthier flavor profile.
For a richer, deeper flavor, I sometimes use a full cup of red wine instead of a cup of broth. A nice Cabernet or Merlot works beautifully. The key is to let it simmer with the vegetables for a few minutes after adding it, to cook off the raw alcohol taste, before adding the rest of the broth. This creates a luxurious, complex sauce that feels incredibly fancy with minimal extra effort.
If you’re not a fan of peas, green beans (added in the last 15 minutes) or corn work wonderfully. I’ve also swapped the potatoes for parsnips or turnips for a lower-carb version, and they absorb the gravy just as beautifully. For an herby twist, fresh thyme is a fantastic partner or replacement for the rosemary. The stew is forgiving—make it your own!
How to Store, Freeze & Reheat
Honestly, this stew tastes even better the next day after the flavors have had time to marry. To store, let it cool completely, then transfer it to an airtight container. It will keep in the refrigerator for up to 4 days. I find the potatoes may soften a bit more, but the flavor is phenomenal. Do not leave it at room temperature for more than two hours while cooling.
This stew freezes beautifully, which is why I often double the batch. I cool it completely, then portion it into freezer-safe containers or bags, leaving some room for expansion. It keeps for up to 3 months. I’ve tried freezing it with the potatoes, and while they can become a little grainy upon thawing, they’re still perfectly tasty in the context of the hearty stew.
To reheat, I always thaw frozen stew overnight in the refrigerator. For both fridge-cold and thawed stew, I gently reheat it in a pot over low heat on the stovetop, stirring occasionally and adding a small splash of broth or water if it seems too thick. The microwave can work in a pinch, but it heats unevenly and can make the vegetables rubbery. Low and slow on the stove preserves the perfect texture.
Conclusion
This one-pot stovetop beef stew is more than just a recipe; it’s a feeling of home. It’s the quiet satisfaction of building layers of flavor, the anticipation as smells fill your kitchen, and the deep comfort of that first spoonful. I hope it brings as much warmth to your table as it has to mine. Give it a try on the next chilly day, and don’t forget the crusty bread. Happy cooking, friends