
Many beginners also forget to secure the stick with chocolate “glue.” It seems optional, but without it, the cake ball almost always loosens during dipping. That small dab of melted candy makes a huge difference and keeps the stick anchored perfectly.
Lastly, some people skip the chilling step entirely — but room-temperature cake pops fall apart under the weight of the coating. Chilling firms the cake mixture just enough to withstand dipping while keeping that soft, moist center intact.
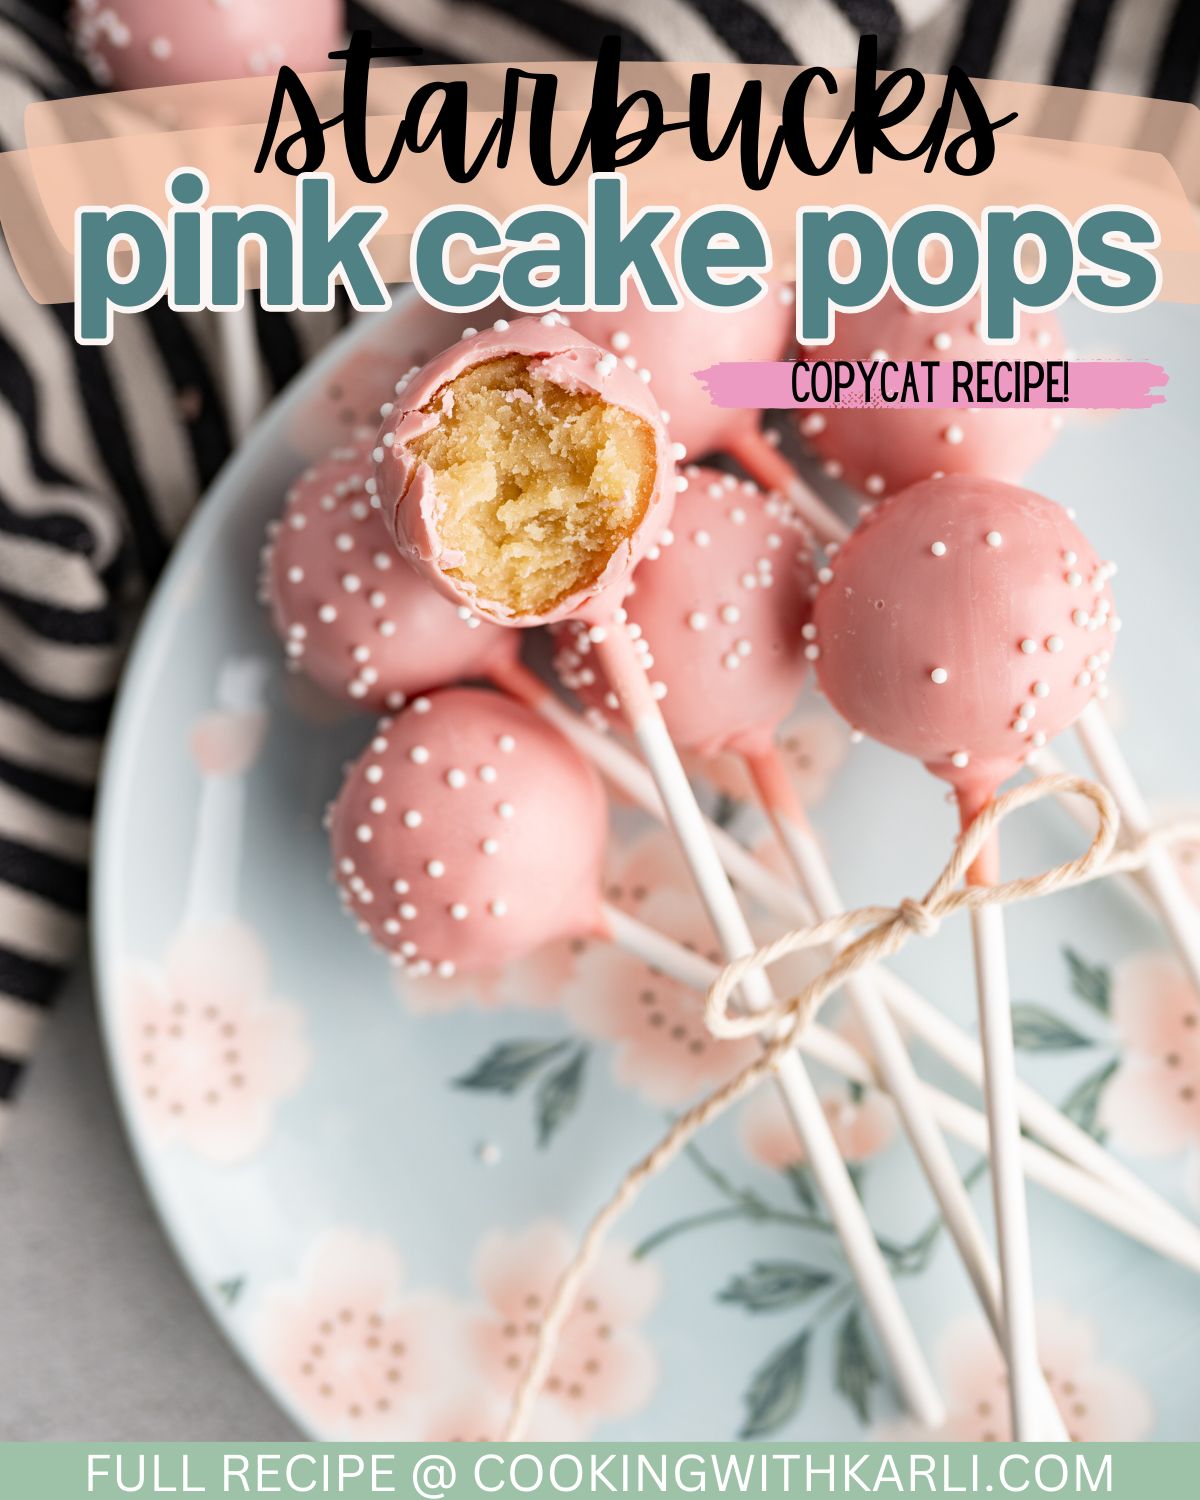
Serving Suggestions
I love serving these Starbucks Pink Cake Pops at parties because they’re cute enough to double as decor. I’ve placed them in mason jars filled with sugar for a whimsical centerpiece, and guests always comment on how charming they look. Since they’re individually portioned, they’re fantastic for birthdays, baby showers, and even afternoon coffee dates with friends.
When I serve them at home, I sometimes pair them with homemade lattes or iced caramel coffees so the whole moment feels like a Starbucks experience. There’s something about enjoying a soft, sweet cake pop with a creamy drink that feels indulgent but cozy.
These cake pops also make adorable edible gifts. I’ve wrapped them in small treat bags, tied them with pastel ribbon, and added handwritten tags. They look boutique-quality, and people are always amazed that they’re homemade. If you ever need a thoughtful but easy gift, this is it.
They also work beautifully for themed events. You can adjust the sprinkle color to match holidays — pink and red for Valentine’s Day, pastel sprinkles for Easter, even gold glittery sprinkles for New Year’s. They’re endlessly customizable while still staying true to that iconic Starbucks look.
Variations & Customizations
One variation I’ve loved trying is switching out the vanilla cake for chocolate. It turns the inside into rich chocolate cake with a pink coating outside — a fun twist that looks striking when bitten into. The combination of chocolate and pink is classy and tastes incredible.
You can also experiment with flavored frostings. Mint frosting gives a refreshing coolness, while strawberry frosting adds extra berry sweetness that pairs naturally with the pink shell. I once tried lemon frosting for a bright spring version, and it was surprisingly delicious.
Color customization is where things really get fun. The most popular version uses pink candy melts, but you can use purple, blue, or even marbled colors for special occasions. I once swirled white and pink melts together, and the effect was beautiful and elegant.
For texture, you can mix add-ins into the cake mixture itself. Mini chocolate chips, crushed Oreos, or sprinkles inside the cake ball give each bite extra personality. I wouldn’t recommend anything too large, but tiny add-ins work very well and keep the structure stable.
How to Store, Freeze & Reheat
Storing these cake pops is easy, and they hold up wonderfully. I typically place them upright in an airtight container and keep them in the refrigerator. They stay fresh for up to a week, and the coating keeps the cake inside perfectly soft. If you want them closer in texture to the Starbucks version, allow them to come to room temperature before eating.
Cake pops also freeze beautifully. I freeze them after dipping, spacing them out on a baking sheet until solid, then transferring them to a freezer bag. They keep their shape perfectly and last up to two months. When I need them for a party, I simply thaw them in the fridge overnight.
If you want to freeze the cake balls before dipping, that works as well. Just let them thaw slightly in the refrigerator so they don’t crack the chocolate coating from being too cold. I’ve made cake pops ahead this way before holidays, and it makes the final assembly incredibly smooth.
Reheating isn’t typically needed because you don’t heat cake pops to serve them, but if the coating looks dull after refrigerating, letting them sit at room temperature for 10 minutes restores that pretty sheen. They’re very forgiving and stable, which is why they’re one of my go-to desserts.
Nutrition Information
While these treats definitely fall into the dessert category, I like knowing roughly what’s in them. Because they’re portion-controlled, I never feel guilty enjoying one. Each pop has a balance of carbohydrates from the cake, fats from the frosting and coating, and a small amount of protein from the cake ingredients. For a dessert, they’re actually quite modest.
If you want to lighten them up, you can use less frosting or a lighter frosting recipe. You can also use white chocolate chips instead of candy melts, though the coating won’t set quite as firmly. Reducing the size of each cake pop is another simple way to make them more calorie-friendly.
They’re naturally nut-free unless you add mix-ins, which makes them safer for parties where guests may have allergies. I’ve served these at school events before and felt good knowing they don’t contain common allergens unless intentionally added.
And because the portion size is small, they satisfy sweet cravings beautifully without being overly heavy or rich. One pop truly goes a long way in hitting that dessert spot.
FAQ Section
1. Can I make these without candy melts?
Yes — you can substitute white chocolate chips with a teaspoon of oil, but the coating won’t be as firm or glossy. Candy melts give the best Starbucks-style finish.
2. Why did my cake pops crack after dipping?
This usually means the cake balls were too cold. Let them rest for a few minutes after chilling to avoid temperature shock when dipping.
3. Can I make these without a cake pop stick?
Absolutely. You can serve them as cake truffles by simply dipping the balls and placing them on parchment to set.
4. My coating is too thick — how can I fix it?
Stir in ½ to 1 teaspoon vegetable oil until smooth. Add slowly so it doesn’t become too runny.
5. How do I keep my cake pops from falling off the stick?
Dip the stick in melted candy, insert it, and chill the pops before dipping. This creates the perfect edible glue.
Conclusion
These Starbucks Pink Cake Pops have become one of my favorite treats to make, not just because they taste spot-on to the ones behind the Starbucks glass case, but because they’re so fun, rewarding, and beautiful every single time. They turn any day into a celebration, and once you make them yourself, you’ll see how truly simple and joyful the process is. I hope you love rolling, dipping, decorating, and of course eating them as much as I do.