
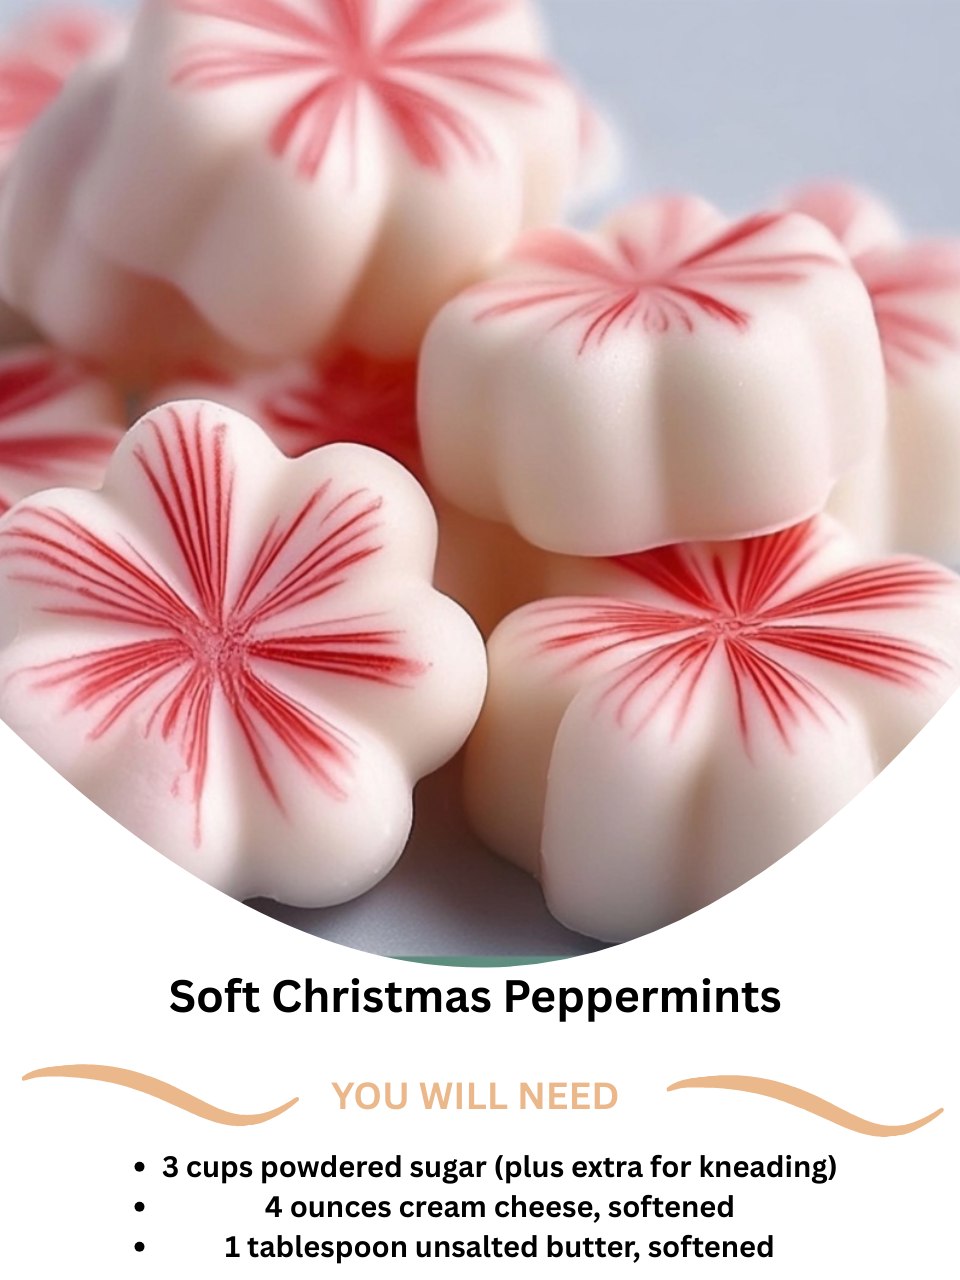
The first time I made these Soft Christmas Peppermints, my kitchen transformed into a winter wonderland of scent and sweetness. As I mixed the snowy powdered sugar with the rich cream cheese, the clean, sharp aroma of peppermint oil filled the air, mingling with the subtle, buttery fragrance of the dough coming together under my hands. Rolling out the soft, pliable paste and cutting it into cheerful little rounds felt less like baking and more like crafting edible holiday ornaments. That first taste—cool, creamy, and meltingly tender with a burst of pure peppermint—was a revelation. These aren’t the hard, chalky candies from a store; they’re soft, luxurious, and taste like the very essence of Christmas cheer. They’ve become my most requested holiday gift, a tradition that now marks the start of my festive season.
Why You’ll Love This Recipe
You will adore this recipe because it lets you create professional-quality, melt-in-your-mouth candies with just a few simple ingredients and no special equipment. It’s incredibly forgiving, wildly customizable, and the process is just as joyful as the result. There’s something deeply satisfying about creating a beautiful, edible gift with your own hands, and these peppermints, with their creamy texture and festive spirit, are guaranteed to bring smiles and requests for “just one more” from everyone who tries them.
Ingredients
- 3 cups powdered sugar (confectioners’ sugar), plus a generous extra 1/2 cup for dusting and kneading
- 4 ounces full-fat cream cheese, softened completely at room temperature
- 1 tablespoon unsalted butter, softened completely at room temperature
- 1/2 teaspoon pure peppermint extract (or 1/4 teaspoon peppermint oil for a stronger flavor)
- 1-2 drops red liquid food coloring (or gel coloring for more vibrant color)
- Optional: Crushed candy canes or coarse sugar for rolling (See the next page below to continue…)
Equipment Needed
- Stand mixer with paddle attachment, or a large bowl and hand mixer
- Medium mixing bowl
- Plastic wrap
- Rolling pin
- Small round cookie cutter (1-inch is perfect) or the open end of a small piping tip
- Parchment paper
- Baking sheet or large plate for drying
Step-by-Step Instructions
My journey with these candies always begins with the most critical step: making sure my cream cheese and butter are truly softened. I take them out of the fridge a good two hours before I start. I learned this the hard way when I tried to rush it with a microwave; even a few seconds of melting creates a greasy, separated mess that won’t incorporate properly. Once they’re perfectly soft to the touch, I place them in the bowl of my stand mixer. I add the peppermint extract and beat them together on medium speed until the mixture is completely smooth, pale, and fluffy. This takes about two minutes, and the smell is already divine.
Now, with the mixer on its lowest speed, I begin adding the powdered sugar, one cup at a time. I let each cup incorporate fully before adding the next. This slow addition prevents the famous “powdered sugar snowstorm” that will coat you and your entire kitchen. After the third cup, the mixture will transform from a wet batter into a thick, cohesive dough that starts to pull away from the sides of the bowl. It should feel soft but not sticky. If it’s still sticking to your fingers, you can add a little more powdered sugar, a tablespoon at a time, but be careful—too much will make the candies dry.
This is where the fun hands-on part begins. I turn the dough out onto a clean surface generously dusted with powdered sugar. I divide it in half. One half I leave pure white. To the other half, I add a single drop of red food coloring. I knead it gently, folding and pressing until the color is evenly distributed, adding more powdered sugar as needed to prevent sticking. If you want a stronger red, use gel coloring; liquid can make the dough too wet. I then shape each portion into a flat disc, wrap them tightly in plastic wrap, and let them rest at room temperature for 30 minutes. This resting period is not optional—it allows the dough to relax and makes rolling so much easier. (See the next page below to continue…)
After the rest, I roll out each disc of dough between two sheets of parchment paper to about a 1/4-inch thickness. Using my small round cutter, I press out as many candies as I can, dipping the cutter in powdered sugar if it starts to stick. I place the soft rounds on a parchment-lined baking sheet to dry. The scraps I gather, re-roll, and cut again. I let all the candies air-dry, uncovered, at room temperature for at least 4 hours, or overnight. This drying time is what gives them their perfect, firm-yet-tender texture on the outside.
Pro Tips for Best Results
The type of peppermint flavoring you use is paramount. I tested this with extract, oil, and even mint extract. Pure peppermint extract works well, but for that classic, potent “candy cane” punch that doesn’t bake out, pure peppermint oil is the winner. It’s more concentrated, so you use half the amount, and the flavor stays bright and clear. Just a quarter teaspoon is usually perfect. Do not use mint extract, which often contains spearmint and will taste like toothpaste.
Getting the dough consistency right is an art of feel. The perfect dough should be pliable and smooth, like very firm playdough, and shouldn’t stick to clean, dry fingers. If it’s too soft and sticky, knead in more powdered sugar, a tablespoon at a time. If it’s too dry and crumbly, you can work in a tiny, tiny amount of softened cream cheese (like half a teaspoon) to bring it back. It’s easier to fix a dough that’s slightly too sticky than one that’s too dry.
For the most beautiful, classic look, I love a two-toned effect. After rolling out the white and red doughs, I carefully place the red sheet on top of the white. I gently roll over them once with my rolling pin to help them adhere, then cut my rounds. This gives you candies with a white bottom and a red top, mimicking a traditional peppermint candy. You can also roll logs of each color, twist them together, slice, and flatten for a swirled look.
Common Mistakes to Avoid
My biggest first-time mistake was not letting the candies dry long enough. After two hours, they seemed firm, so I packed them in a tin. The next day, they had all softened and fused into one giant peppermint blob. Don’t do what I did! They need a full 4-6 hours at a minimum, and overnight is ideal. This drying time isn’t just for show; it allows the surface to form a slight crust so they can be handled and stored without sticking.(See the next page below to continue…)
Do not substitute low-fat or whipped cream cheese. I tested it, hoping for a lighter option, and the results were a disaster. The dough was wet, impossible to roll, and the candies never properly set, remaining sticky and soft. The fat in full-fat, brick-style cream cheese is essential for the right texture and stability. It provides the rich, creamy mouthfeel and acts as a binder for the sugar.
Avoid using too much food coloring, especially liquid. More than a drop or two can make the dough tacky and throw off the moisture balance, requiring you to add more sugar and potentially making that batch drier than the white one. For a deep, vibrant red without the moisture, use a highly concentrated gel food coloring. You’ll use less and get a much more professional-looking color.
Finally, don’t skip the resting time for the dough after mixing. If you try to roll it out immediately, it will be elastic and fight you, shrinking back constantly. That 30-minute rest wrapped in plastic allows the gluten in the flour (from the powdered sugar) to relax and the moisture to distribute evenly. It makes the rolling process peaceful and smooth instead of a frustrating battle.
Serving Suggestions
I love presenting these mints in a beautiful crystal bowl or a festive holiday dish as part of a dessert spread. They look stunning nestled amongst chocolate truffles and spritz cookies. Their bright white and red colors pop, and they offer a lovely, palate-cleansing bite after richer desserts. I always make sure to separate layers in a bowl with small parchment squares so they don’t touch and stick.
These are my absolute favorite homemade gift. I stack them in clear cellophane bags tied with a sparkly ribbon, or layer them in a decorative tin with parchment paper between layers. A small tag with the name “Soft Christmas Peppermints” makes it extra special. They are non-perishable for gifting purposes and always receive exclamations of delight—people are genuinely impressed that you made candies!
For a fun and interactive treat at a holiday party, I sometimes serve them alongside a rich hot chocolate or a strong cup of coffee. Placing a small peppermint on the saucer lets guests drop it into their drink for a DIY peppermint mocha or simply enjoy it as a sweet accompaniment. It’s a simple touch that feels thoughtfully festive.
Variations & Customizations
For a chocolate-peppermint version, I replace 1/4 cup of the powdered sugar with unsweetened cocoa powder (sifted!). It creates a beautiful chocolate dough with a minty kick, like a soft After Eight mint. You can make half the batch chocolate and half peppermint for a variety. Rolling the chocolate mints in crushed candy canes looks especially striking.
If you want to play with flavors, the possibilities are endless. Replace the peppermint with 1/2 teaspoon of pure orange extract and use orange food coloring for a “Creamsicle” candy. Use a few drops of lemon extract and yellow coloring for a bright, sunny treat. Just remember to keep the extract amounts small, as they can be potent.
For a decorative touch, instead of food coloring in the dough, I’ll sometimes keep the entire batch white. After cutting out the rounds, I brush the tops with a tiny bit of corn syrup (thinned with water) and dip them in or sprinkle them with colored sanding sugar, nonpareils, or very finely crushed candy canes. It gives them a sparkling, crunchy top that’s absolutely beautiful.
How to Store, Freeze & Reheat
To store these mints, I place them in a single layer in an airtight container, separating layers with parchment or wax paper. They will keep perfectly at cool room temperature for up to 2 weeks. Do not store them in the refrigerator, as the humidity can make them sticky and cause them to weep moisture. A cool, dry pantry or cupboard is ideal.
Yes, you can freeze them for long-term storage. Once completely dry, arrange them in a single layer on a parchment-lined baking sheet to flash-freeze for an hour. Then, transfer the frozen mints to a freezer-safe bag or container. They will keep for up to 3 months. This is a fantastic way to get a head start on your holiday baking in November.
There is no need to reheat these candies. To serve frozen mints, simply remove them from the freezer and let them thaw, still in their container, at room temperature for about an hour. This prevents condensation from forming on the candies themselves. They will taste exactly as fresh as the day you made them.
Conclusion
Making these Soft Christmas Peppermints has become one of my most cherished holiday rituals. The process is calming, the result is delightful, and the joy they bring to others is immeasurable. I hope this recipe encourages you to create a little edible magic in your own kitchen, filling it with the scent of peppermint and the spirit of the season. They’re more than just a candy; they’re a tiny, sweet token of holiday warmth.